Installing the INUBIT Process Monitor
The following sections describe how to install the INUBIT Process Monitor. Follow the instructions in the following sections in the specified order.
|
You require a license for the INUBIT Process Monitor. To check your license, select About in the Help menu in the Workbench. If you have a valid license, the Process Monitor will be displayed under Licensed plug-ins on the License Information tab. Without a license, you cannot install the INUBIT Process Monitor. |
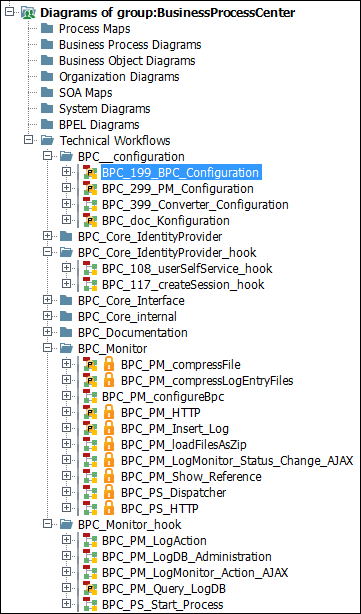
Importing and Activating Diagrams
You have to import the supplied technical workflows and the system diagram into INUBIT. In the system diagram, you centrally manage the access data for the database.
Proceed as follows
-
Start INUBIT.
-
Log on to the Workbench. Choose a user who is authorized to edit the technical workflows whose data flow is to be monitored.
-
Show the Designer tab.
-
Import the provided
zipfile to a user group.Virtimo AG recommends importing the file to a higher-level user group so that the INUBIT Process Monitor can be used by all lower-level user groups and their applications.
After the import, the diagrams are available in this user group:
-
Activate all technical workflows including their modules in the user group.
Configuring the Database Connection
Depending on the database you use, you may have to define the connection parameters.
Proceed as follows
-
Show the Designer tab.
-
Open the
BPC_PM_FunctionalLogDBmodule in theBPC_PM_Query_LogDBworkflow for editing. -
Open the Database connection and query type tab.
-
In the
Database connectionsection, edit the database connection settings by choosing the Presetting and adjusting the values afterwards. -
Publish the the module and the workflow.
Installing Database Drivers
You must install a driver for the database you use, refer to Managing Libraries.
|
The database driver used for the Process Monitor database must be also installed in the BPC Monitor environment. |
Proceed as follows
-
Open the Configuration > Library Manager menu item in the Workbench.
-
In the Library Manager dialog, click the New icon. The Upload library dialog opens.
-
In the File field, click the
 button.
A file explorer opens.
button.
A file explorer opens. -
Navigate to the desired driver and click Open. The file name is displayed in the File field.
JDBC drivers are available:
-
In the Type pull-down menu, select Driver library.
-
Click OK.
→ The file is loaded. If the upload is successful, you receive a confirmation.
The uploaded library can be used only after both the Process Engine and the Workbench is restarted.
-
Click OK to close the Library Manager dialog.
Specifying the Database Type
Proceed as follows
-
Open the technical workflow
BPC_299_PM_Configurationin theBPC__configurationdiagram group for editing. -
Open the variable mapping of the
BPC_Assign_hookmodule. -
Select the
XSLTSource variable. -
In the Source section, click the Edit button next to the Style sheet label to open the XSLT editor.
-
Set the
databaseelement according to your database type using one of the following values:oracle,mssql,mysql(also for MariaDB), orpostgresql -
Close the variable mapping by clicking OK.
-
Publish the workflow.
Generating Database Tables
The INUBIT Process Monitor writes the data to be logged to the defined database. The INUBIT Process Monitor expects a particular table structure, which does not exist initially. This section describes how to generate it.
|
If you want to add additional table columns to the preconfigured table columns, you have to define these additional columns prior to creating the tables in the |
Prerequisites
Database management system and database schema are already available and can be accessed by INUBIT. For Oracle databases, one user mostly corresponds to one schema and the schema was thus already created implicitly. When using other databases, a schema must be created and assigned to the intended user.
|
When using Oracle, the user requires the system authorization |
Proceed as follows
-
Display the technical workflow
BPC_PM_LogDB_Administrationin theBPC_Monitor_hookdiagram group. -
Select the
BPC_PM_startWFHereEmpty module in the top leftcreate log tableframe. -
Open the context menu and click Set start point. A green start point appears.
-
Select the start point, open the context menu, and click Start test without file.
→ The workflow starts and generates the database tables and views. With the factory defaults, the workflow generates database table for five Process Monitor grids. These Process Monitor grids illustrate the options for displaying individual grids and multiple Process Monitor Grids (grouping in GridGroups, Tabbing).
Refer to
Generating Test Entries
After activating the portal and deploying the Process Monitor, all created grids and dashboards are still empty. To display an example of the visualizations of logged data, you can generate test entries.
The Technical workflow BPC_PM_LogDB_Administration contains the create test data frame to generate example database entries.
Proceed as follows
-
Display the workflow
BPC_PM_LogDB_Administrationin theBPC_Monitor_hookdiagram group. -
Select the
BPC_PM_startWFHeremodule in thecreate test dataframe. -
Open the context menu and choose Set start point. A green start point appears.
-
Select the start point, open the context menu, and click Start test without file.
→ The workflow starts and generates the example entries. If you now go into the portal, an evaluation of the generated log entries in the form of dashboards and process and status overviews are displayed in the Process Monitor.
Setting up BPC
Usage
To setup the BPC instance for using the INUBIT Process Monitor with it
Proceed as follows
-
Open the
BPC_PM_LogDB_Administrationworkflow in theBPC_Monitor_hookdiagram group. -
Set the start point on the
BPC_PM_startWFHeremodule in theBPC Setupframe. -
Open the context menu of the start point and choose the Start test without file menu item.
-
Wait until the workflow has finished successfully.
Configuring the BPC Database Connection
Usage
To configure the BPC database connection
Proceed as follows
-
Open the
BPC_399_Converter_Configurationworkflow in theBPC__configurationdiagram group for editing. -
Open the Variables mapping dialog of the
BPC_Assign_hookmodule. -
Set the variables as follows:
Variables not mentioned in the following list should neither be changed nor removed.
-
conf.db.passwordDatabase user password
-
conf.db.urlDatabase URL
-
conf.db.userDatabase user name
-
conf.db.typeDatabase system
-
-
Close the Variables mapping dialog.
-
Publish the workflow.
Configuring the BPC Data Management
Usage
To configure the BPC Data Management
Proceed as follows
-
Open the
BPC_499_VAM_Konfigurationworkflow in theBPC__configurationdiagram group for editing. -
Open the Variables mapping dialog of the
BPC_VAM_Assignmodule. -
Set the following variable:
var.organizationIdID of your organization
-
Close the Variables mapping dialog.
-
Publish the workflow.
Configuring the BPC Documentation Module
Usage
To configure the BPC Documentation module
Proceed as follows
-
Open the
BPC_doc_Konfigurationworkflow in theBPC__configurationdiagram group for editing. -
Open the Variables mapping dialog of the
BPC_doc_initializeConfigmodule. -
Set the variables as follows:
Variables not mentioned in the following list should neither be changed nor removed.
-
var.InstallationUserGroupName of the user group where the workflows are located, by default BusinessProcessCenter
-
var.ReportsDirectoryRepository folder for caching PDF reports
-
var.rootUserName of the
rootuser, by defaultroot -
var.rootpwdPassword of the
rootuser -
var.docExportUserUser who shall execute the data export. This user needs access to the diagrams/modules to be exported, for example, using an additional user group.
-
var.docExportUserPasswordPassword of the user configured in the
var.docExportUservariable -
var.pdf.colorColor of the PDF file to be exported, by default:
#96bebe, gray) -
var.pdf.adresseAddress as XML structure in the PDF file to be exported
-
-
Close the Variables mapping dialog.
-
Publish the workflow.