Administrating Process Engine Users
The visibility of data is controlled via the allocation of users to groups. The following applies:
-
Each user has exactly one specific user role.
-
Each user can display and edit her own data (modules, diagrams, Repository files).
-
Each user belongs to one primary user group and can display and edit its data.
-
Each user can display the data of her higher-level group.
-
Each user can be assigned to one or more additional user groups and can display and edit their data.
-
In the User Manager, each user can see all other users of the same group as well as all of its own lower-level groups and their members.
Creating Users
Prerequisites
The user group to which the user should be assigned exists already.
Proceed as follows
-
In the INUBIT Workbench, display the Administration > User Manager tab.
-
Select the group to which you want to add a new user.
-
Open the context menu and select New user. A dialog opens.
The user group and user role are already preset.
-
Enter the user data or change the preset user data.
-
Click OK.
→ The dialog closes, the user is created, and displayed in the user hierarchy.
|
Usernames have to be unique. If a username or a user group with the same name already exists, an error message is displayed. Usernames and user group names are not case-sensitive, that is, upper/lower case is not taken into account. |
|
Share the password with the newly created user. Inform the user to modify the password immediately after the first login to the Workbench. |
Assigning Users to Additional User Groups and Editing the Assignment
You can assign one or more additional user groups to users. After having been assigned, users can display and edit the diagrams of these additional user groups, not only the diagrams of their own and their higher-level user group.
The users are linked with the additional user group and hence are called linked users.
|
By changing the data of a linked user or by deleting the user you directly change the data of the original user or delete the original user. |
As long as users are accessing the additional user groups’ diagrams, they cannot edit or display the diagrams of their own or their higher-level user group.
|
The root user is special and can always access the diagrams of her own user group. |
For information about changing to an additional user group refer to Switch to Additional User Group.
|
At the login, you can also choose an additional user group to log in directly to this user group. |
Proceed as follows . Log in to the INUBIT Workbench as root user. . Display the Administration > User Manager tab. 3. Select the user you want to assign one or more additional user groups or whose assignment to additional user groups you want to edit. . Open the context menu and select Edit assignment to additional user groups. A dialog opens up. The primary user group of the user is already selected. It was assigned when creating the user. You cannot remove this selection.
-
Select all groups the user is to be assigned to. To delete an existing assignment, remove the corresponding selection.
-
Click OK to close the dialog.
→ The linked user is displayed below the selected groups. A link symbol signals that the user is only linked to the groups, for example:
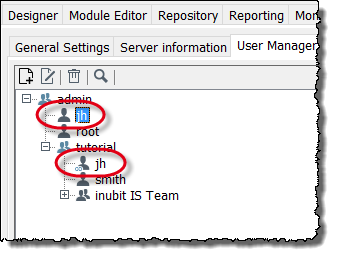
If you have deleted the assignment to an additional group the user concerned is not displayed below this group any longer.
Editing Users: Assigning Roles and Groups, Defining E-Mail Addresses
It is possible to allocate existing users to another user group or role and change the user data.
Proceed as follows
-
In the INUBIT Workbench display the Administration > User Manager tab.
-
Select the user you want to edit.
-
Open the context menu and choose Edit User Data. A dialog opens.
-
Change the user data.
-
Click OK.
→ The dialog closes and the modified data is stored.
Locking User Manually
You can lock users manually. Locked users can no longer log in to the INUBIT Workbench. Locked users who are already logged in but then locked cannot continue working and must log out.
|
The |
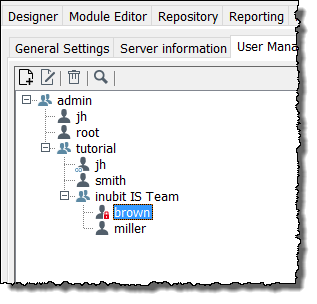
Locked users are indicated in the User Manager tab by the red padlock on the blue user symbol, unlocked users by the blue user symbol:
Users can also be locked automatically, refer to Lock inactive user.
Proceed as follows
-
In the INUBIT Workbench display the Administration > User Manager tab.
-
Select the user to be locked.
-
Open the context menu and select Lock User.
→ A red padlock symbol appears in the user hierarchy on the blue user symbol.
Unlocking Users
Unlocked users may conduct all actions they were authorized to do before the lock, in accordance with their role. Only locked users can be unlocked.
Proceed as follows
-
In the INUBIT Workbench display the Administration > User Manager tab.
-
Select the user to be unlocked.
-
Open the context menu and choose Unlock User.
→ In the user hierarchy, the padlock icon on the blue user icon disappeared.
Deleting Users
|
The user |
Proceed as follows
-
In the INUBIT Workbench display the Administration > User Manager tab.
-
Select the user to be deleted.
-
Open the context menu and select Delete User.
-
If the Clear repository files checkbox is selected, then the old versions of the repository files created by the user will be deleted.
If the base version is one, then a new version will be created with all the tags and the username is changed to “Deleted user” and if a version has any active tags, then that version will have no effect.
-
If the checkbox is not selected, the repository files will not be deleted.
-
-
Confirm the prompt.
→ The selected users and their modules/diagrams are deleted and no longer displayed in the user hierarchy.