Creating Context-sensitive Online Help for Forms
You can create help texts for form elements and have them displayed in specified situations. There may be one or more help texts for each form element.
Example
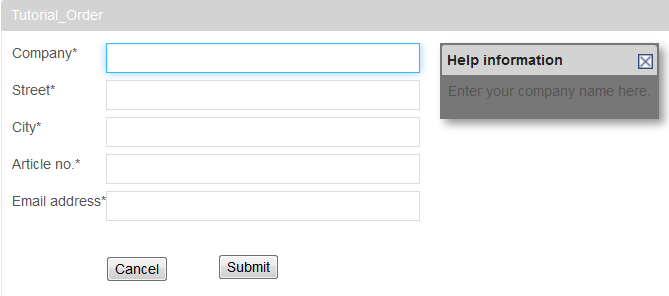
When a user clicks on the Department field, the help text with information regarding responsible unit as insurance criterion will be displayed.
Technical background
The help text for the input field Department is displayed as soon as it gets the focus. This is expressed in an XML file by using an XPath in the following manner:
</inubit:HelpPredicate>
<inubit:HelpPredicate inubit:disabled="false" inubit:elementName="Department">
    local-name(.)='Department'
</inubit:HelpPredicate><inubit:HelpPredicates>
...
<inubit:HelpPredicate inubit:disabled="false" inubit:elementName="gebDatum">
local-name(.)='gebDatum'
<inubit:ResponseHtml inubit:language="en">
Indicate the responsible unit or department.
</inubit:ResponseHtml>
</inubit:HelpPredicate>
</inubit:HelpPredicates>Proceed as follows
-
Display the form in the Form Designer.
-
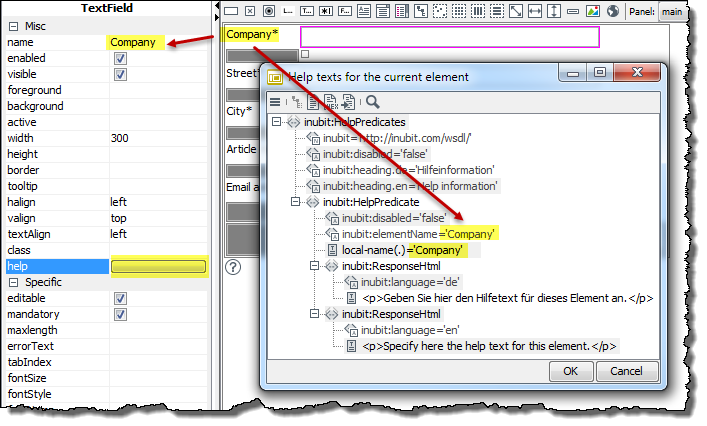
Select the form element for which you want to create a help text, and display the Properties tab.
-
In the Misc area, click the empty field next to the help attribute. The editor opens and displays an XML document with a HelpPredicate for the selected form element.
Example:
-
Replace the content of the
inubit:ResponseHTMLelement with your help text.Other languages:
By default, help texts are displayed in German and English. To display Spanish help texts, for instance, proceed as follows:
-
Into the
inubit:HelpPredicateselement add the following attribute: valueheading.es=‘información on-line‘This text is displayed as title of the help text. -
Enclose each Spanish help text with the
<inubit:responseHtml inubit:language.es>element.
-
-
Click OK to save.
The editor closes, and your changes are saved. Once you have entered a help text, the help attribute value will be 1. If several help texts exist, the number increases accordingly.
To display or edit all help texts for a form, select Edit > All help texts. The editor opens and displays an XML document with all help predicates.
-
Activate the display of the help texts in the portal:
-
Move your cursor to the bottom-right border of the task list where you are viewing your form.
-
Select Active help checkbox
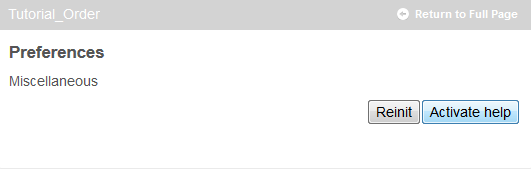
The task list is displayed with your help texts.
-