Installing INUBIT Software
|
If you are about to migrate from an older INUBIT version to the current one, first refer to Migration Guide. |
Preparation
The following requirements must be met before installation:
-
You have an INUBIT license.
-
The installation file suitable for your platform is available on your target system.
-
Make sure that enough disk space is available.
If the installer returns the message
There is not enough space to perform this installation. Please free some disk space and re-run this installer…, the environment variableIATEMPDIRcan be alternatively set to a disk partition that has enough space.
Install INUBIT via graphical interface
Proceed as follows
-
Start the installation file.
-
Select the installation dialog language.
-
Follow the wizard instructions and stop on the Choose Install Set dialog.
-
By default, an JDK suitable for INUBIT and BPC is installed in the
<SUITE-INSTALL-DIR>/_jvmdirectory. This JDK installation is used by both INUBIT and BPC including Opensearch and Karaf. -
Select and check an install set on the Choose Install Set dialog. The install set must match your license, unless you have got a test license. In this case, you can select any installation set.
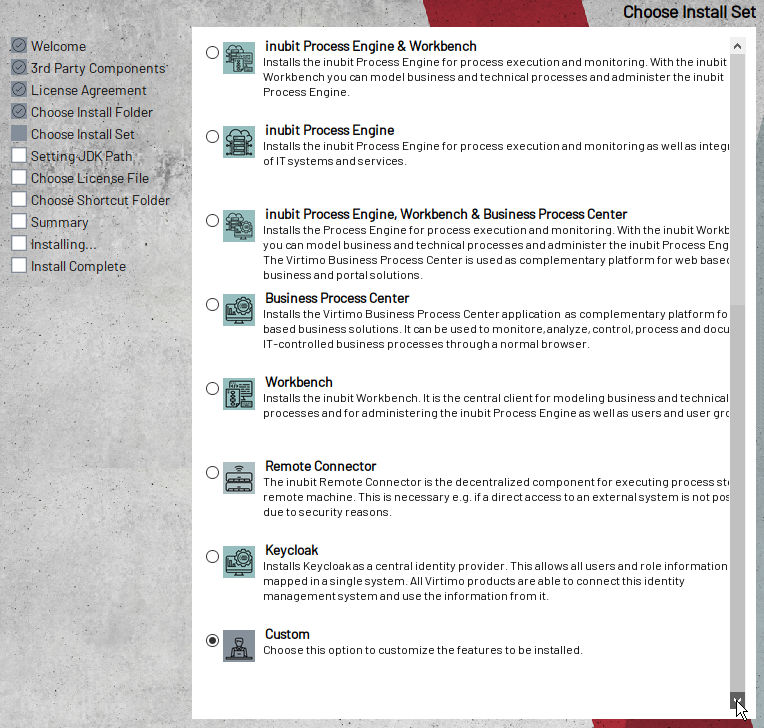
To use the AS4 Connector, select the Custom install set and activate the AS4-Gateway option. To install other components as Tomcat Manager, Plug-in SDK, and/or Remote Manager, choose the Custom install set and activate the desired component.
The Tomcat Manager will be installed in the
<SUITE-INSTALL-DIR>/inubit/server/process_engine/webapps/managerdirectory. The Plug-in SDK and the Remote Manager will be installed in separate subdirectories below theSUITE-INSTALL-DIRdirectory. -
Click Next.
-
If you have selected one of the pre-defined install sets, the Choose License File dialog is displayed, refer to step 7.
-
If you have selected Custom, the dialog for selecting individual components is displayed.
-
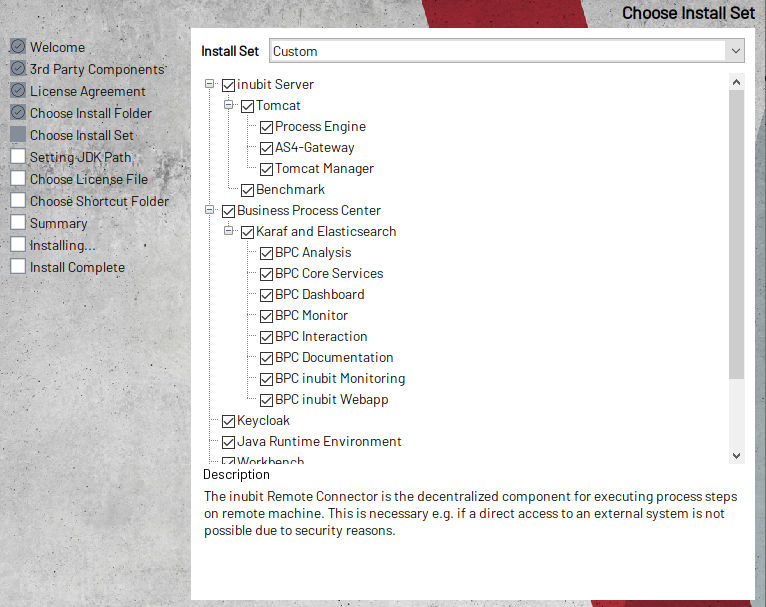
From the Install Set list, select the install set that is most similar to what you wish to install. By doing so, all components of the install set are selected.
-
Check all components that should be installed and uncheck all components that should not be installed. The checkmark symbol and the minus sign both signal that the component listed next to them will be installed:
-
Click Next.
-
-
-
When having chosen the Custom Install Set and having deactivated the Java Runtime Environment option, the Setting JDK path dialog is displayed. Otherwise, the Setting JDK path dialog is not displayed and the JDK path is set automatically to the
<SUITE-INSTALL-DIR>/_jvmdirectory where an JDK delivered with the INUBIT installer will be installed.In both cases, a
java_home_path_setter.[sh|cmd]script is generated for INUBIT and/or for BPC during the installation. For INUBIT, it is stored in theSUITE-INSTALL-DIRdirectory. For BPC, it is stored in the<bpc-installdir>directory, and it used for both Karaf and Opensearch.In the Setting JDK path dialog, enter the path to the JDK installation to be used for your INUBIT and/or BPC installation.
-
Click the Choose… button.
→ The dialog Choose a File opens.
-
Choose the path to the JDK installation.
When clicking on Restore Default, the current value of the
JAVA_HOMEenvironment variable is displayed if set.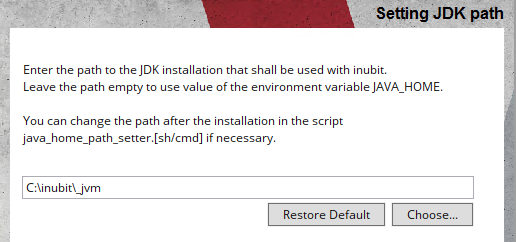
-
Click Next.
-
-
Choose License File for INUBIT.
-
Click the Choose… button.
→ The dialog Choose a File opens.
-
Choose the
license.xmlfile from your local file system.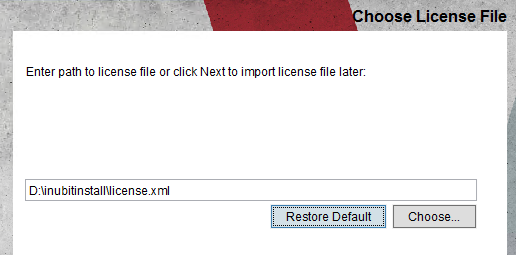
The
license.xmlfile will be saved to the<SUITE-INSTALL-DIR>/inubit/server/ibis_root/confdirectory during the installation. -
Click Next.
-
-
Optional: Choose License File for BPC.
When having chosen to install the Business Process Center, you can enter the path to the
license.xml.bpcfile you have received from the support of the Virtimo AG.If you have not yet received a BPC license, you can leave the field empty and add the license file later.
-
Click the Choose… button.
The dialog Choose a File opens.
-
Choose the
license.xml.bpcfile from your local file system. -
Click Next.
-
-
Choose the shortcut folder.
-
Click Next.
→ A summary of the information you have entered so far is displayed.
-
Click Install.
The selected components are installed. A progress bar indicates the current status. Once the installation is finished, the Pre-Installation Summary page is displayed.
-
If the generated script
java_home_path_setter.[sh|cmd]is already existing due to a previous installation, a dialog is displayed providing the following options:-
Keep the existing script. The previous JDK path specifications are preserved.
-
Overwrite the existing script by the new generated script. The JDK path specifications made during the current installation (see above) are taken into account.
-
-
Click Finish to close the installation wizard.
Depending on your selected installation set, proceed as follows:
-
Workbench
-
All other install sets
Continue with the following subordinate sections.
Install INUBIT via the command line
If the target system does not support a graphical interface, the installer can be run on the command line.
If you access the system remotely, disable X11 forwarding in the terminal client used (e.g. Mobaxterm, Putty).
Prerequisites
-
You have copied the installation file to your computer.
-
To install INUBIT unattended in silent mode, you have to create a response file with a typical installation using the following command before, e.g.:
setupLinuxX64-<inubit version>.bin -r <full path to response file>
setupWinX64-<inubit version>.exe -r <full path to response file>
The installation assistant starts and guides you through the installation. The options selected during the installation are stored in the specified file that contains among others the following entries, for example, for Windows:
#Choose Install Folder
#---------------------
USER_INSTALL_DIR=D:\\inubit80
#Choose Install Set
#------------------
CHOSEN_FEATURE_LIST=IBIS,Tomcat,TomcatPE,AS4-GT,TomcatMan,benchmark,BPC,Karaf ES,BPC-Ana,BPC-Core,BPC-Dash,BPC-Mon,BPC-Int,BPC-Doc,BPC-iMon,BPC-iWeb,keycloak,JRE,Workbench,Doc,Tutorial,Plug-in,RC
CHOSEN_INSTALL_FEATURE_LIST=IBIS,Tomcat,TomcatPE,AS4-GT,TomcatMan,benchmark,BPC,Karaf ES,BPC-Ana,BPC-Core,BPC-Dash,BPC-Mon,BPC-Int,BPC-Doc,BPC-iMon,BPC-iWeb,keycloak,JRE,Workbench,Doc,Tutorial,Plug-in,RC
CHOSEN_INSTALL_SET=Benutze
#Choose License File
#-------------------
USER_INPUT_LICENSE_FILE=D:\\inubitinstall\\inubit8.0\\license.xml
USER_INPUT_BPC_LICENSE=D:\\inubitinstall\\bpc-be-license.jar
#Choose Shortcut Location
#------------------------
USER_SHORTCUTS=C:\\inubit\\inubit80
Proceed as follows
|
In the event under Linux the error message
For this purpose, execute the following command in the terminal:
|
-
Open the command line.
-
Start the installation.
-
Console mode
Call up the installation file corresponding to your operating system using the parameter
-i console, for example:setupLinuxX64-<inubit version>.bin -i console setupWinX64-<inubit version>.exe -i console→ You are guided through the installation script, and you have to answer the questions to continue.
If the parameter is missing, the installation wizard is displayed!
Product features can be selected or deselected by specifying their numbering. If features are marked with an X, they are already selected and can be deselected by entering the corresponding number.
-
Silent mode ü Call up the installation file corresponding to your operating system with the response file created before using the parameter
-i silent, for examplesetupLinuxX64-<inubit version>.bin -f <full path to response file> -i silent setupWinX64-<inubit version>.exe -f <full path to response file> -i silent→ The installation starts using the given response file without either user interaction or output except the installation log file that is written to the installation directory.
Linux: If the installer fails with the error message
Installer User Interface Mode Not Supported, it means that the DISPLAY variable is set. Performexport DISPLAY=""to solve this issue.
-
-
Depending on your selected install set, proceed as follows:
-
Workbench
-
All other install sets
Refer to Requesting a License Key
-
Installing/Uninstalling INUBIT Process Engine as Service
You can make the INUBIT Process Engine available as a service and start, stop, abort or continue it after an error on a local or remote computer. Additionally, you can configure start and recovery options.
Scripts for installing/uninstalling the INUBIT Process Engine as a service are included in delivery of the INUBIT software.
|
To modify a service script, for example, if adding proxies, uninstall the service, change the script, and reinstall the service. |
Installation as service on Windows
Usage
To install/uninstall the INUBIT Process Engine as a service.
|
The script described in this section supports log rotation. Once the log file size has exceeded the configured maximum log file size or the service was (re)started, the current log file is renamed by adding the current date and time and a new log file is created. Old log files are not limited to a maximum age or a maximum total size and therefore grow steadily unless they are cleaned up periodically (manually, via TWF or script). |
Prerequisites
You have administrator rights so that you can run the script.
|
The Windows operating system does not provide the normal command prompt with administrator rights!
For information how to obtain these rights refer to Executing Programs on Windows as Administrator.
You can also use the |
Proceed as follows
-
Open the
SUITE-INSTALL-DIR\inubit\server\process_engine\bin\directory. -
Open the
ibis_nt_service_nssm_install.cmdscript for editing. -
Configure the following parameters accordingly to your needs.
-
NSSM_ROTATE_FILE-
0: No log file rotation -
1: Log file rotation (default)
-
-
NSSM_ROTATE_FILE_SIZEConfigure the maximum log file size in bytes. By default, the maximum log file size is set to 10 Mbyte:
NSSM_ROTATE_FILE_SIZE=10000000 -
NSSM_ROTATE_ONLINE-
0: The log files are rotating only if the maximum log file size configured using theNSSM_ROTATE_FILE_SIZEparameter has exceeded when the service is (re)started.If the service shall run for a long time without being restarted, this value should not be used.
-
1: The log files are rotating while the service is running (default).
-
-
-
Save the changes.
-
Execute the
ibis_nt_service_nssm_install.cmdscript to install the INUBIT Process Engine service.→ The INUBIT Process Engine is installed as INUBIT 8.0 Service with the start type Automatic, and it can be started. Once the system is (re)started, the INUBIT 8.0 Service is started automatically.
-
Start the INUBIT 8.0 Service using the Services application or the following command:
net start "INUBIT 8.0 Service"→ Depending on your configuration, in the
SUITE-INSTALL-DIR\inubit\server\process_engine\logsdirectory, the following log files rotate/do not rotate:stderr.log
stdout.log -
To stop the INUBIT 8.0 Service, use the Services application or the following command:
net stop "INUBIT 8.0 Service" -
To uninstall the INUBIT 8.0 Service, execute the
ibis_nt_service_nssm_uninstall.cmdscript in theSUITE-INSTALL-DIR\inubit\server\process_engine\bin\directory.
|
You can start and stop the service, and you can change the start type of the service using the Services application when running it as administrator. |
Executing Programs on Windows as Administrator
Proceed as follows
|
The following description refers to Windows 10. When using another Windows version, the steps may differ. |
-
Click the magnifier icon next to the Windows logo in the bottom left corner.
-
Into the search field at the bottom, enter
cmd.exeand press Ctrl+Shift+Enter.This shortcut is the equivalent of the
runascommand or the GUI option Run as administrator.The command prompt opens:
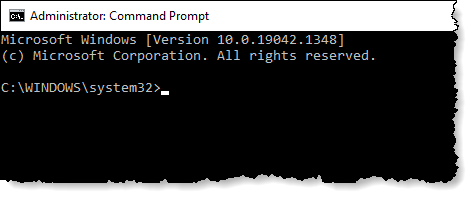
You now have administrator rights, and the title bar of the command prompt will show: Administrator:
Installation as service with SysVinit on Linux
Prerequisites
You must have root rights to install the script for starting the INUBIT Process Engine.
The required file can be found here: <SUITE-INSTALL-DIR>/inubit/server/process_engine/bin/inubitis
Proceed as follows
-
Copy the files as follows:
It is not necessary to copy the
INUBITis.conffile to/etc/. If you want to copy theINUBITis.conffile to/etc/, you have to customize the path to this file in the/etc/init.d/INUBITisscript to use it.cp <SUITE-INSTALL-DIR>/inubit/server/process_engine/bin/inubitis /etc/init.d/ cp <SUITE-INSTALL-DIR>/inubit/server/process_engine/bin/inubitis.conf /etc/ -
Allocate the service to a run level and connect the service to the respective entries for starting and stopping, e.g.:
cd /etc/init.d/rc3.d ln -s ../inubitis S70inubitis ln -s ../inubitis K03inubitis -
Switch to the
/etcdirectory. -
To list the available parameters, call up the script without parameters:
cd /etc/init.d ./inubitis start ./inubitis status ./inubitis stop ./inubitis forcestop ./inubitis restart -
The paths for the following entries may need to be adjusted in the
inubitis.conffile.-
Installation directory
IS_DIR=/opt/inubit-IS -
User under which the service is to be run
IS_USER=is
-
Installation as service with Systemd on Linux
Prerequisites
-
You must have
rootrights to install the INUBIT Process Engine as service usingsystemd. -
Make sure that the
JAVA_HOMEenvironment variable in the<SUITE-INSTALL-DIR>/inubit/java_home_path_setter.shscript is set to the absolute path to the JDK installation used for INUBIT, e.g.:JAVA_HOME=/home/inubit/_jvm
Proceed as follows
-
In the
/etc/systemd/systemdirectory, copy theinubit.servicefile in the<SUITE-INSTALL-DIR>/inubit/server/process_engine/bindirectory, e.g.:cd /etc/systemd/system sudo cp <SUITE-INSTALL-DIR>/inubit/server/process_engine/bin/inubit.service inubit.service -
Optional: If the user who has installed INUBIT and the user who should run the INUBIT Process Engine as a service using
systemd, the user parameter in theinubit.servicefile has to be adjusted as follows:-
Navigate to the
<SUITE-INSTALL-DIR>/inubit/server/process_engine/bin/directory. -
Open the
inubit.servicefile for editing. -
In the line starting with
User=, replace the existing username with the user who shall run the INUBIT Process Engine as a service usingsystemd. -
Save the changes.
-
-
Reload the
systemctl daemonconfiguration as follows:
sudo systemctl daemon-reload -
Enable the
inubit.servicefile before starting the INUBIT Process Engine as follows:
sudo systemctl enable inubit.service→ Now, you can use the following commands:
-
Starting the INUBIT Process Engine
sudo systemctl start inubit -
Stopping the INUBIT Process Engine
sudo systemctl stop inubit -
Restarting the INUBIT Process Engine
sudo systemctl restart inubit -
Checking the status of the INUBIT Process Engine
sudo systemctl status inubit
-
Post-installing Components of the INUBIT Software
Proceed as follows
-
Stop the INUBIT Process Engine.
-
Start the installation wizard again.
-
As installation directory select the directory the INUBIT software is installed in.
-
As type of installation select
User-defined. -
Check all components which you want to install.
When you select a component which is subordinated to other components in the tree, then all superordinated components are installed again.
-
Start the installation. Your configuration files are not overwritten automatically. You can define for each file individually whether to keep its current version or let it overwrite.
Set or change Java runtime environment
By default, a Java runtime environment (JDK) suitable for INUBIT is installed in the directory <SUITE-INSTALL-DIR>/_jvm.
This JDK installation is used by all applications included in the installer.
When having deactivated the Java Runtime Environment option on the Custom Install Set dialog during the installation, the Setting JDK path dialog is displayed.
Enter the path to your own JDK installation here.
This will be stored in the JAVA_HOME environment variable and used in the following scripts:
<SUITE-INSTALL-DIR>/inubit/java_home_path_setter.[sh|cmd]
<SUITE-INSTALL-DIR>/bpc/java_home_path_setter.[sh|cmd]
If you have not specified the path to the JDK installation or want to change the path, you can change the environment variable JAVA_HOME at any time.
|
The environment variable |
Proceed as follows
-
Open the file
<SUITE-INSTALL-DIR>/inubit/java_home_path_setter.[sh|cmd] for editing and set theJAVA_HOMEenvironment variable to the path to the JDK installation used by INUBIT.Make sure that the version of the specified JDK installation fits the required version number set for the
JAVA_MAJOR_VERSION_REQUIREDvariable. Otherwise, the version check fails, an error message is displayed, and neither the INUBIT Process Engine nor the Remote Connector can be started.Path with whitespaceIf you specified the path during a Linux installation, and it contains spaces, you must update the
java_home_path_setter.shfile by enclosing the path in quotation marks.Example:
JAVA_HOME="/home/inubit/jdk 11" -
Restart the Process Engine or the Remote Connector for the changes in the
<SUITE-INSTALL-DIR>/inubit/java_home_path_setter.[sh|cmd]script to take effect.
Preparation on Linux/Unix
Adjusting the Open File Limit
Usage
For setting the maximum number of open files for one or more users
Proceed as follows
-
Open the
/etc/security/limits.conffile for editing. -
Add the following entry for the user who is to start the Process Engine. If necessary, adjust the value to your environment as required.
<inubit user> hard nofile <new value> -
Save the file.
Example
-
Under Linux/Unix: In the
/etc/security/limits.conffile, you have adapted the file handle limit for the installing user according to the following pattern:<Installing user> soft nofile 4096 <Installing user> hard nofile 131072For the
rootuser, these entries should look like this:root soft nofile 4096 root hard nofile 131072
Adjust the Ulimit
Usage
For setting the maximum number of open file descriptors
Proceed as follows
-
Open the file
$HOME/.bashrcfor editing. -
Add the following entry and adjust the value (in the following example
128000) to your environment as required:ulimit -n 128000 -
Save the file.
Adjusting the Kernel Parameters
Proceed as follows
-
Log on as administrator root.
-
Open the file
/etc/sysctl.conffor editing. -
Adjust the following parameter values to your environment. The following values serve as examples:
-
net.core.rmem_defaultDefault receive buffer for network packets
-
net.core.rmem_maxMaximum receive buffer for network packets
-
net.core.wmem_defaultDefault send buffer for network packets
-
net.core.wmem_maxMaximum send buffer for network packets
-
-
Save the file.
-
Load the changed kernel parameter values using the command
sysctl -w.
Installing and Configuring a Load Balancer
|
A load balancer is not part of the delivery. |
Installing a load balancer
Proceed as follows
-
Select a load balancer.
-
Install and configure the load balancer to suit your requirements and the manufacturer’s specifications.
-
Activate the required ports, such as
8009. -
Disable any ports not needed, such as
80or8000.
Configuring the load balancer
Proceed as follows
-
Open the file
<SUITE-INSTALL-DIR>/inubit/server/process_engine/conf/server.xmlfor editing. -
Remove the comment characters for the following parameters and configure the load balancer.
The following example shows how to configure the Apache load balancer with
mod_jk.<Connector port="8009" protocol="AJP/1.3" redirectPort="8443"/> ... <Engine name="Catalina" defaultHost="localhost" jvmRoute="<DNS name / IP address of the current node>">