Deployment
Using the Deployment function, an administrator can transfer individual module components and BPC configurations from one BPC installation to another within BPC.
It is also possible to deploy modules and themes; see Deploying BPC Modules and Themes.
Configuring Deployment Targets
The BPC instances to and from which a configuration is to be deployed must be created as Backend Connections of the type deployment_system (see Backend Connections).
|
For the local BPC server (which can be used as both a source and a destination), a deployment system named |
Launching the Deployment Wizard (Option 1)
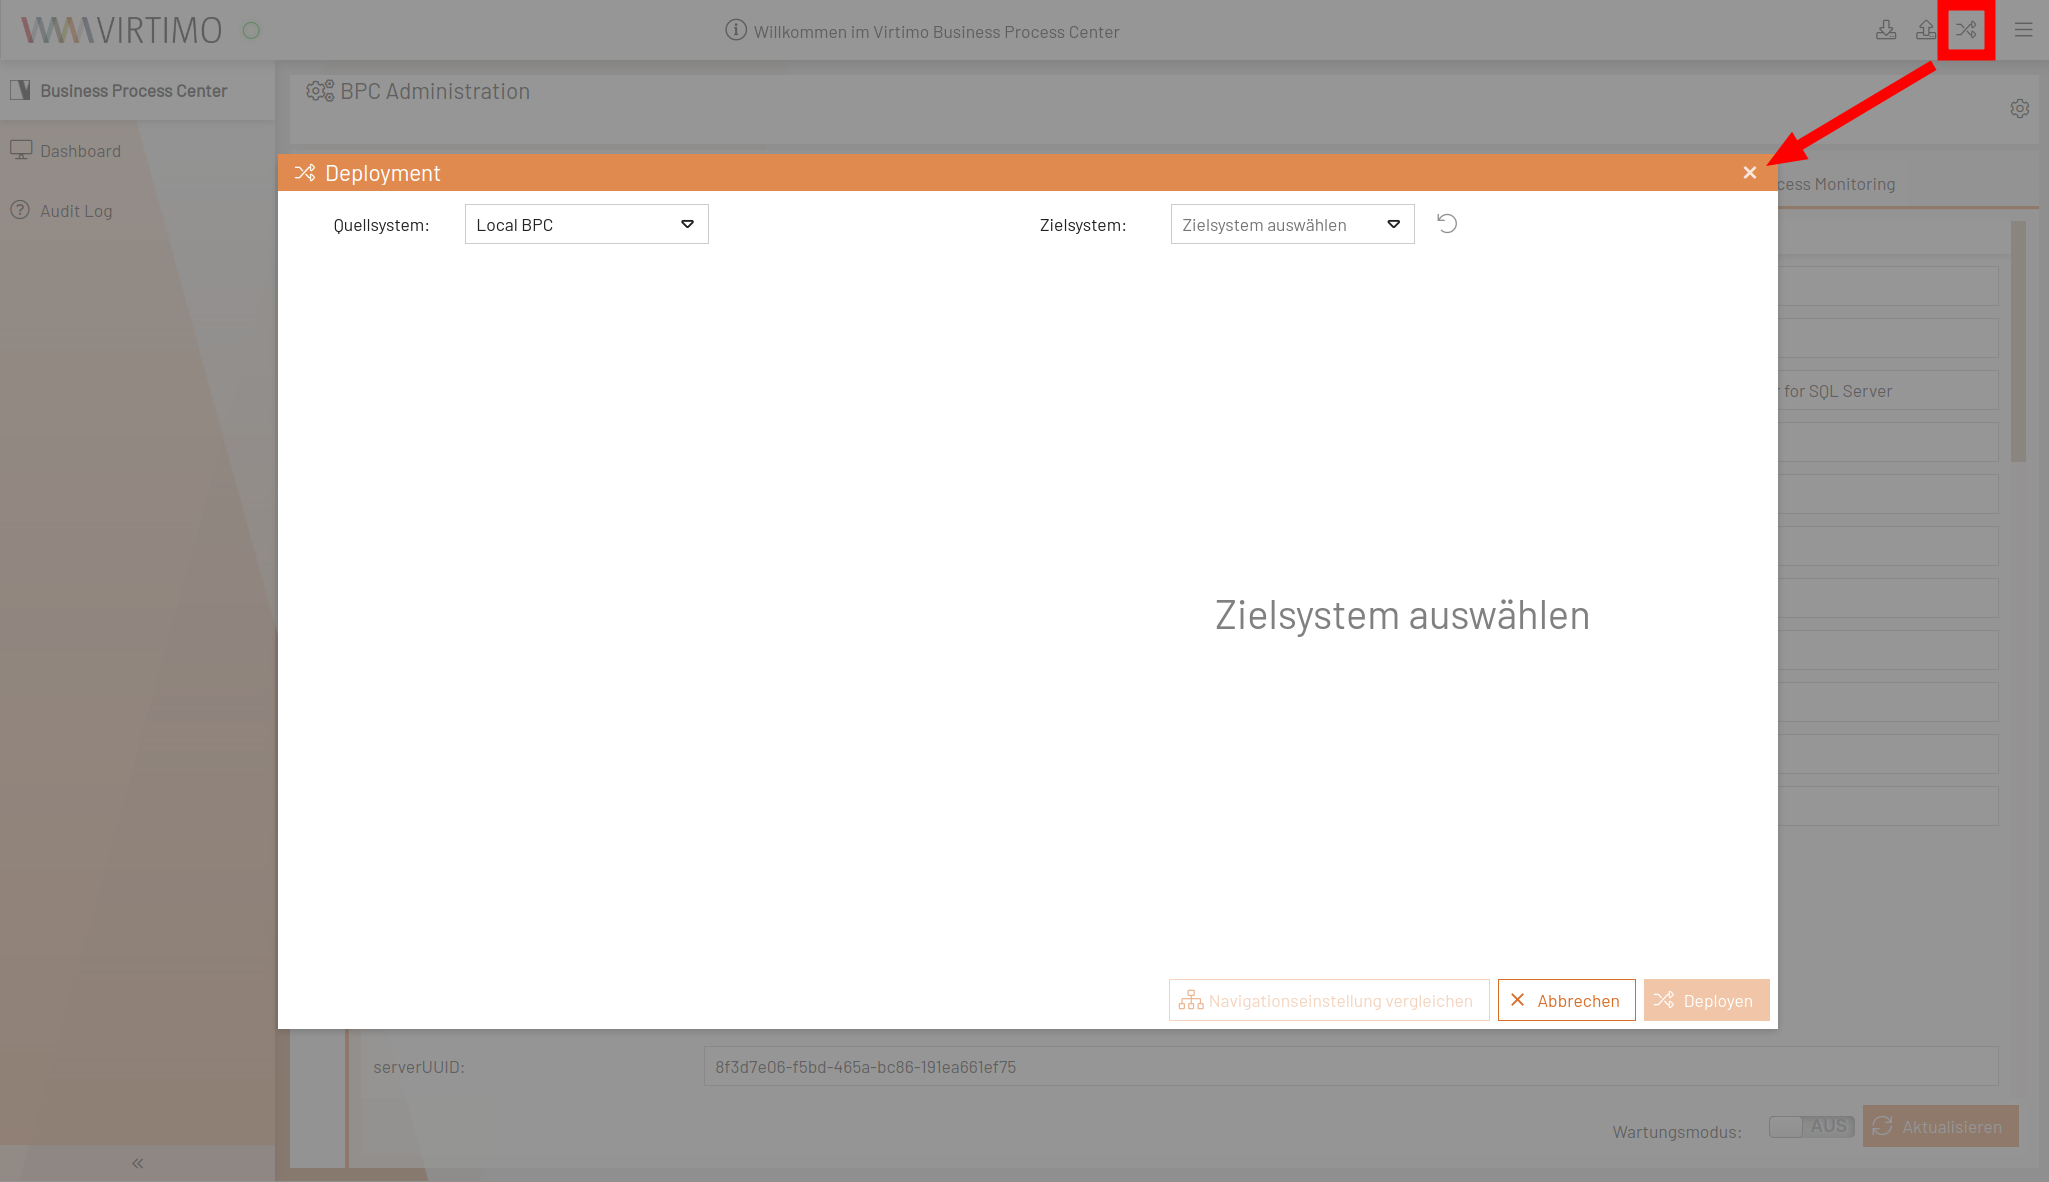
In the administration area, you can launch the Deployment Wizard from the function bar. This allows you to select the source and target deployment systems, automatically starts the synchronization of the selected BPC instances, and lists all discrepancies.
Launching the Deployment Wizard (Option 2)
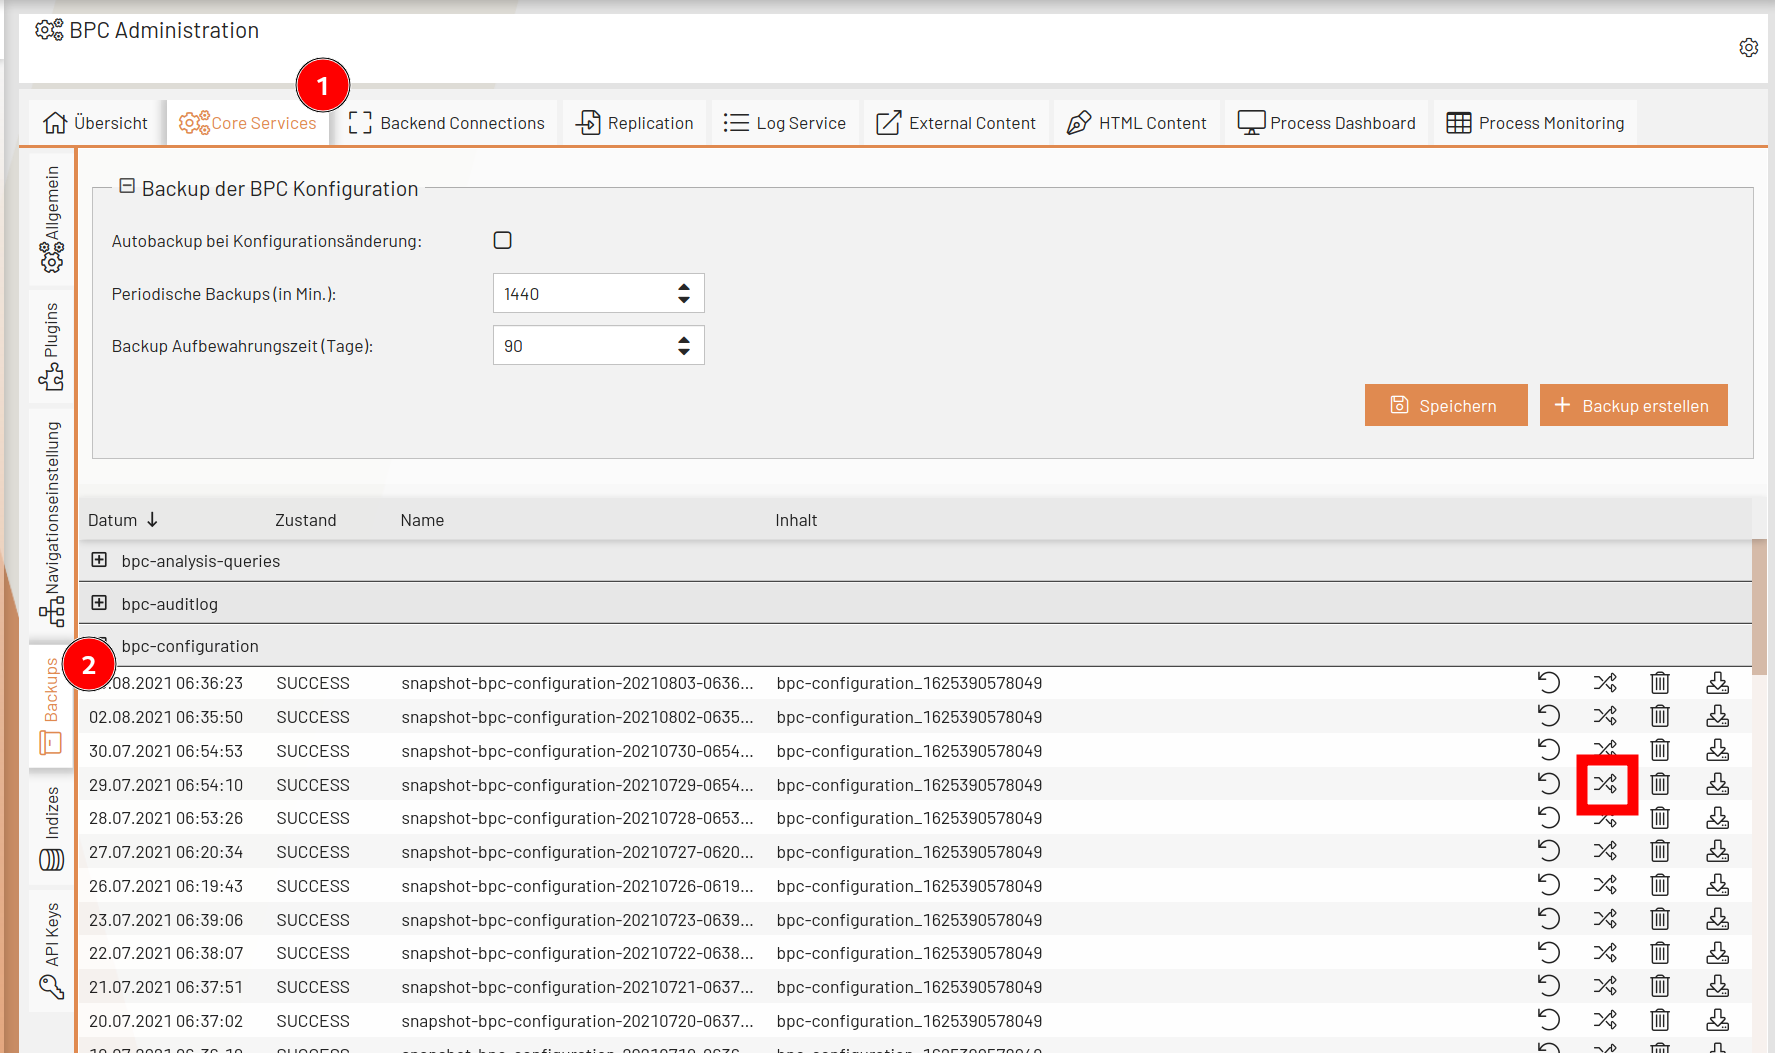
For the Core Services and Backups, you can select a backup of the bpc-configuration indexes (which contain the configuration settings) as the source for the deployment.
To do this, click the icon with the two arrows (see screenshot).
Launching the Deployment Wizard (Option 3)
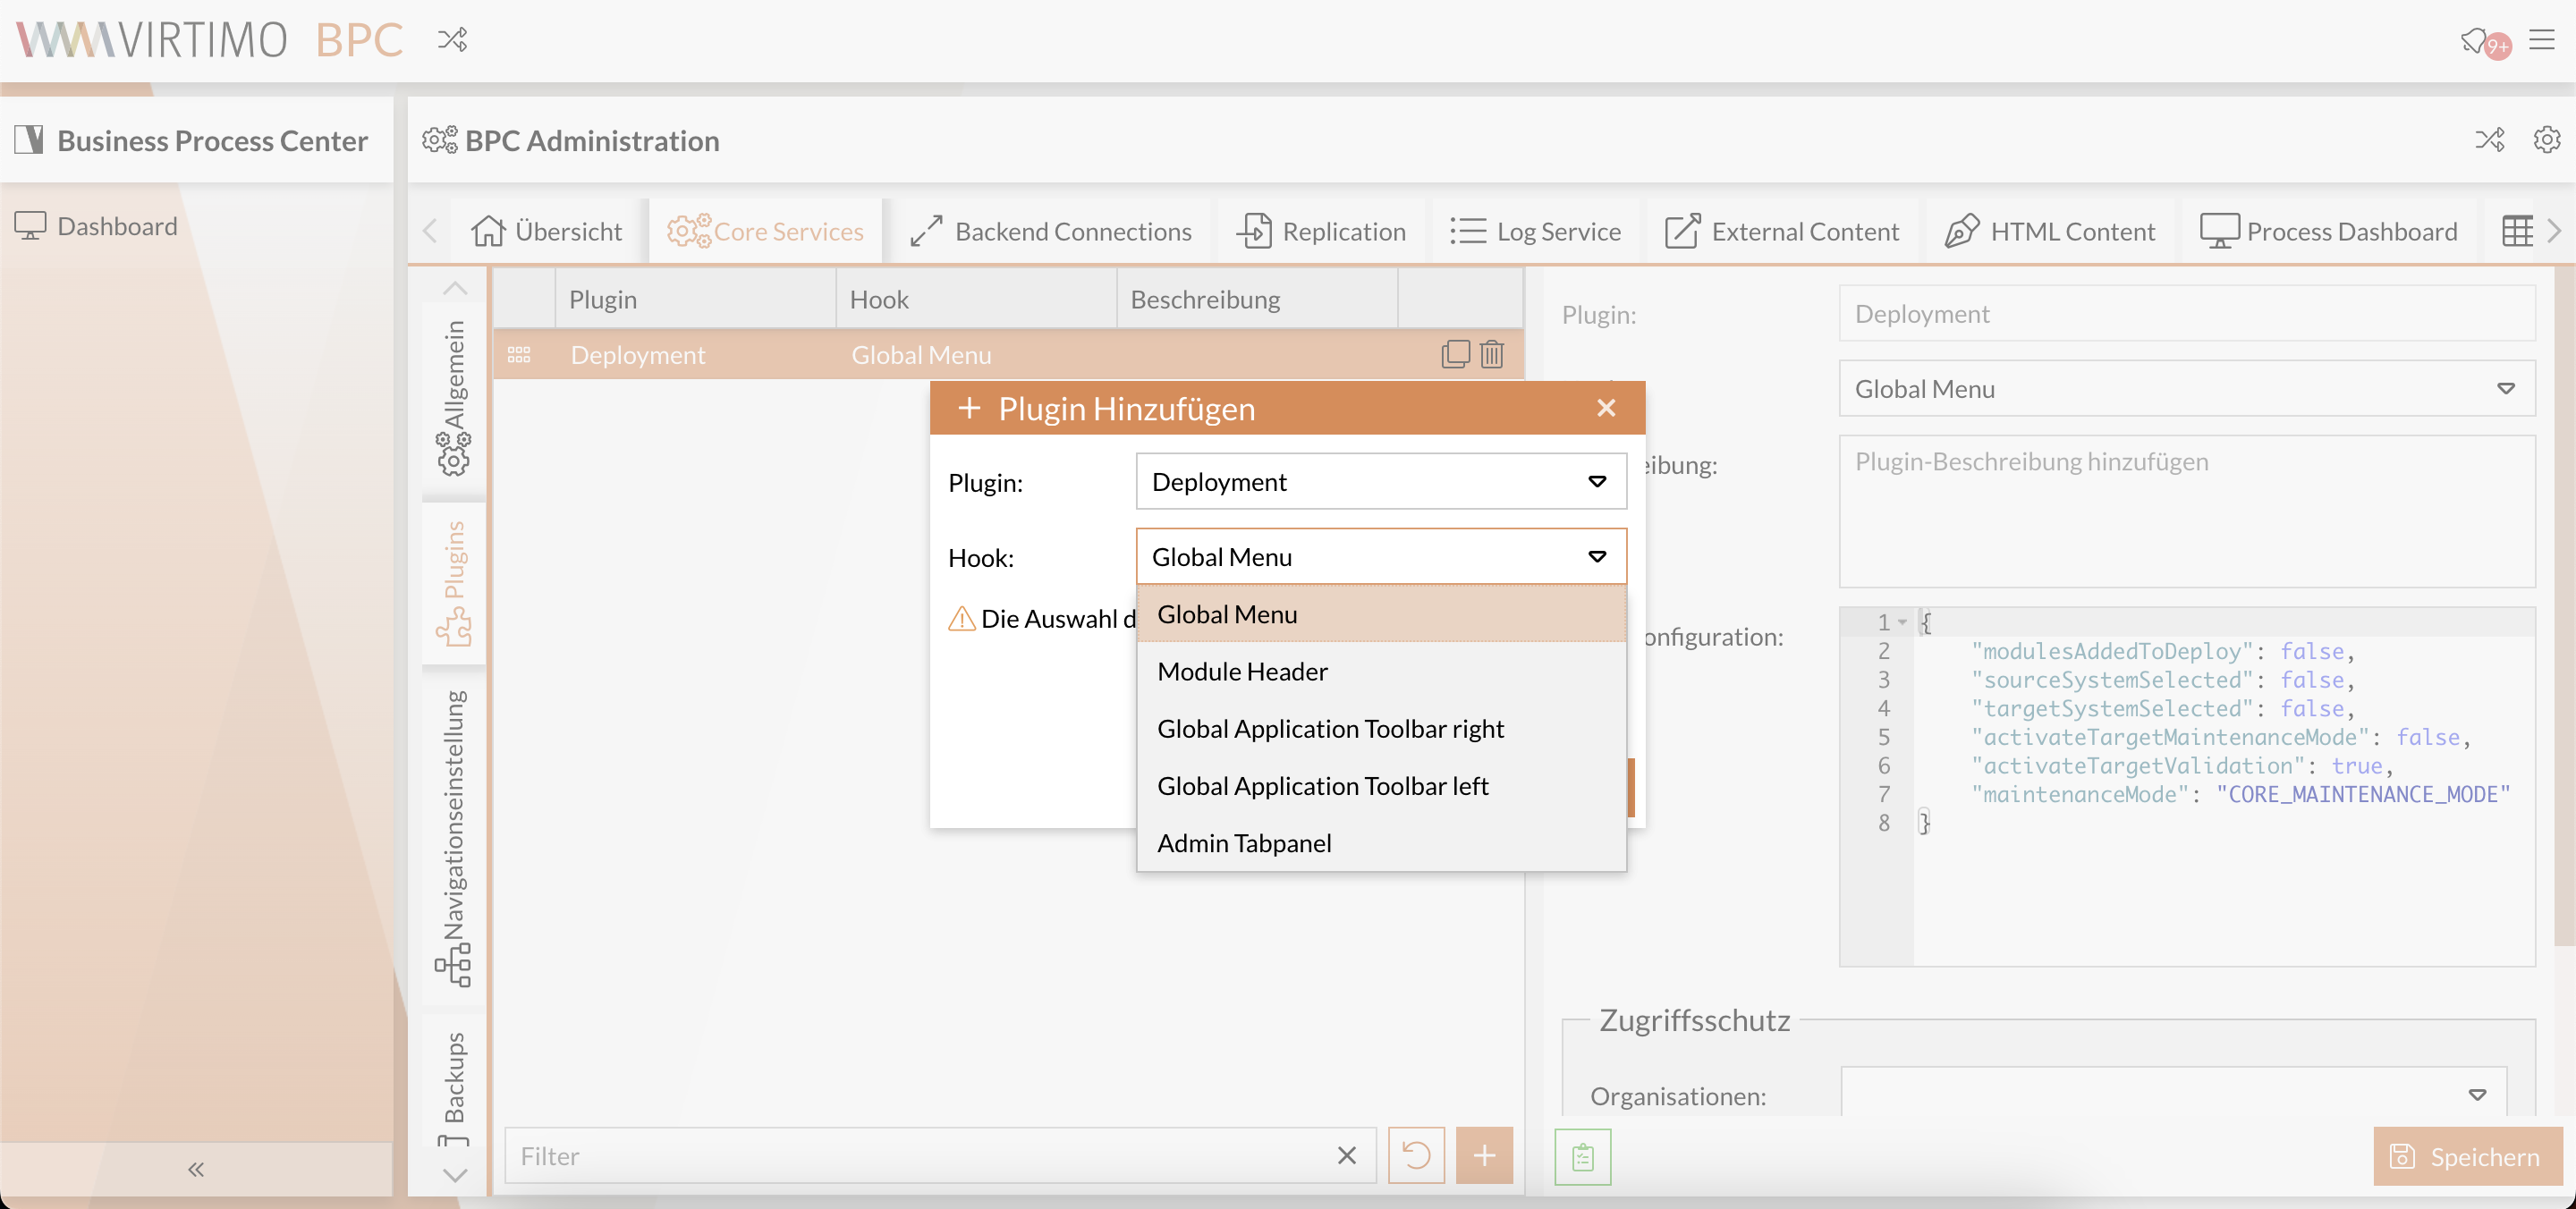
The Deployment Wizard is available as a plugin at various hooks under Core Services and Plugins.
Deployment Wizard
After selecting the source and target systems for deployment, a tree view is generated, grouped by module type.
|
If there is no direct connection between the two systems, you can use a JSON file as an intermediary.
To do this, first select the source system and then select |
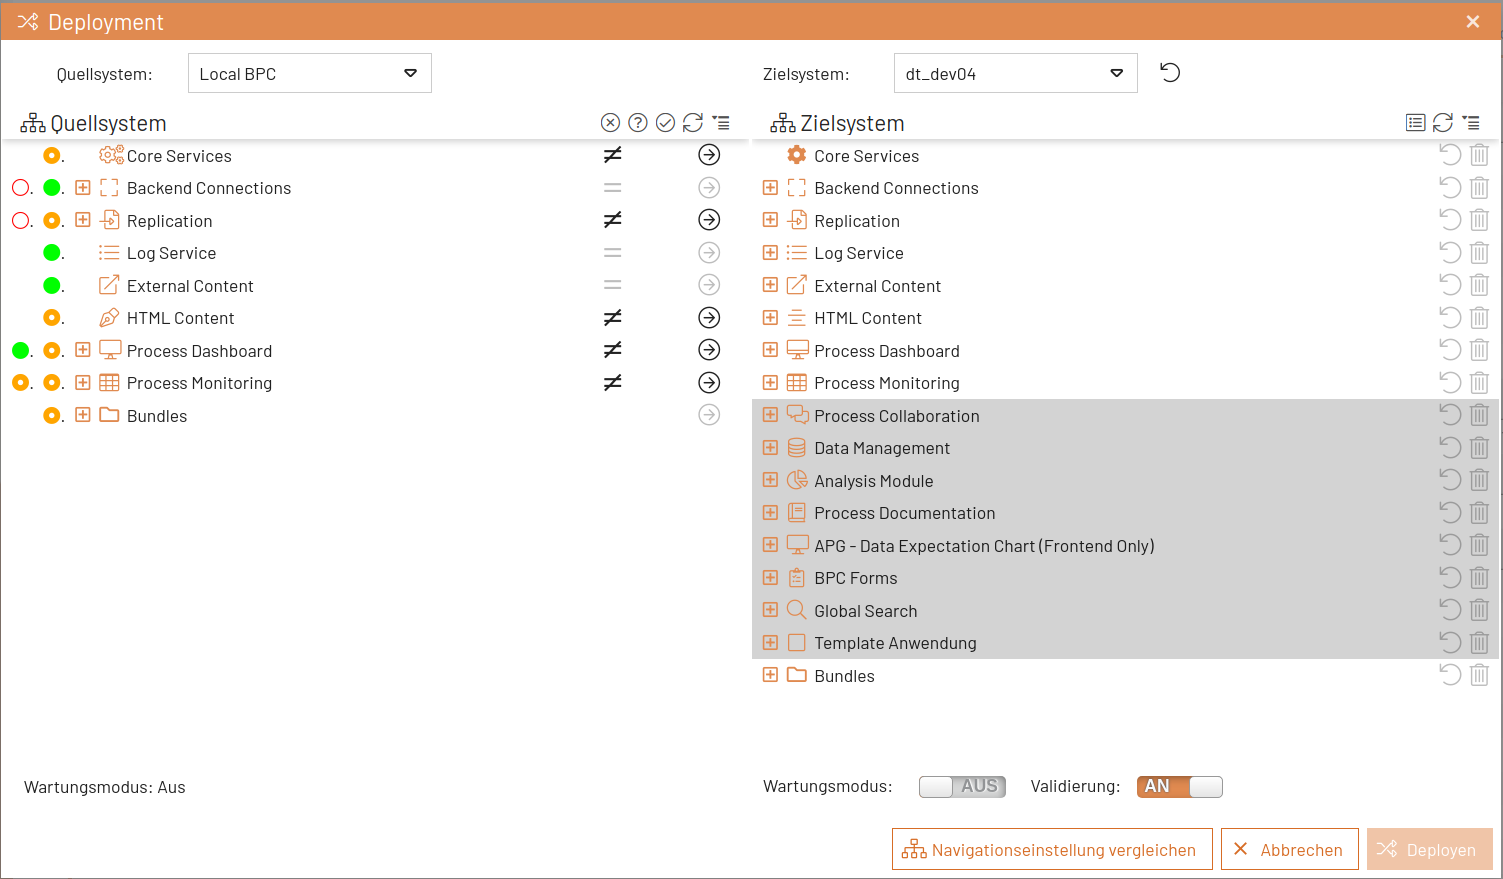
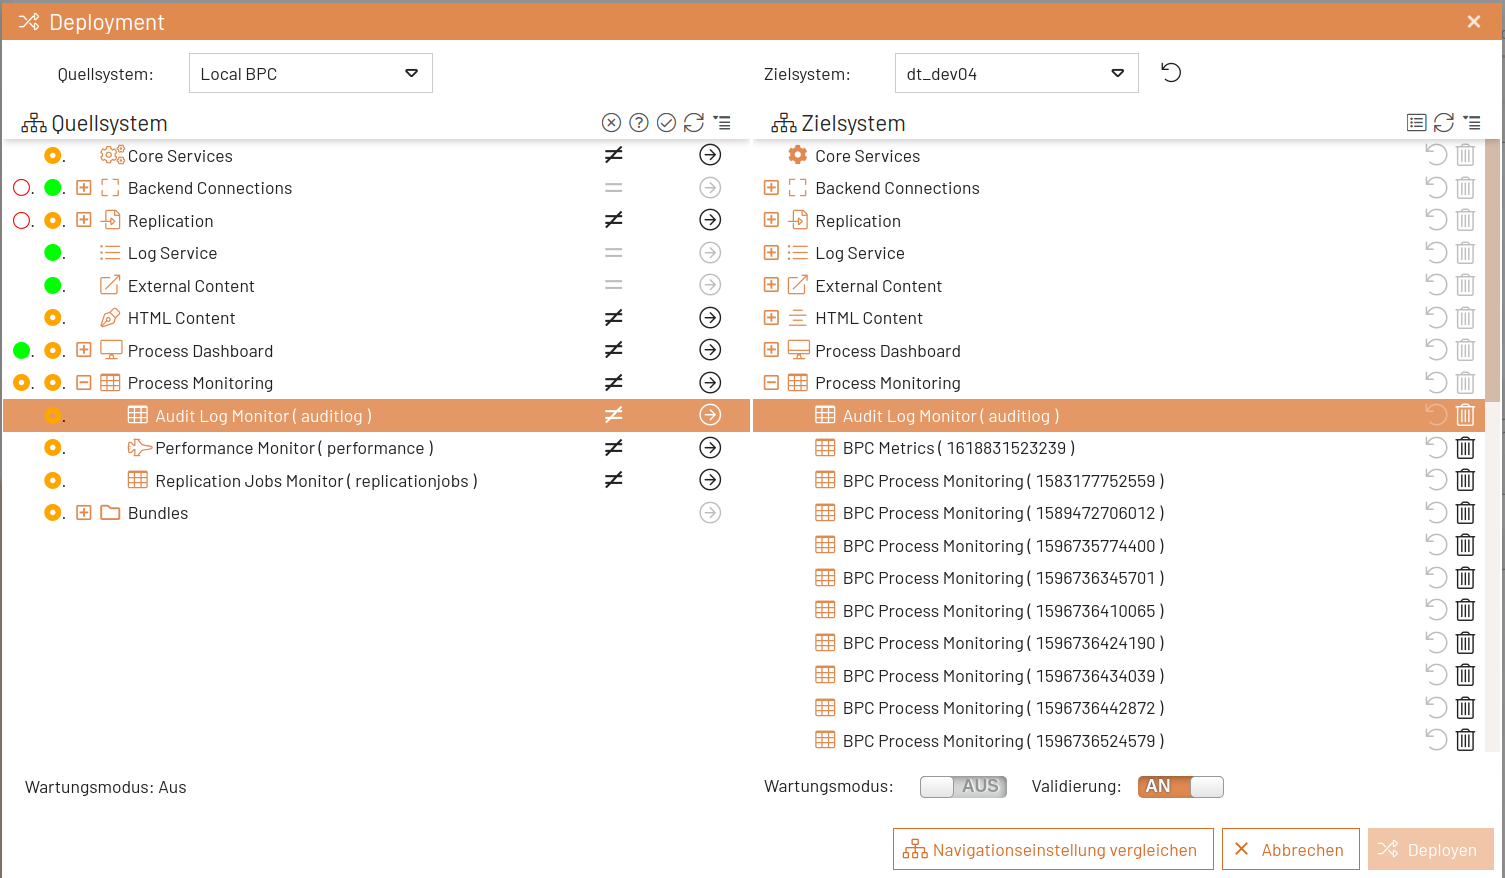
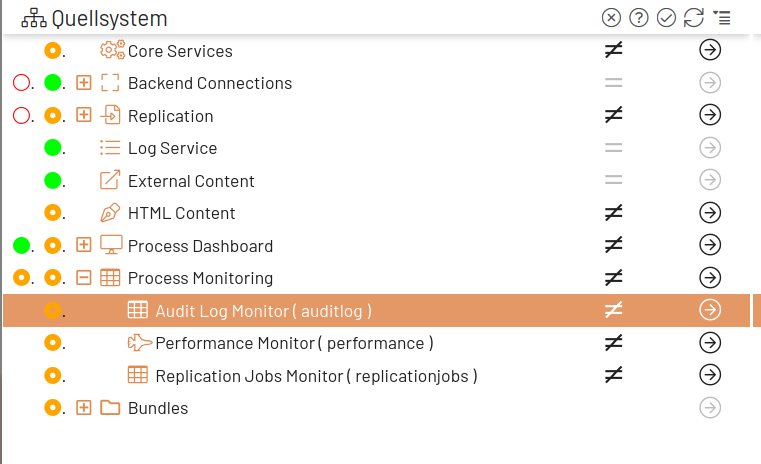
The colored circles in the source system help identify differences between modules compared to the target system. The circles in the first column refer to a module’s components, while those in the second column refer to the module itself.
| Color code | Meaning |
|---|---|
Green |
The green circle indicates that the module or module component is present on both the source and target systems and has the same configuration. |
Orange |
The orange circle indicates that the module or module component is present on both the source and target systems, but with different settings or setting values. |
Red |
The red circle indicates that the module or module component is missing on the target system. |
A tooltip explaining the meaning is available next to the colored circles.
Source System Selection Filters
Filters can be set in the source tree using the tools in the tree header. The filters display missing, modified, and identical modules compared to the target system.

Target System Selection Filters
The target filter displays the list of modules or module components to be deployed.

Deployment of Modules and Components
To deploy modules and components, click the arrow in the source tree. If the module does not yet exist on the target system, it will be added to it. If the module already exists on the target system, the settings from the source system will overwrite the settings on the target system as soon as the "Deploy" button is clicked.
|
During deployment to the target system, only different and missing settings are transferred. |
Deployment of Individual Settings
Individual settings for modules and components can also be deployed.
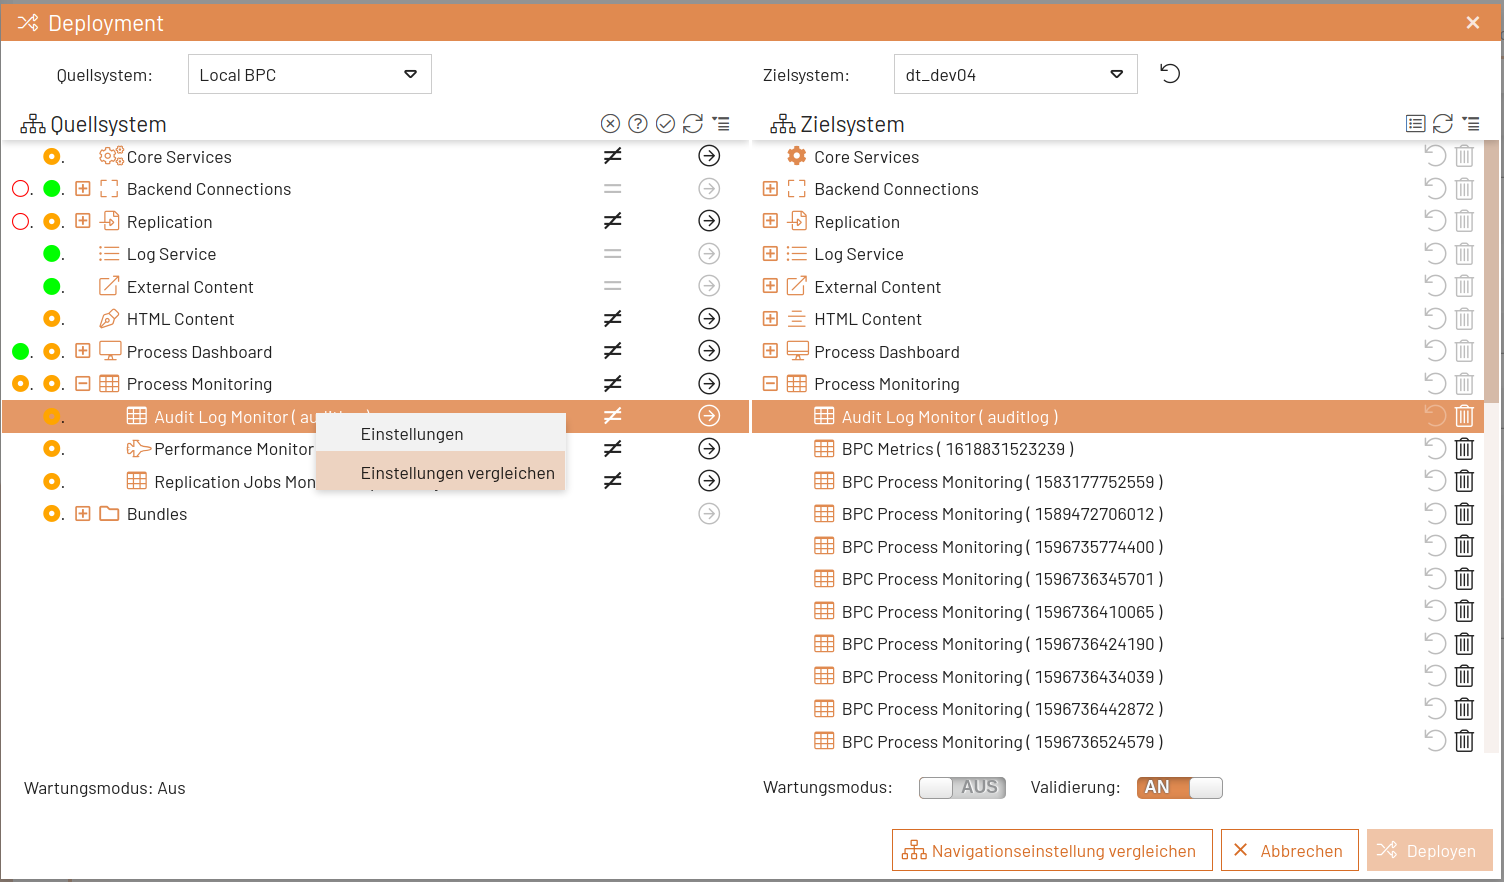
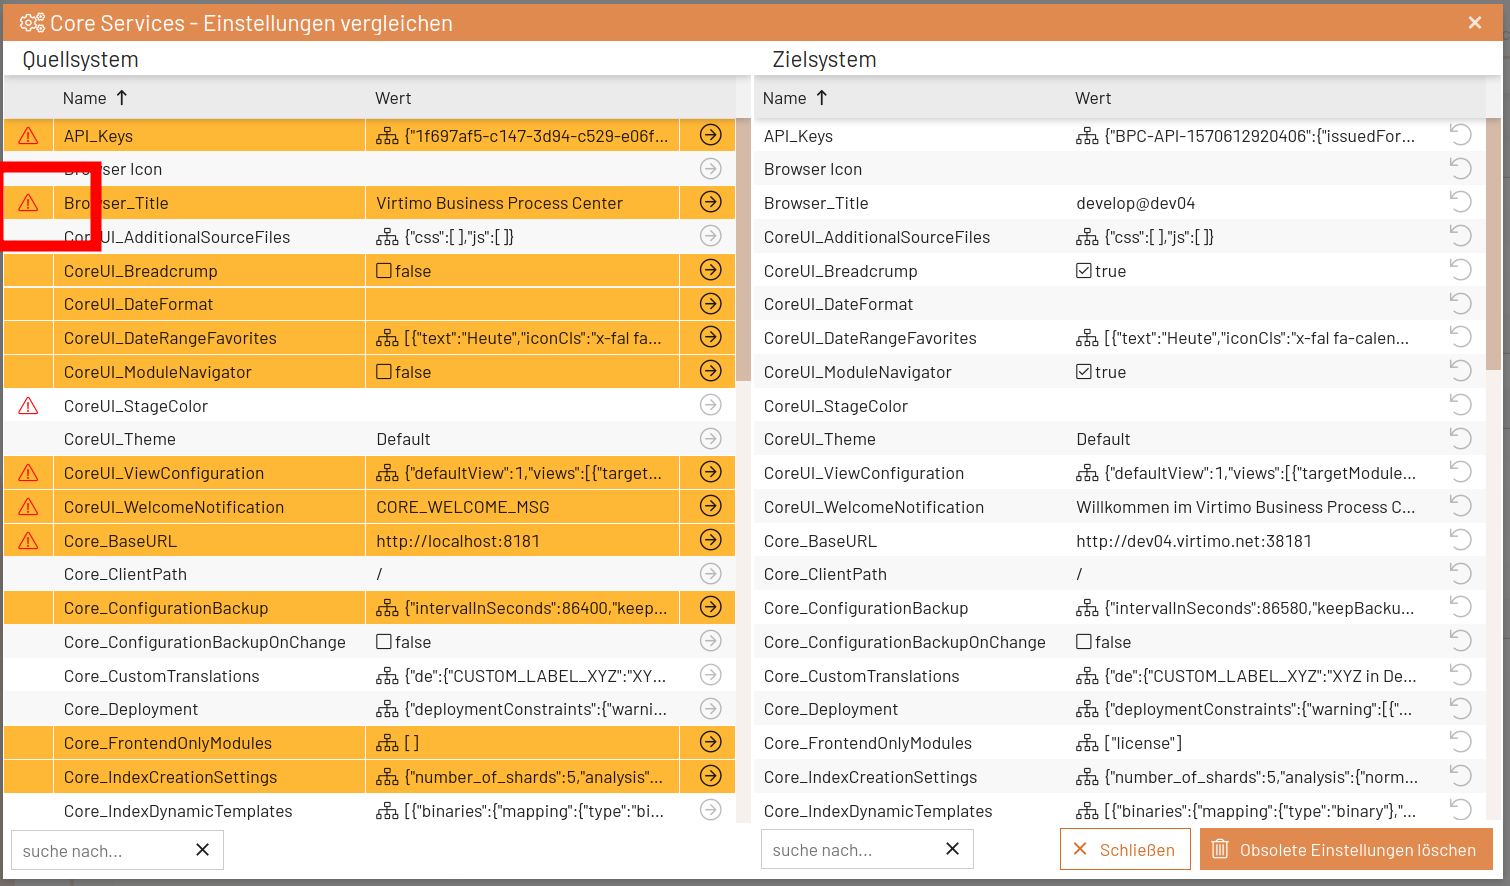
In the source tree, open the context menu for the selected module or module component and select “ Einstellungen vergleichen ” or click the icon with the “≠” symbol.
In the settings comparison window, the settings are color-coded as described above (except for settings that do not differ).
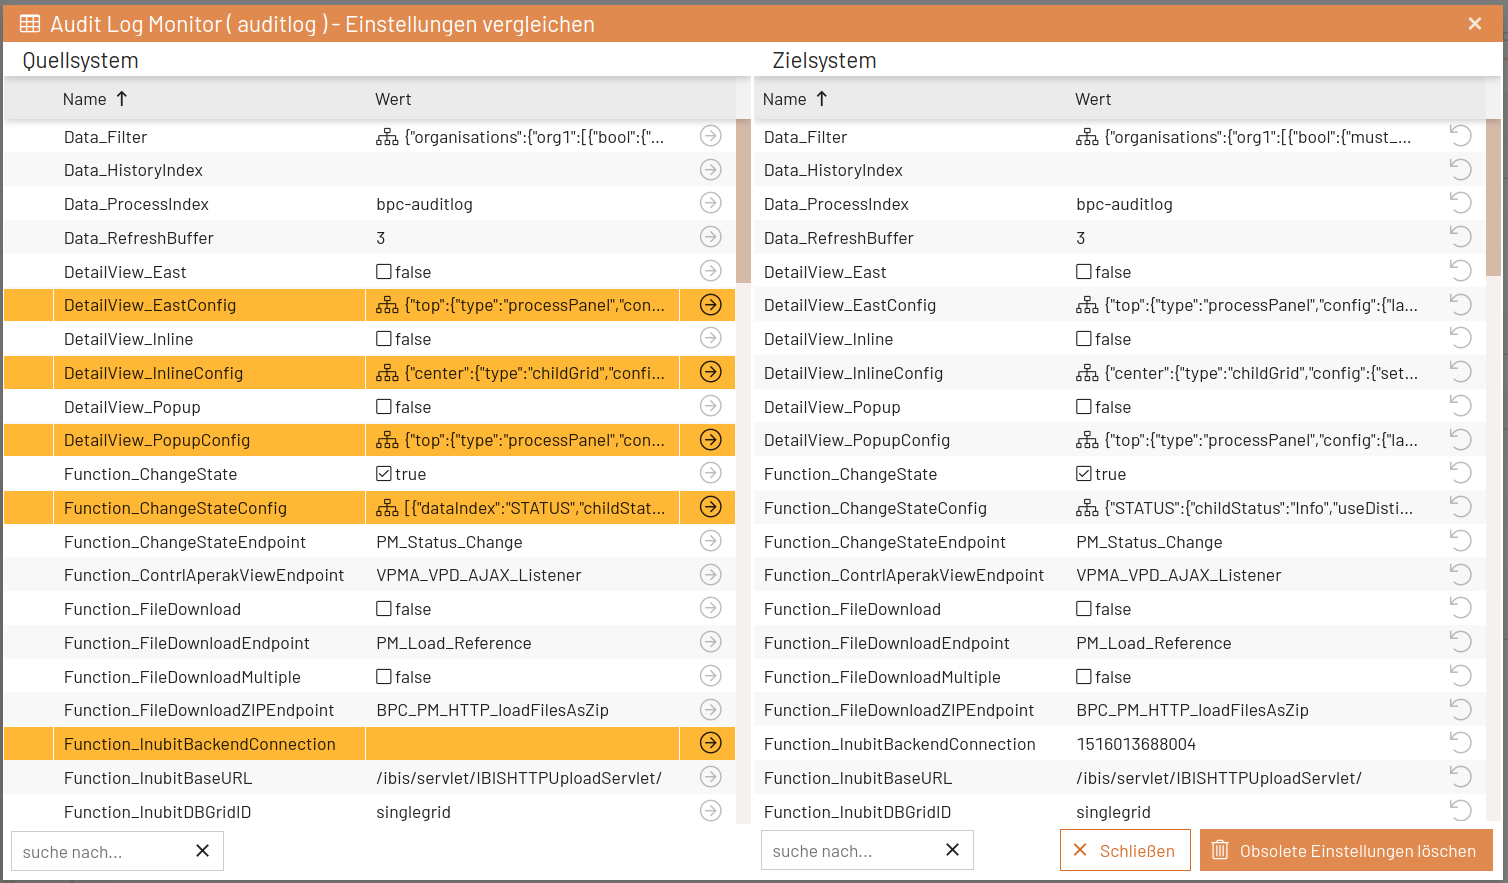
Use the arrow in the source tree to add individual settings to the deployment. You can undo this using the arrow in the target system.
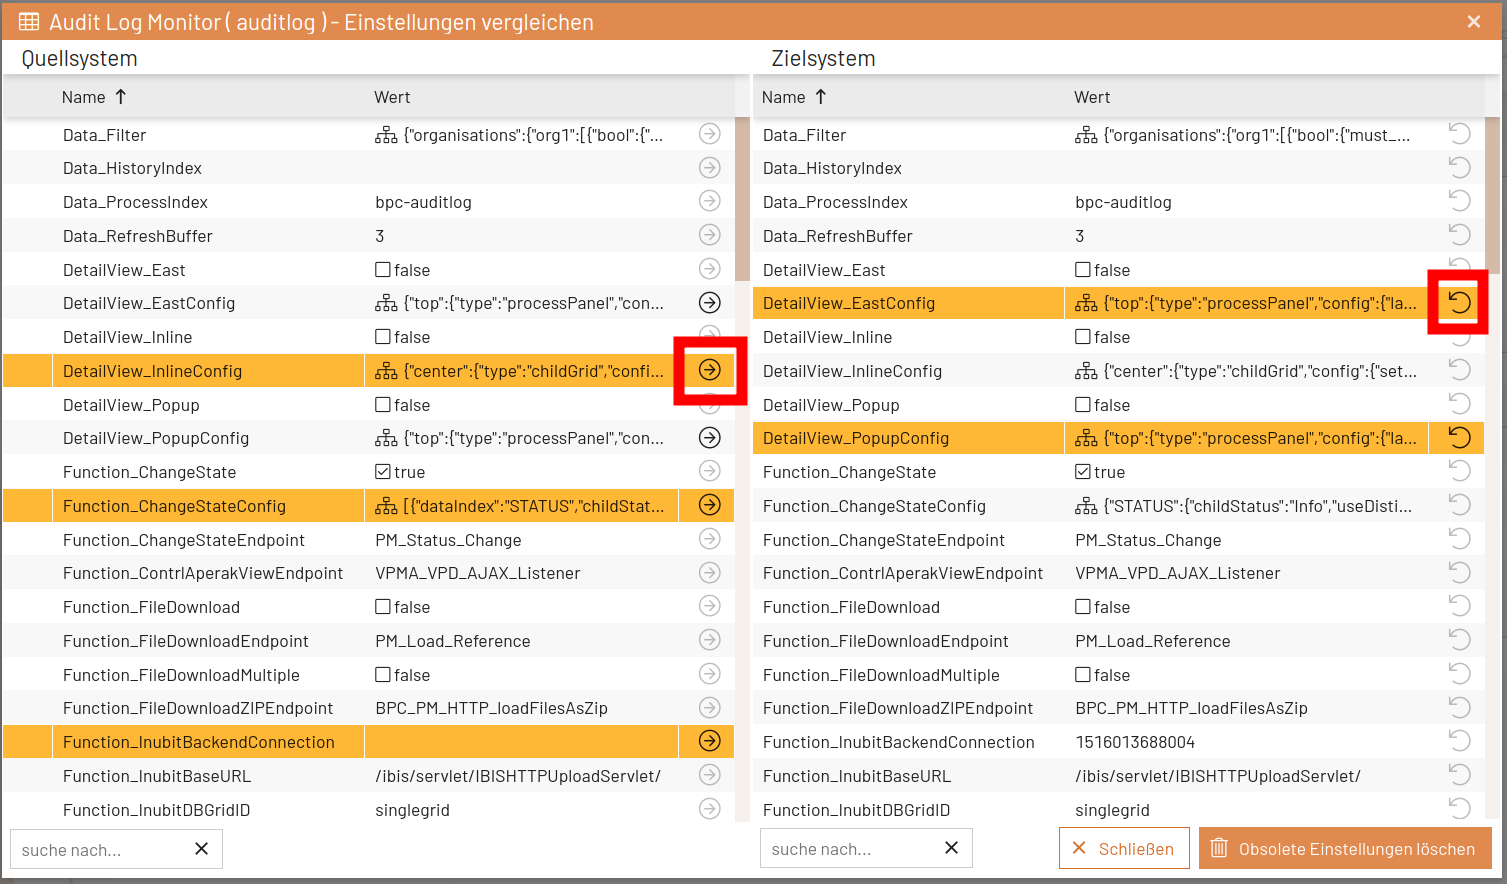
If settings with a JSON value differ, you can open a comparison window by clicking on the value in the source system. In this window, the differences are visually highlighted.
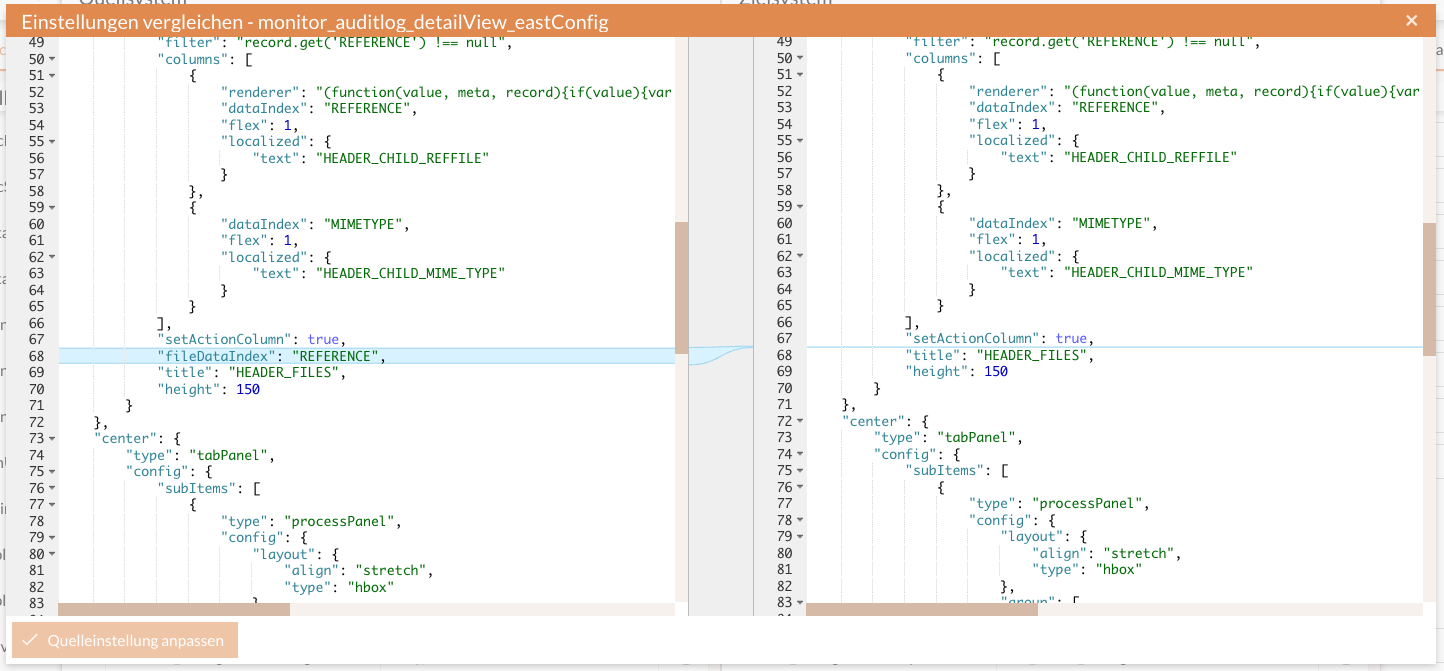
The JSON in the source system (left side) is editable. Click the “Adjust Source Setting” button to apply these changes.
Deployment of Bundles
To deploy bundles, click the arrow in the source tree. If the bundle does not yet exist on the target system, it will be added to it and will be available shortly after the deployment is complete. If the bundle already exists on the target system, it will be replaced by this version.
Deployment of OpenSearch Indices
To deploy OpenSearch indices, click the arrow in the source tree. If the index does not yet exist on the target system, it will be created there with the same settings and mappings, and the documents will be copied in blocks. If the index already exists on the target system, it will first be deleted, then recreated, and the documents will be copied.
|
Depending on the size of the indexes to be copied, this process may take some time. It is intended for smaller indexes or for cases where an index is needed on another system for testing or troubleshooting purposes. If the data can be created via replication, choose this method. |
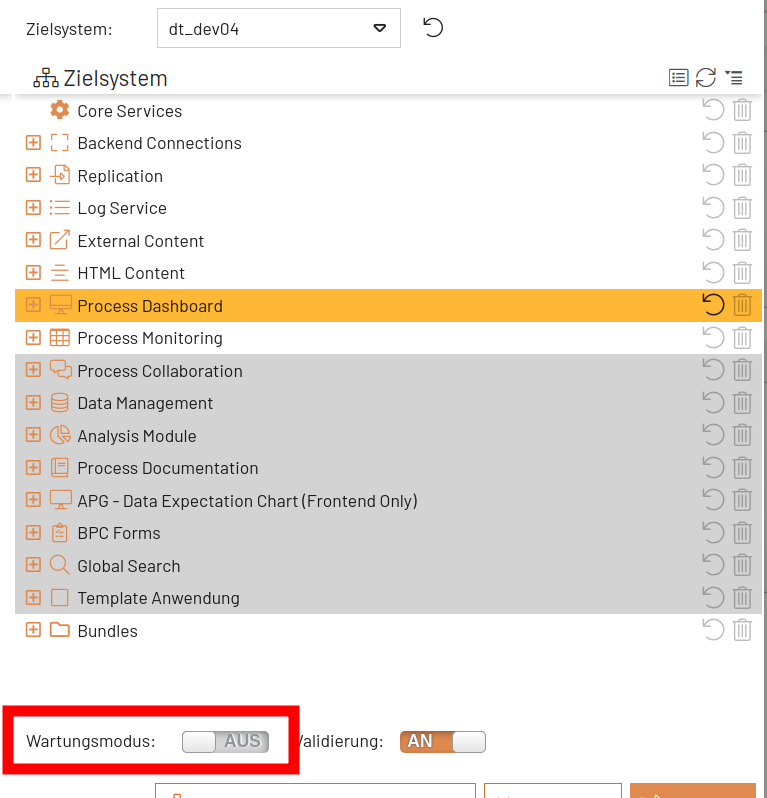
Enable maintenance mode on the target system
Target system maintenance mode can be enabled from the deployment window, but can only be disabled directly on the target system.
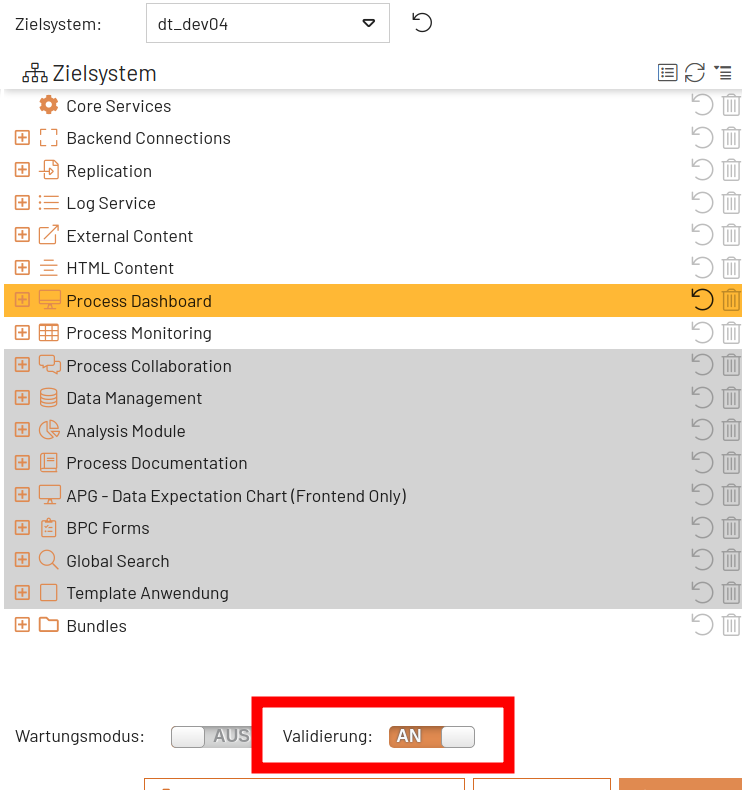
Validating Module Settings
If the " Validierung " option is enabled, the module settings on the target system are validated during deployment.
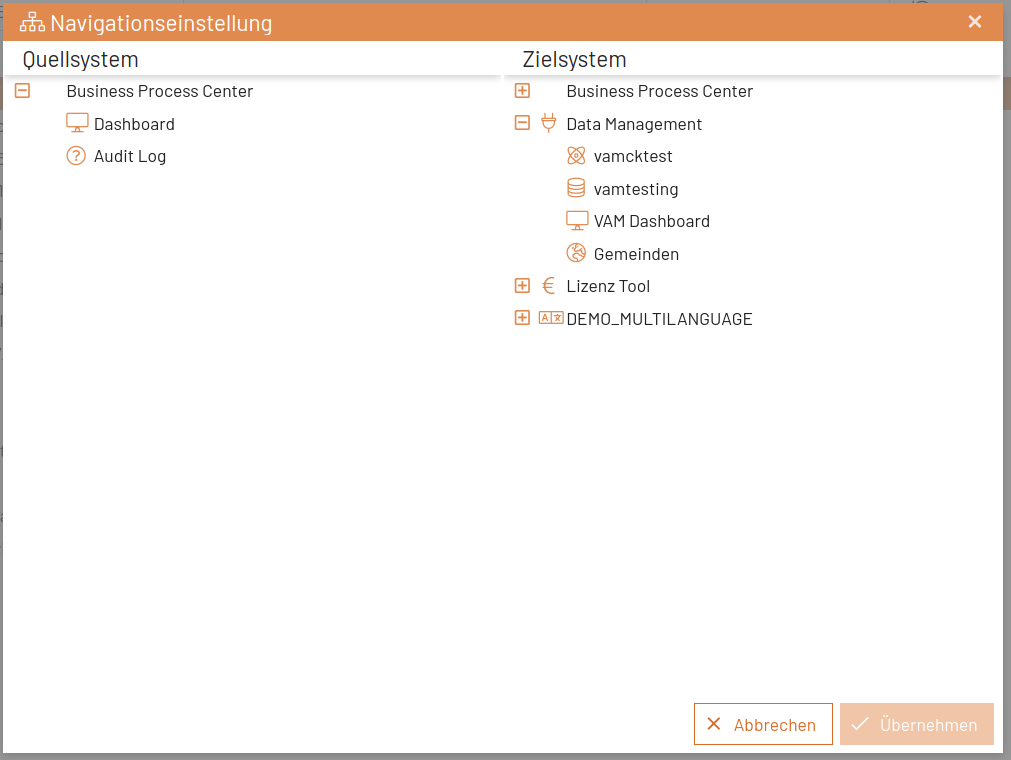
Comparing Navigation Settings
You can also compare navigation settings and deploy them individually.

Then perform the assignment via drag-and-drop.
Warning for Critical Settings
Some settings can cause unintended behavior on the deployment target. To make such critical settings easier to identify during deployment, they are marked with an exclamation point and a short tooltip. A few settings are already marked as critical via the “Core Services” setting “Core_Deployment” and can be further customized there for the respective system.
Deployment between BPC instances with different versions
It is not possible to perform a Deployment from a BPC with a higher model_version to a BPC with a lower model_version.
However, it is possible to perform a deployment from a BPC with a lower model_version to a BPC with a higher model_version.
If necessary, configuration adjustments are made automatically during this process.
