Setting Up Microsoft Azure AD as an IdP in Keycloak
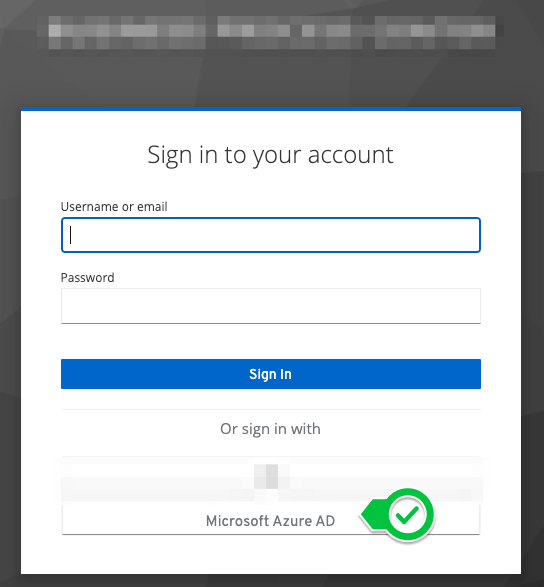
This page describes how to configure Microsoft Azure AD as an additional identity provider (IdP). This option will then appear as an additional button on the login page.
Setting Up an Application in Microsoft Azure AD
In order for Keycloak to authenticate, it must be registered as an application in Azure Active Directory (AD).
Add a New Application
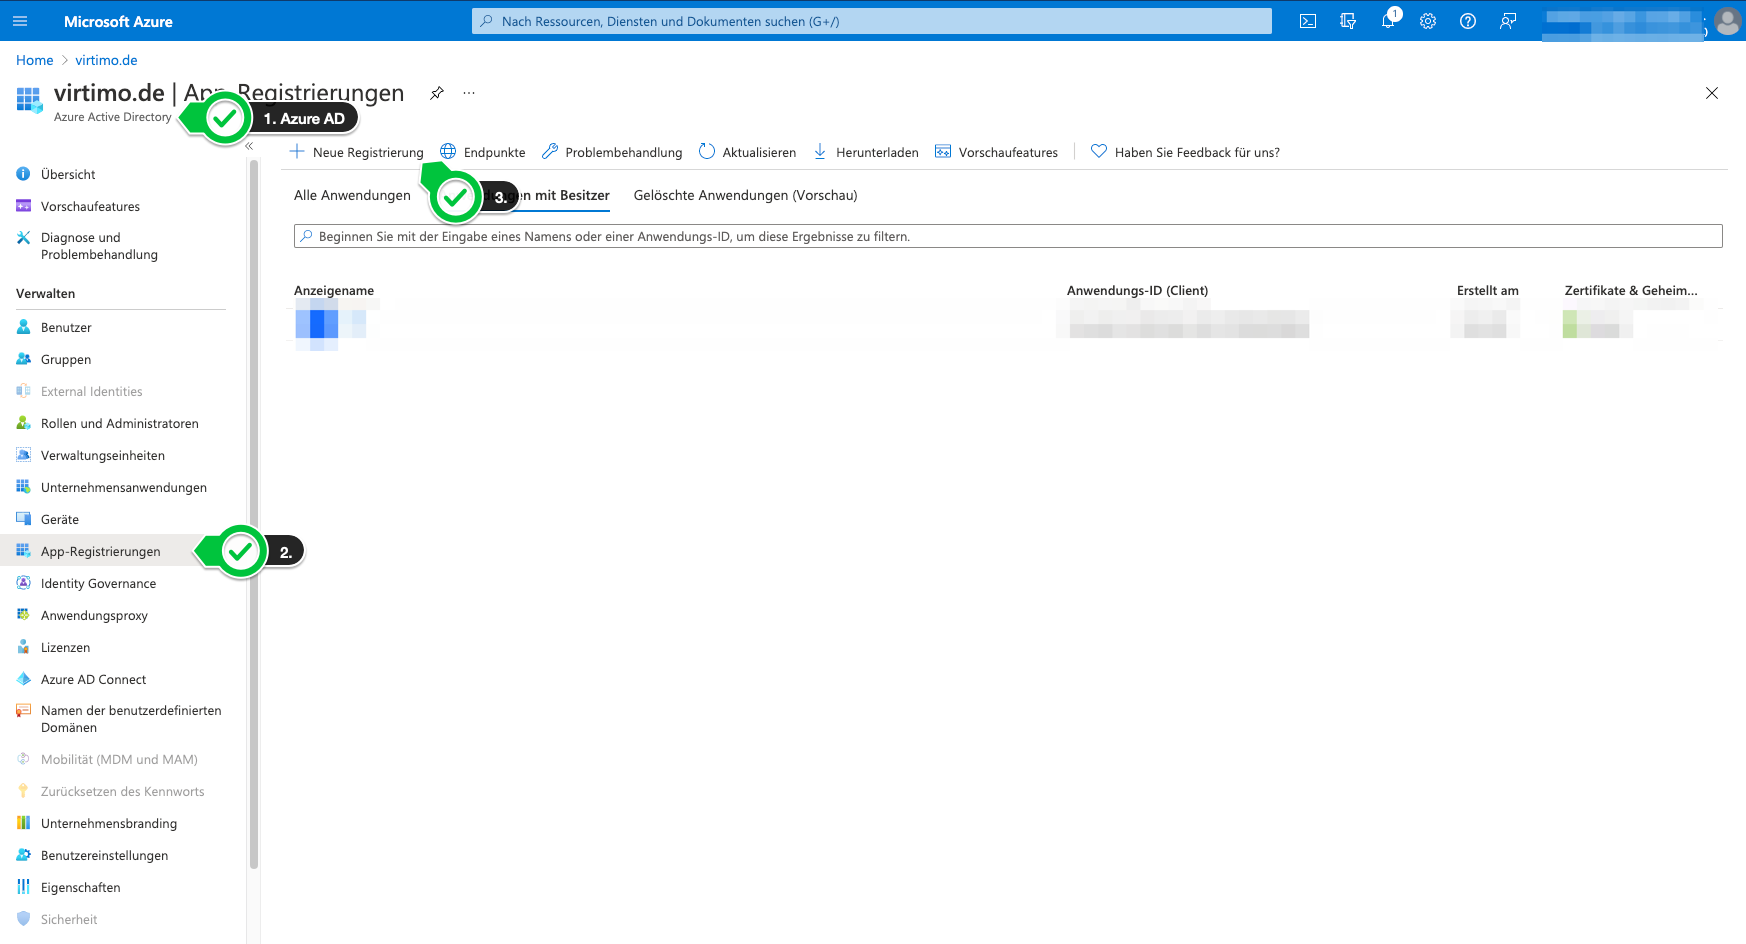
First, a new “app” must be registered in Azure AD.
-
To do this, navigate to the “App Registrations” menu item
Do not confuse this with the “Enterprise Applications” section. However, it can also be found there later.
-
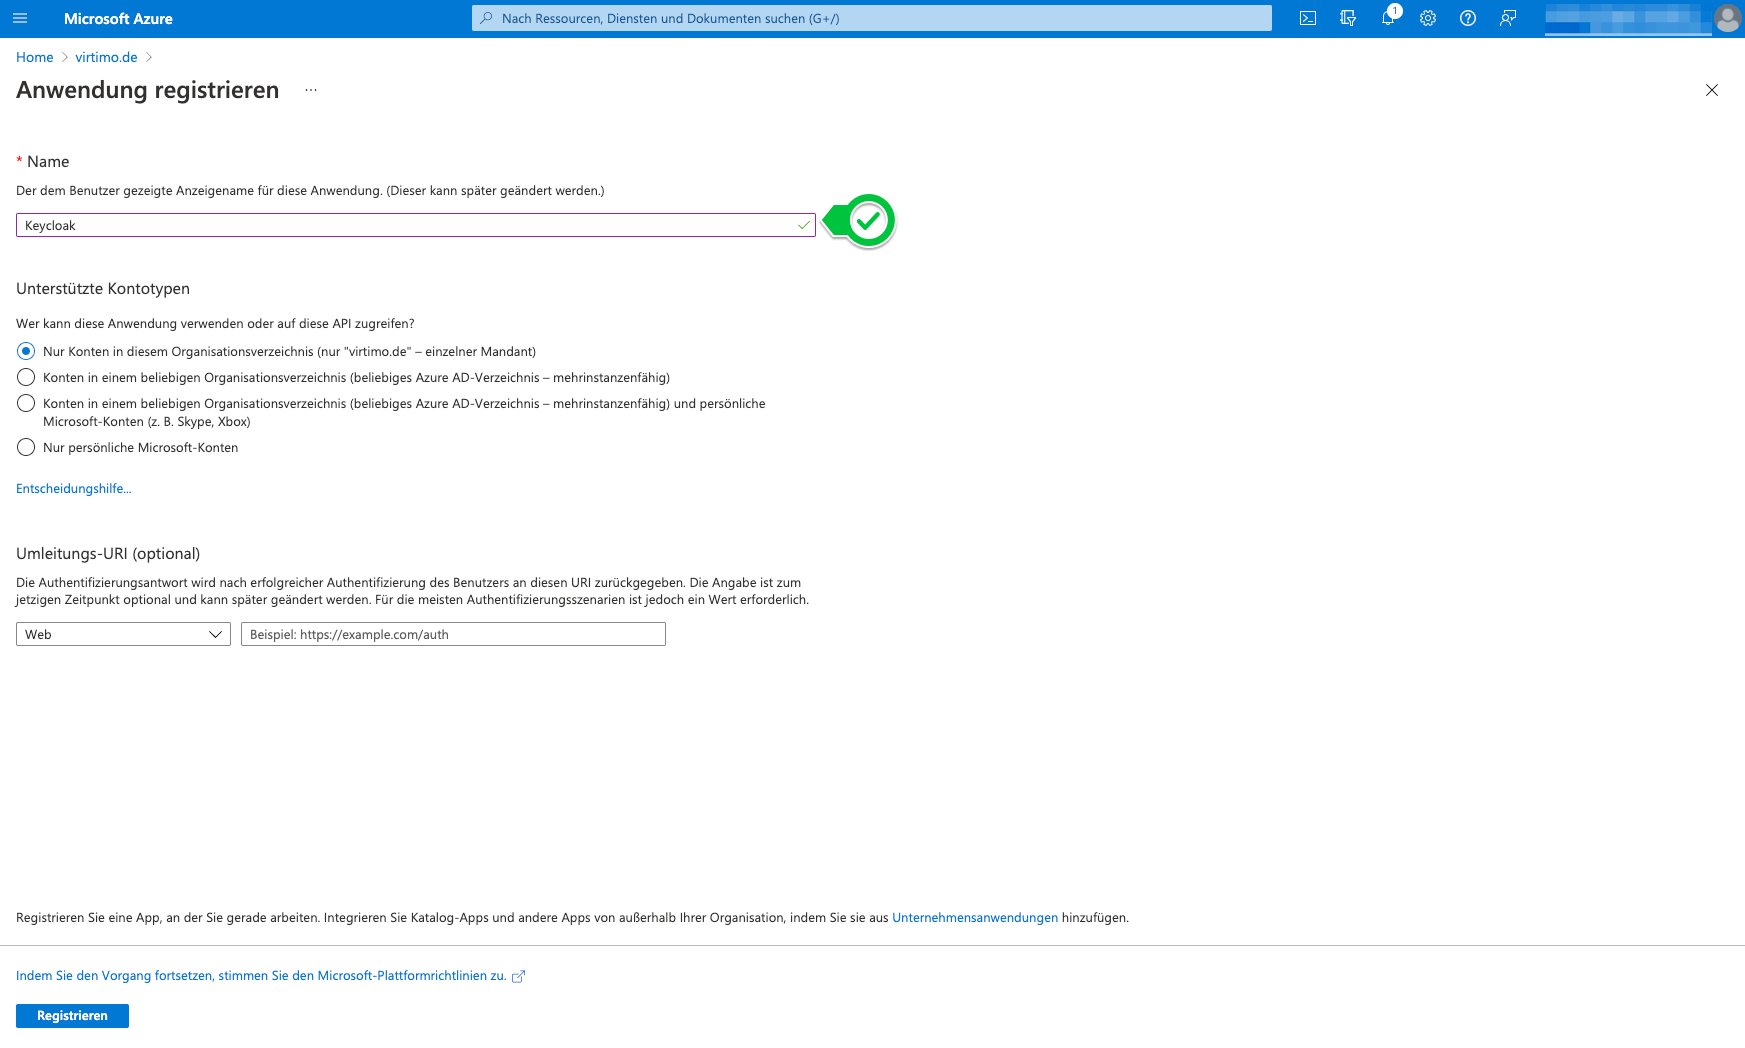
Next, assign a descriptive name.
-
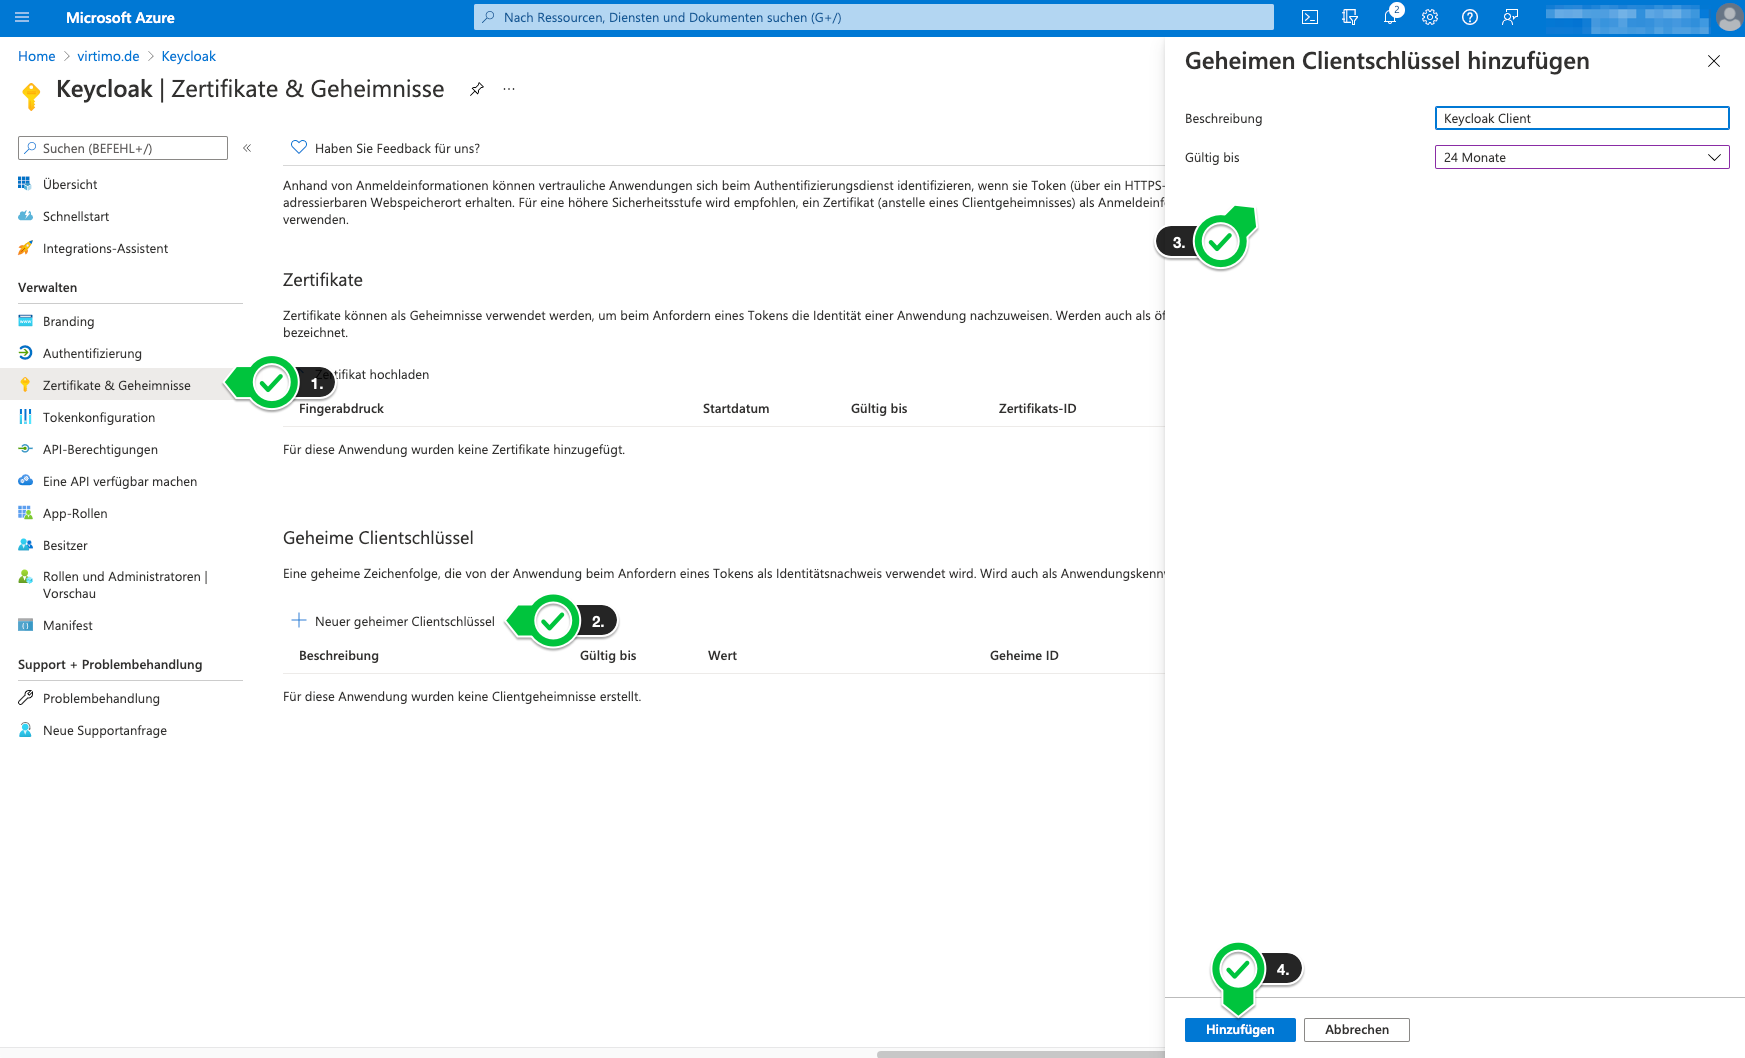
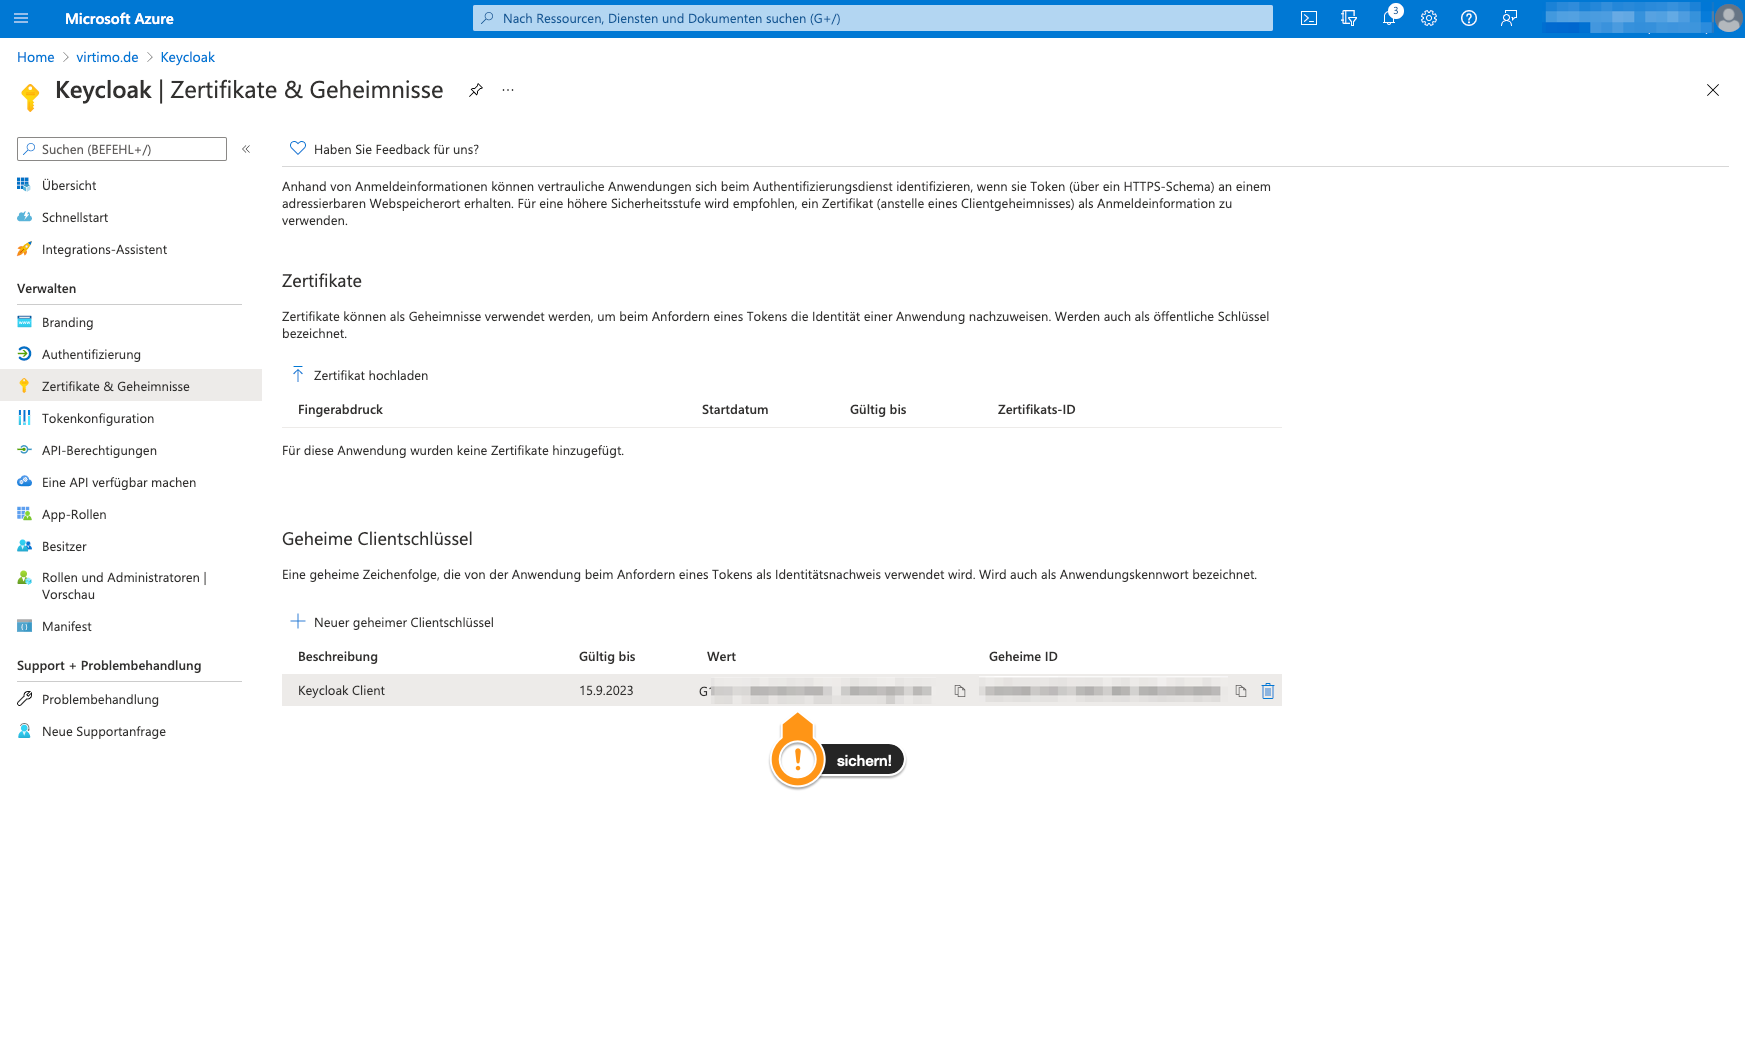
Next, a secret key must be generated for the client (Keycloak).
-
The key is displayed immediately after generation and should be saved right away. It will not be possible to view the key later. If the key is lost, a new one must be generated.
-
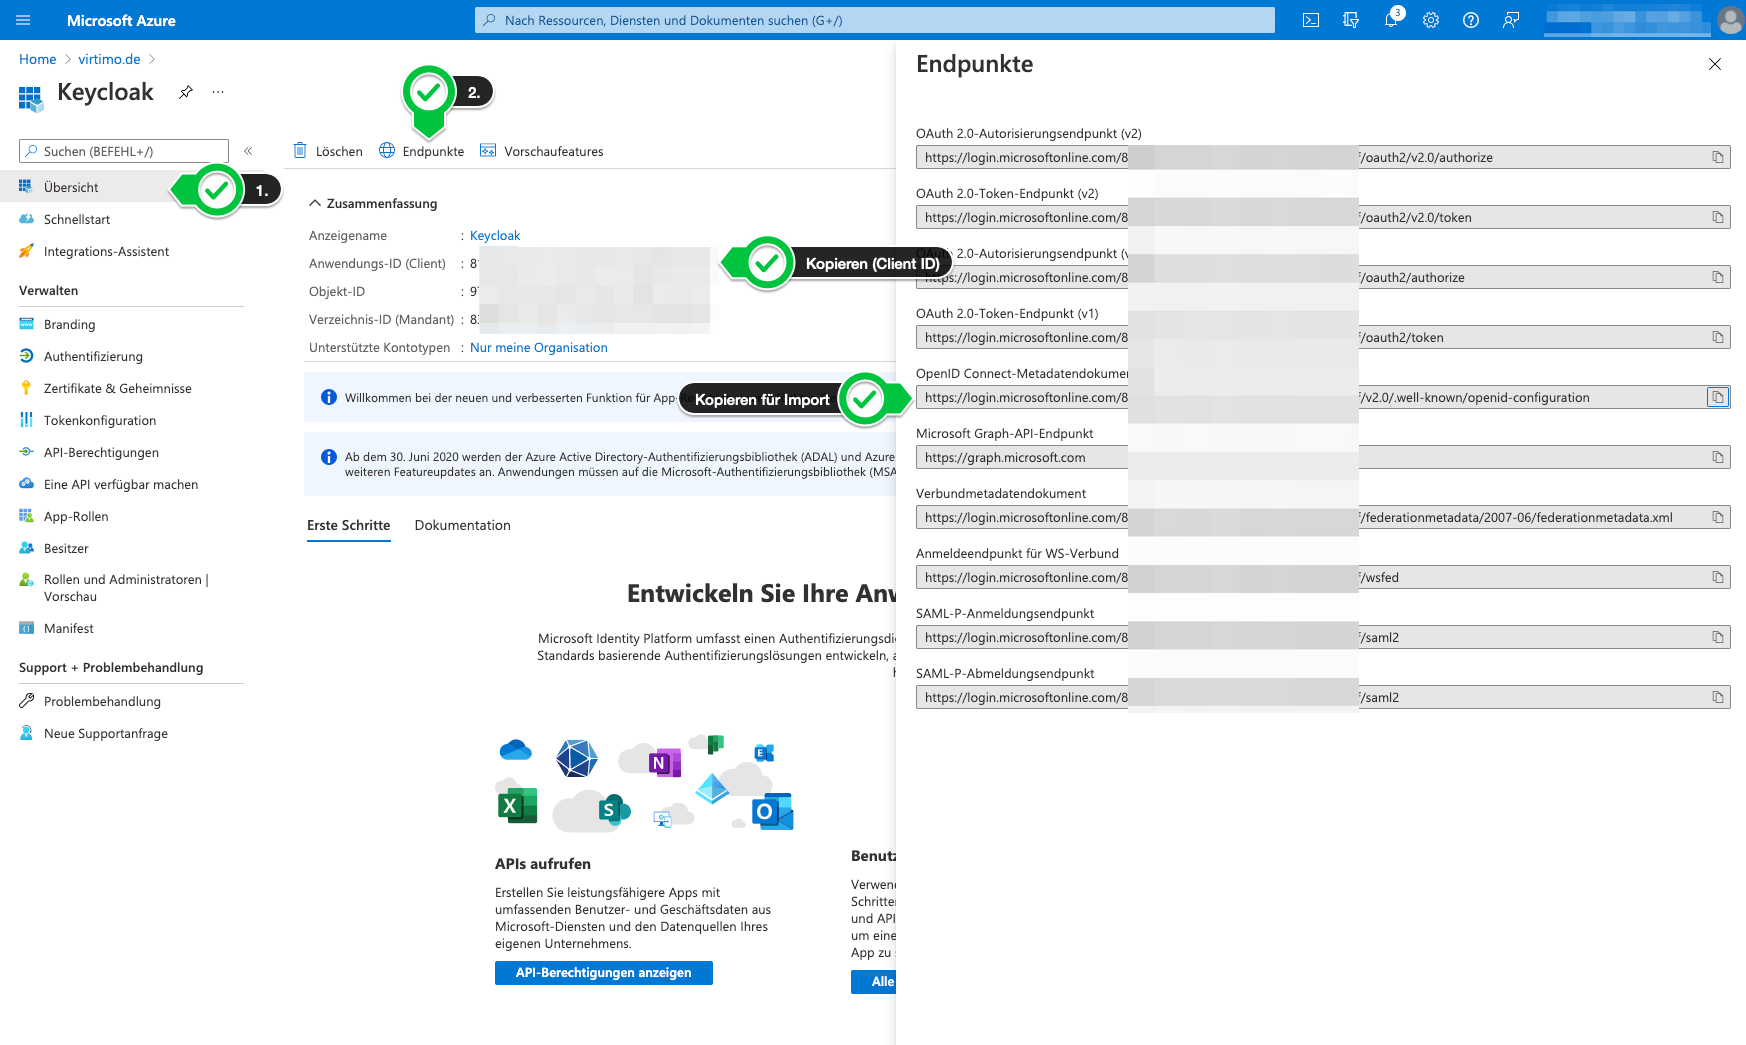
Afterward, in addition to the secret key, you must also determine the client ID and the URL for the OpenID Connect configuration.
Configure the IdP in Keycloak
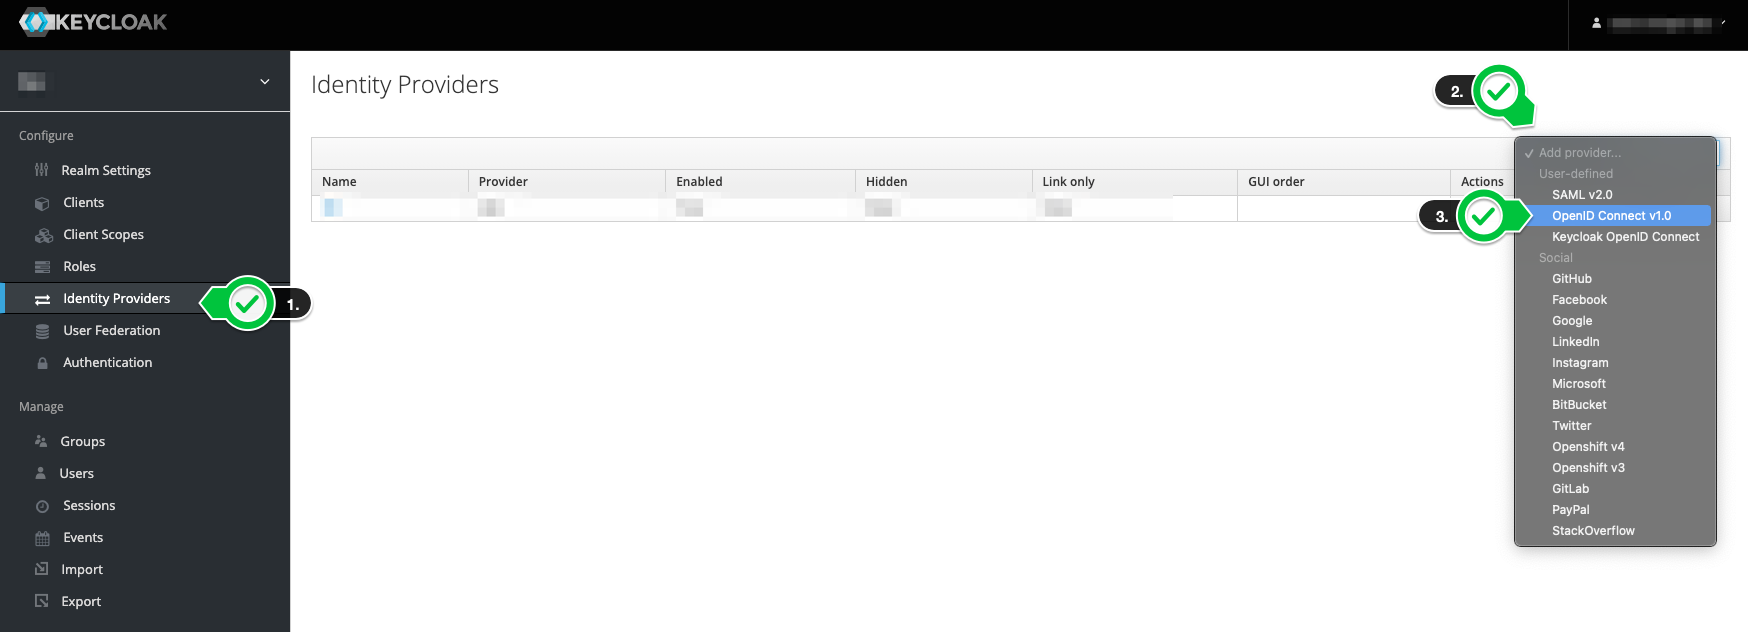
Now you can create a new Identity Provider in Keycloak.
|
Do not select “Microsoft” under “Social” here. For this option, the client must be configured differently in Azure AD, as this would allow login with any Microsoft account (even outside your own organization). |
-
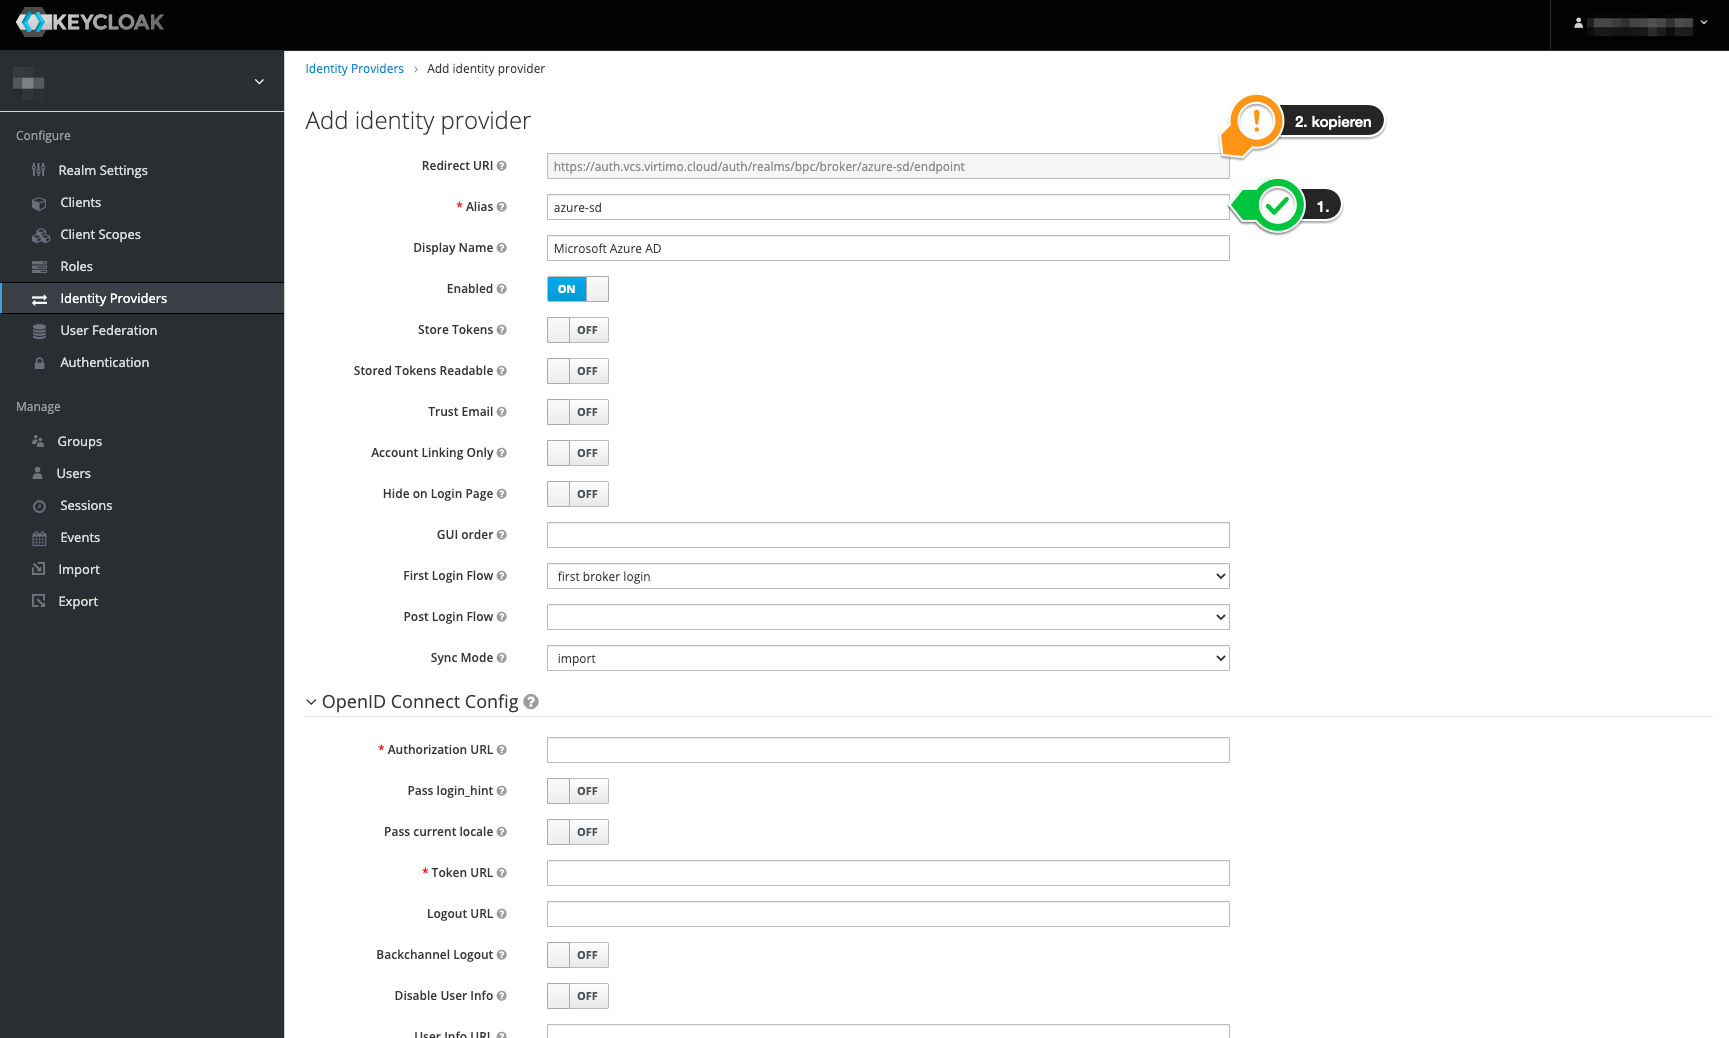
The first step is to assign an alias. This affects the redirect URI, which we’ll need later. The display name ultimately determines the label shown in the application’s login screen.
-
Next, use the OpenID Connect URL from Azure AD to configure the endpoints. To do this, enter it accordingly and load it using the "Import" button.
Afterward, all relevant URLs will be filled in automatically.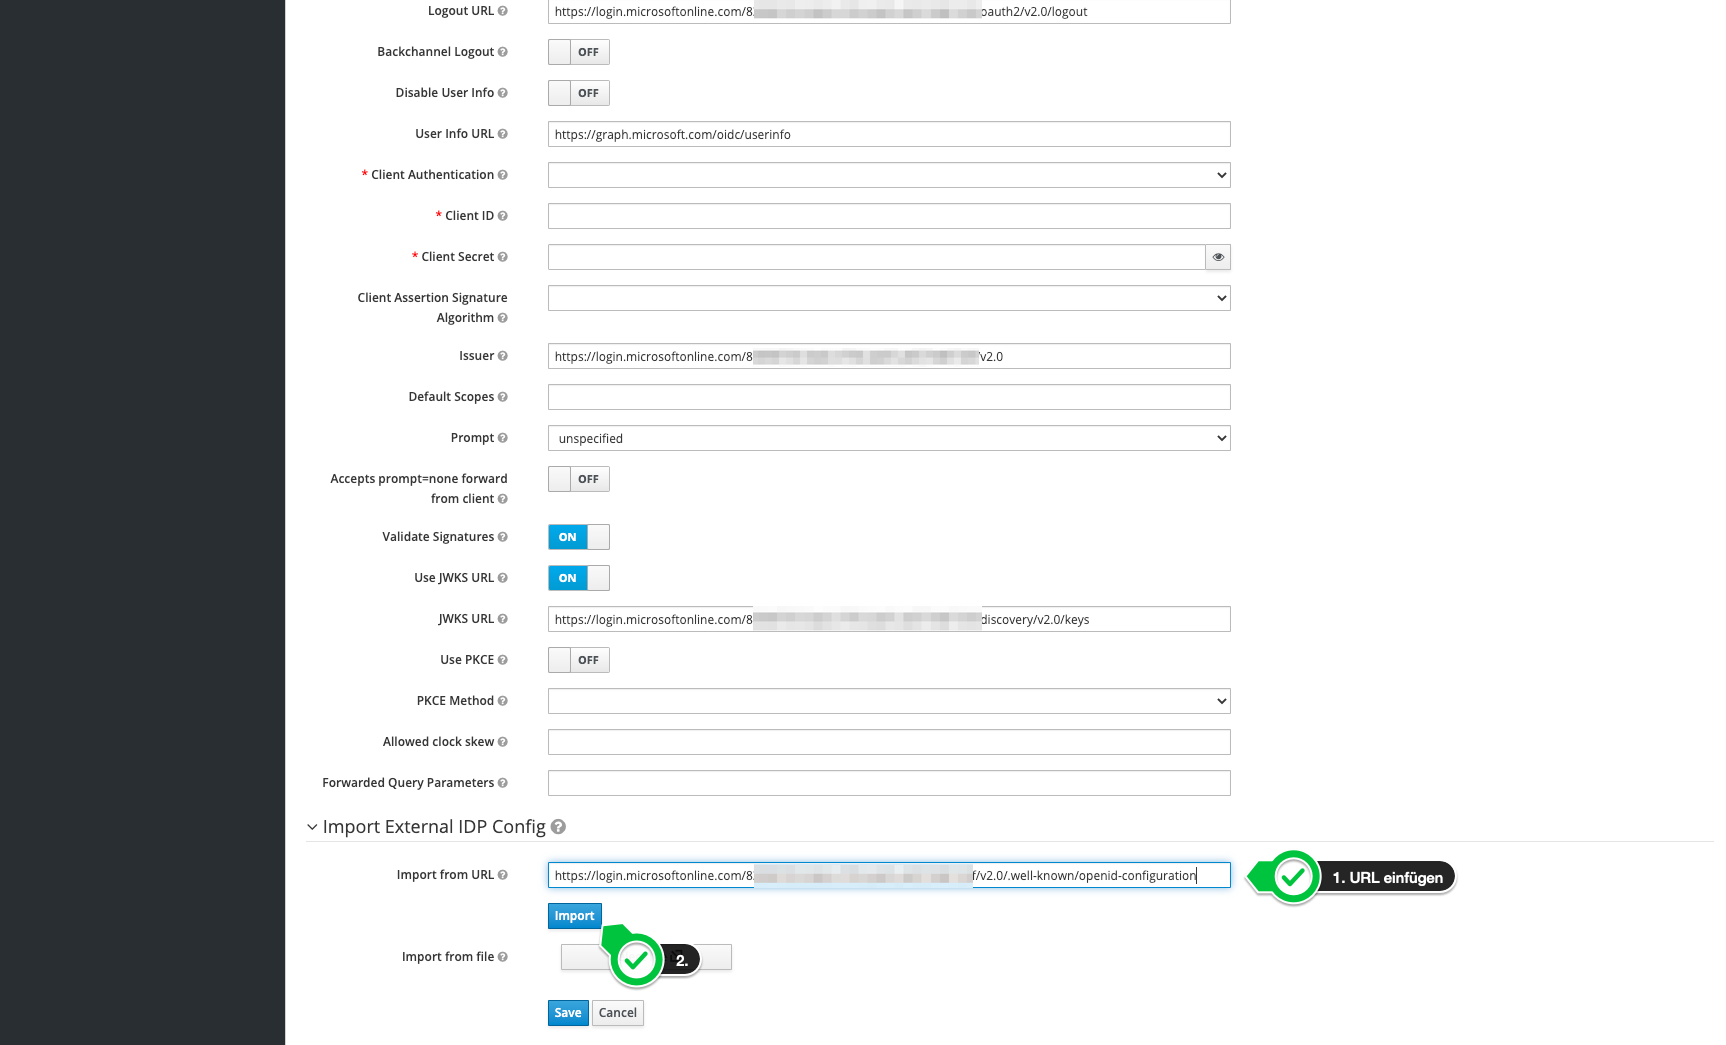
-
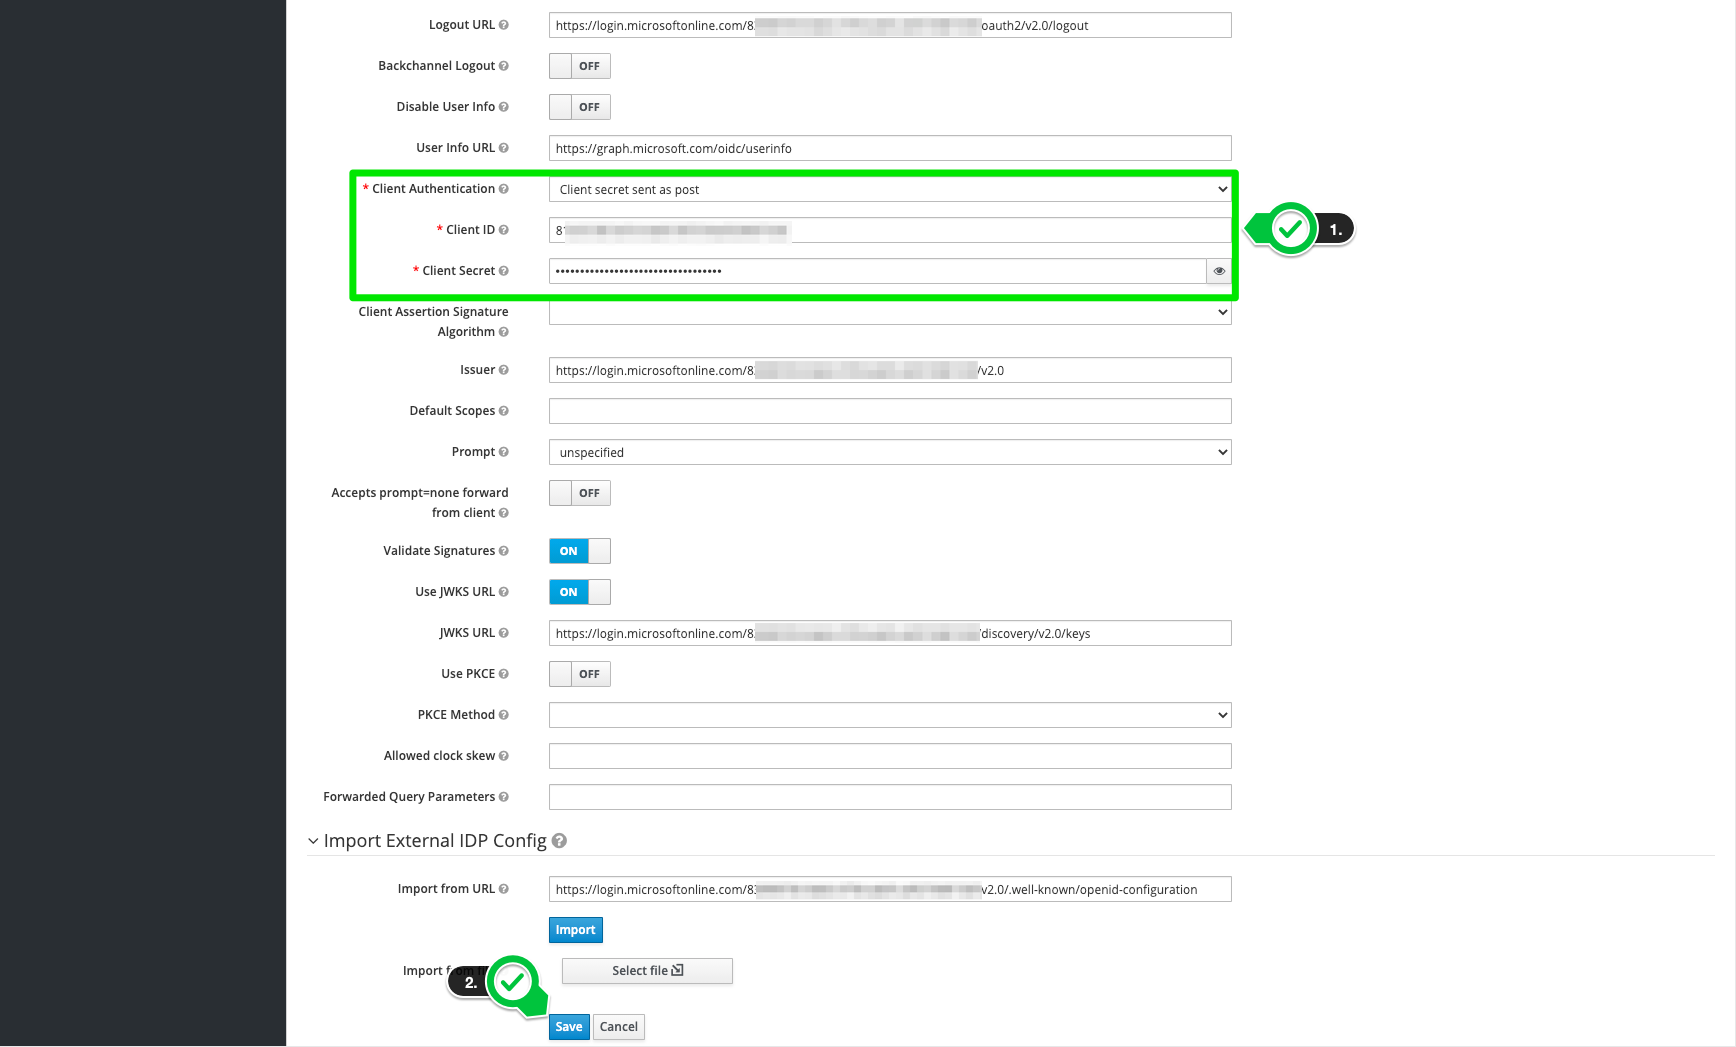
Finally, enter the client ID and secret key_._
-
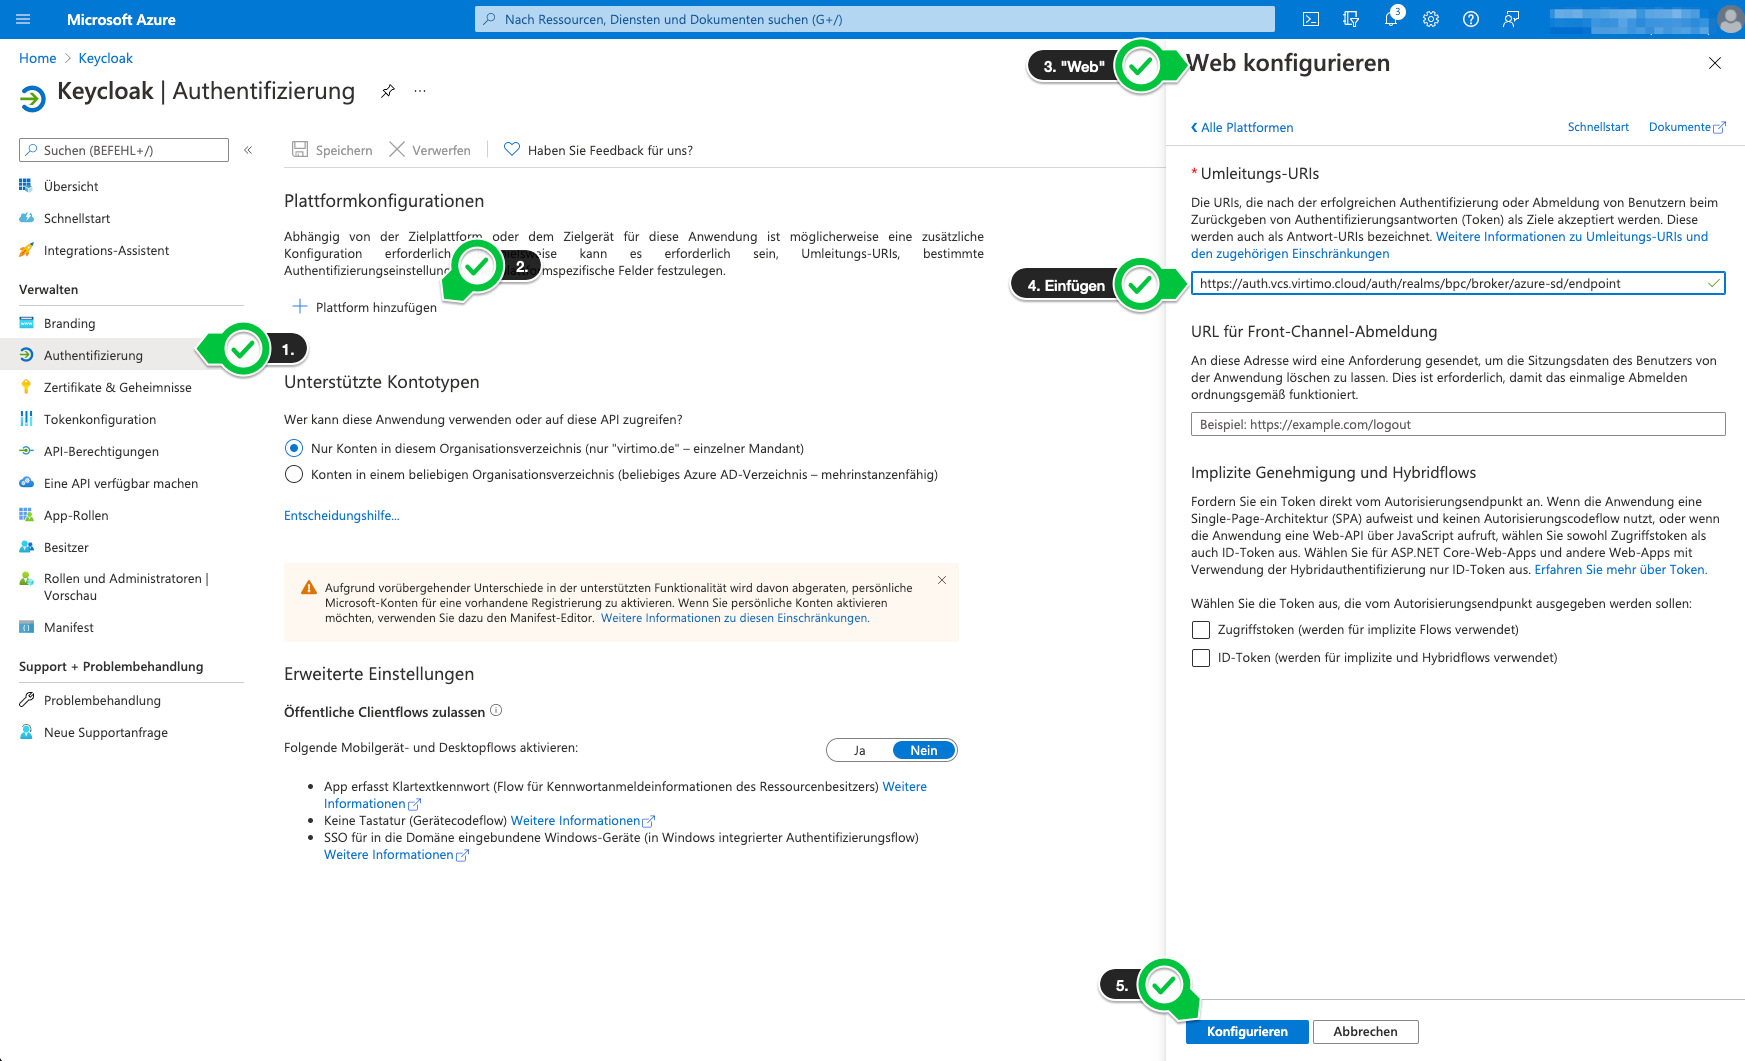
The redirect URI from the previous step must now be configured in Azure AD.
Troubleshooting
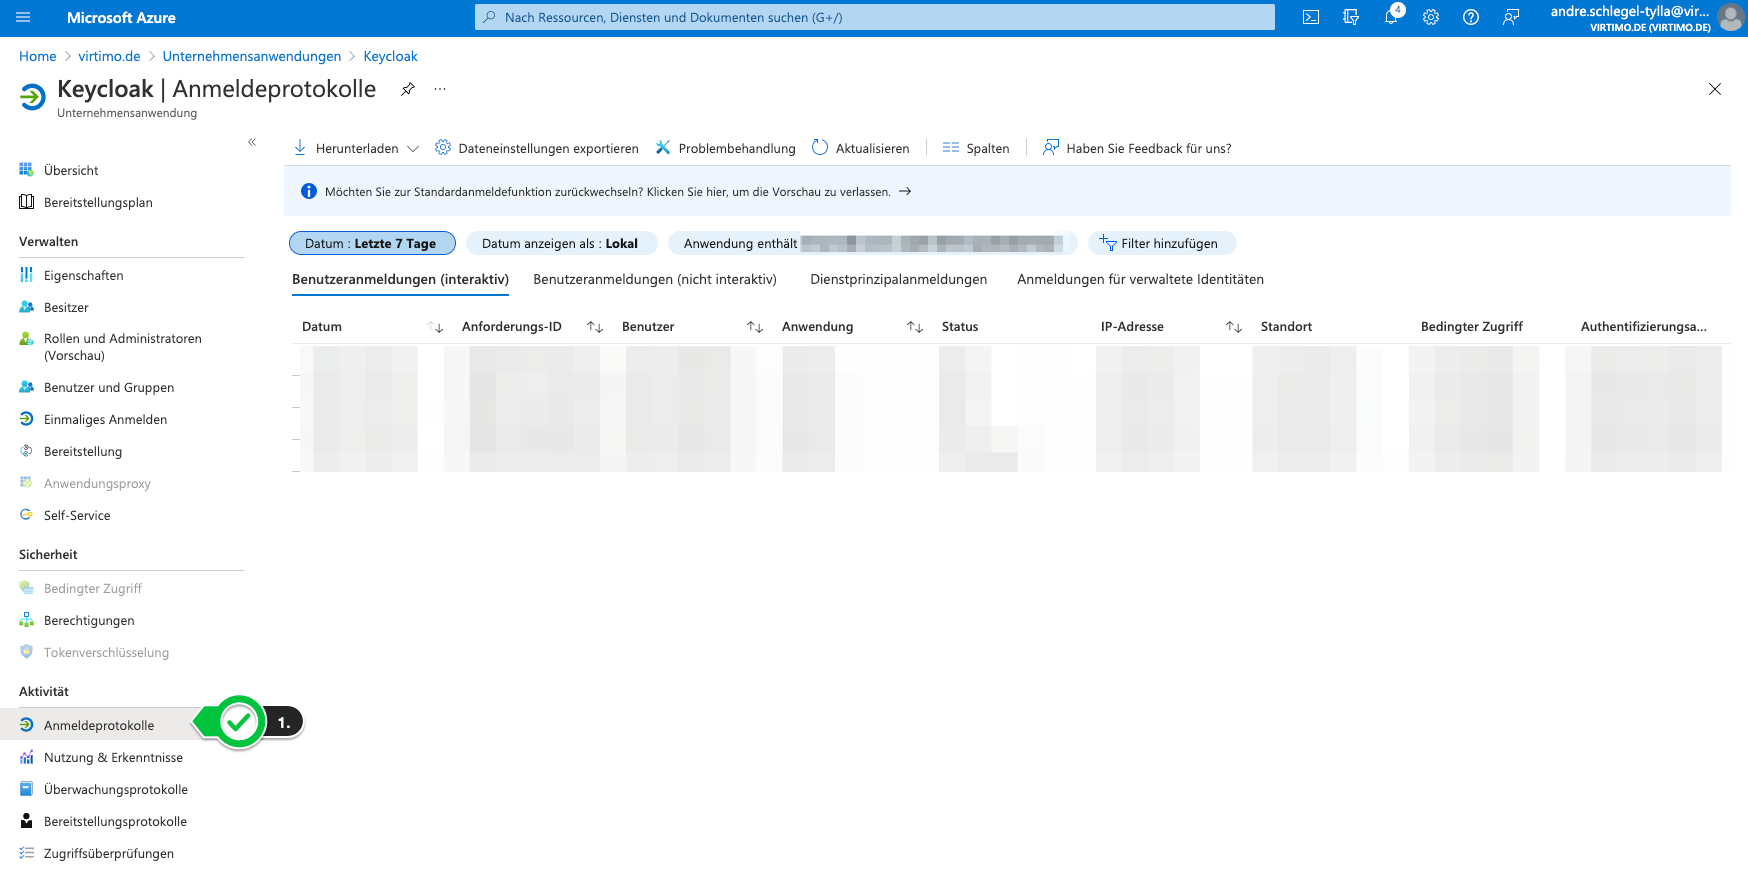
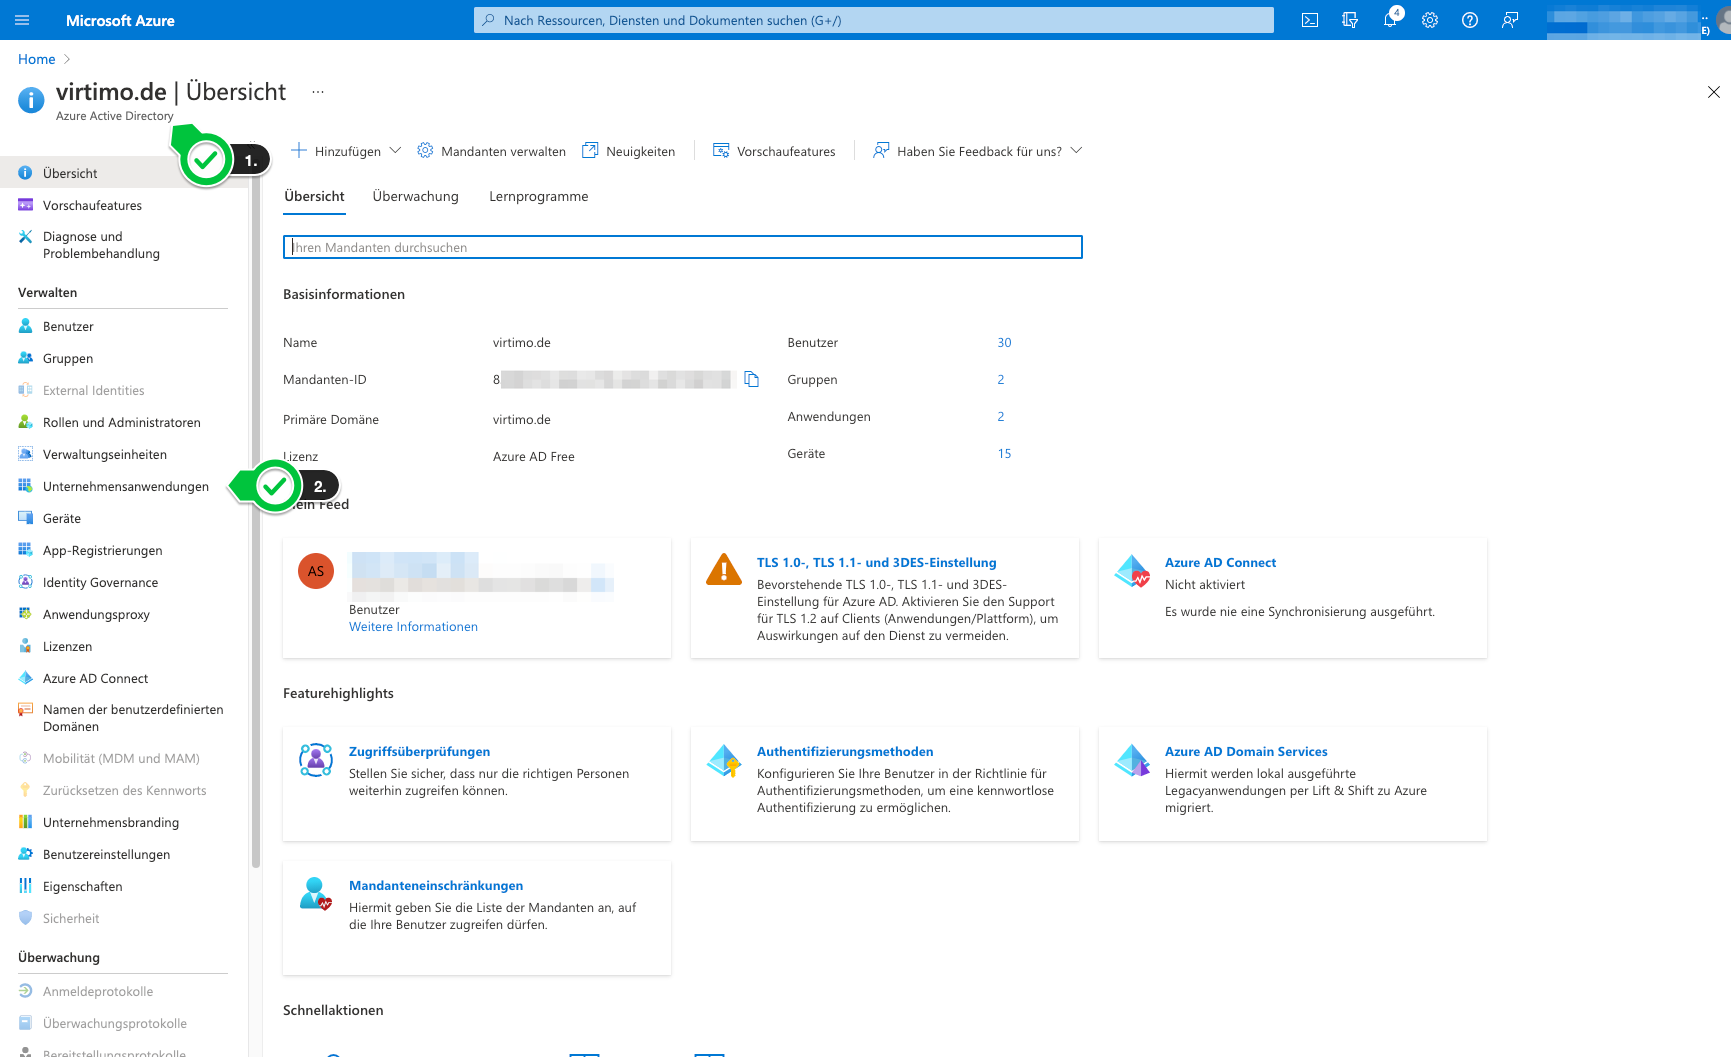
In this setup, it’s not so easy to find errors. The logs in Keycloak can be a useful resource. If in doubt, however, the key is to determine what is wrong on the Azure AD side. To view failed sign-ins, navigate through the interface as follows.
-
Open enterprise applications in Azure AD.
-
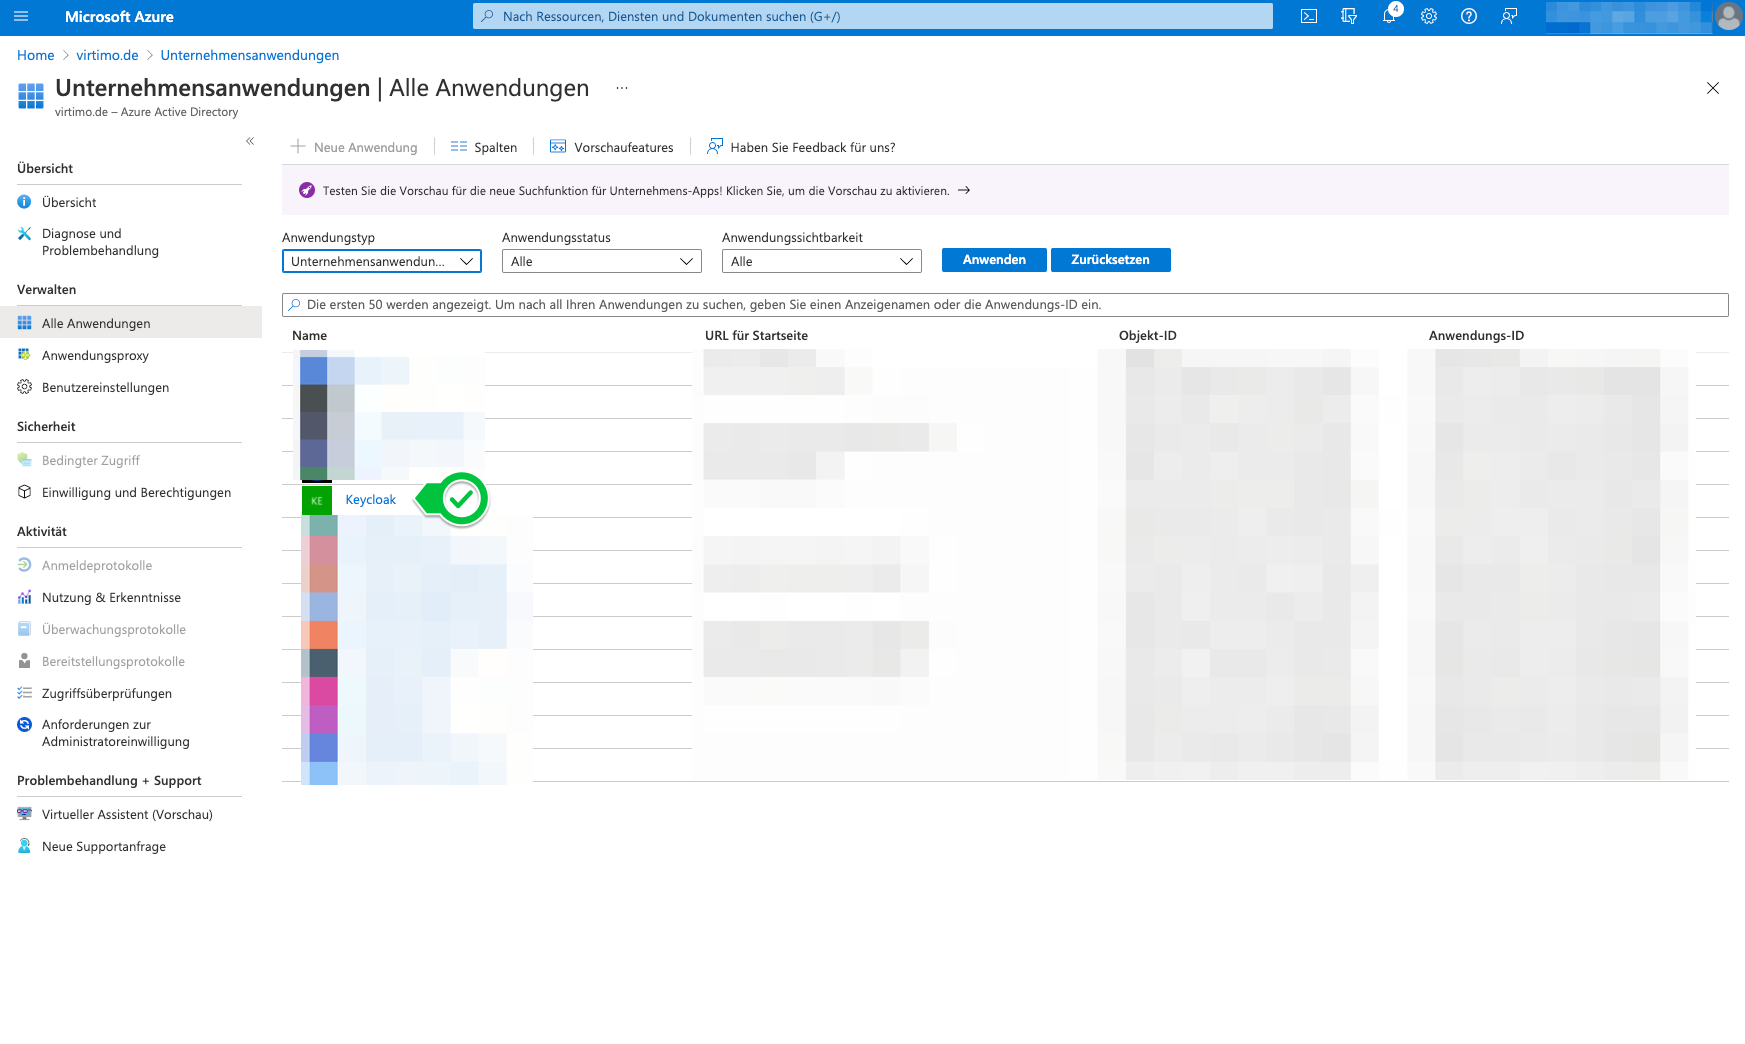
Select your own application/APP.
-
Open sign-in logs.