Languages
This feature allows you to translate text elements of the user interface yourself or, if necessary, to adapt existing translations. So-called language keys are available for this purpose, each consisting of a translation key and a translation.
Translation keys are, for example, associated with buttons and other text-based elements.
These are texts that reference a specific entry in the currently loaded language file.
Depending on which language has been selected in the BPC (see Select Language), different language files are loaded.
For each translation key, there can be exactly one translation per language.
The settings made here apply throughout the entire BPC for all users.
User Interface
-
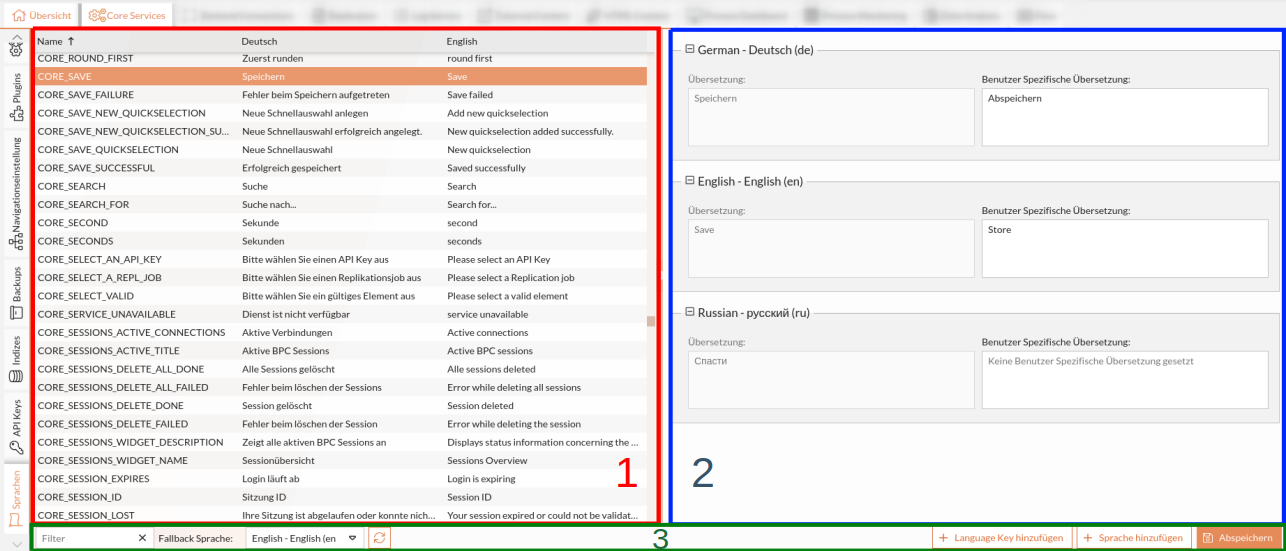
Section 1: List of all translation keys and translations
-
Section 2: Language Editor
-
Section 3: Toolbar
Add a New Translation
By default, all language keys in the BPC already have a German and an English translation stored.
Any number of additional languages can be added.
For each newly created language, two fields are generated in the Language Editor:
| Translation |
Contains the value of the stored default translation and cannot be edited. |
| User-specific translation |
Input field for the desired translation. |
-
Select a translation key from the list.
-
Click the "Add Language" button.
A window opens. -
Select a language code.
-
Click “Add.”
The new language appears in the editor.
The languages are automatically sorted in alphabetical order by language code. -
Enter the desired text in the "Translation" field for the newly created language.
-
Save.
-
Reload the page to see the changes.
Custom Translation
Language keys that have already been “translated”—such as German or English text elements—can be customized for users by manually overwriting the translation keys.
This can be done in the settings at Core_CustomTranslations; see Core Services Settings.
For example, Buttons labeled "Save" can be given a new label, "Save":
{
    "de": {
        "CORE_SAVE": "Abspeichern"
    },
    "en": {
        "CORE_SAVE": "Store"
    }
}
Remove a translation
A translation can only be removed in the Core Service Settings (see Core Services Settings) using the JSON editor.
Show/hide columns in the language key list
If languages other than German and English have been created, they can also be displayed in the list of translation keys.
-
Hover the mouse pointer over any column header.
An arrow for the drop-down menu will appear. -
Open the drop-down menu.
-
Select “Columns.”
-
Check or uncheck the desired columns.
-
Save.
Arranging Columns
By default, the columns are sorted alphabetically—except for the “Name” column, which appears first.
You can rearrange the columns individually using drag-and-drop.
|
The arrangement is only retained for the current session. |
Add Your Own Language Key
|
This feature is only useful if you have at least one custom-developed module for your BPC.
In addition, the corresponding translation keys must be created in this module. |
-
Click “Add Language Key” in the toolbar.
A window will open. -
Enter the name of the language key.
Here, you must select the same name that is stored for the component.
-
Select the language for the translation.
-
Enter the translation.
-
Save.
Edit Language Key
-
Select the language key from the list.
All languages and translations contained in the language key are displayed. -
Edit the translation in the desired language editor.
-
Go to Core Service Settings.
-
In the "
Core_CustomTranslations" setting, edit the corresponding key in the JSON editor.
Remove a Language Key
User-created language keys must be manually deleted in the " Core_CustomTranslations " setting (see Core Service Settings) using the JSON editor.
Filter Language Keys and Translations
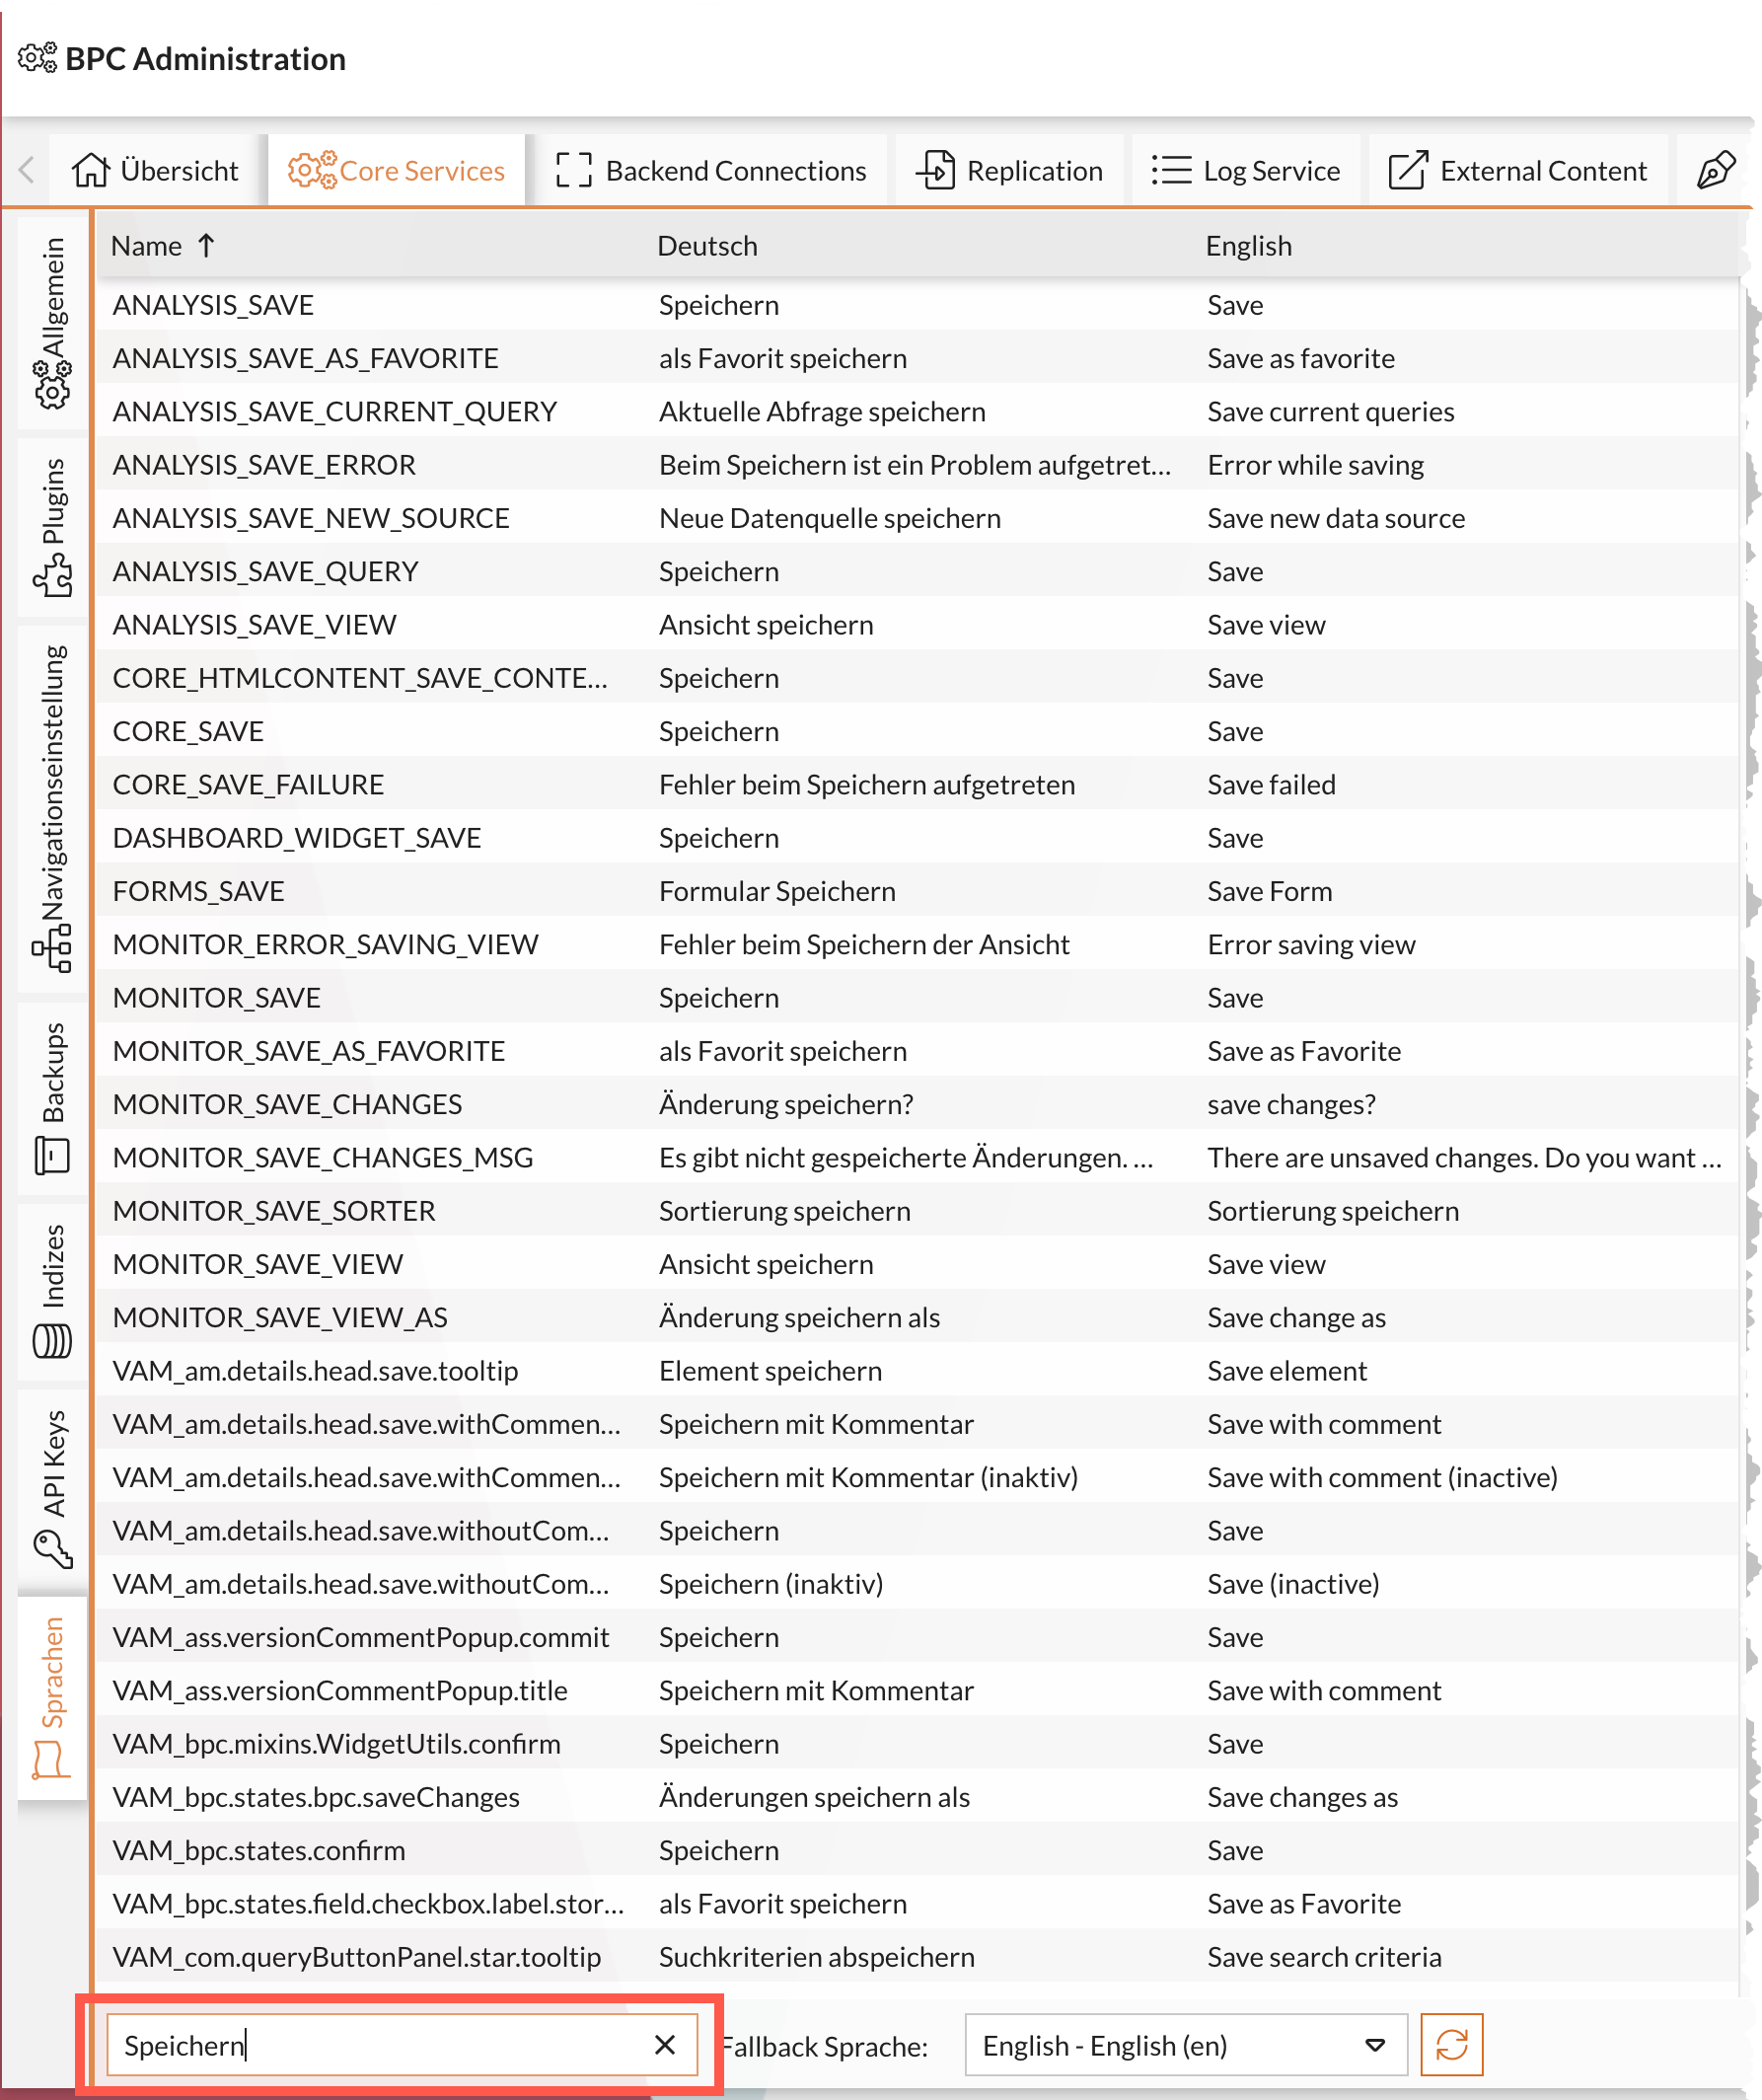
If you are looking for a specific language key, you can filter the list.
Example:
To filter for a “Save” button, enter “Save” in the filter field and then refine the search based on the module assignment in the name to find the desired key.
Clicking the “X” clears all text from the field.
Sorting Language Keys and Translations
-
Click on the column header/name (1x = ascending, 2x = descending, 3x = default)
Example: Click once on “Deutsch” → The list is sorted alphabetically in ascending order by the entries in the "German" -
Hover the mouse pointer over the column header > click the arrow for the drop-down menu > sort in ascending or descending order
Selecting a Fallback Language
Suppose the user selects a specific language and there are no translations or only incomplete translations of the language keys available for that language. In this case, a fallback language can be selected: a language that is automatically used if no translation is available for the language that was actually selected. This means that all texts with translations will be displayed in their translated form, and all texts without translations will be displayed in the fallback language.
Only one fallback language can be selected for all language keys.
English is usually the default.
|
You can also configure the fallback language in the Core Service parameter |
