Configuration area
The selected elements can be configured in the configuration area.
This applies to almost all elements of the Diagram, except for the Funnels, where no configuration options are available.
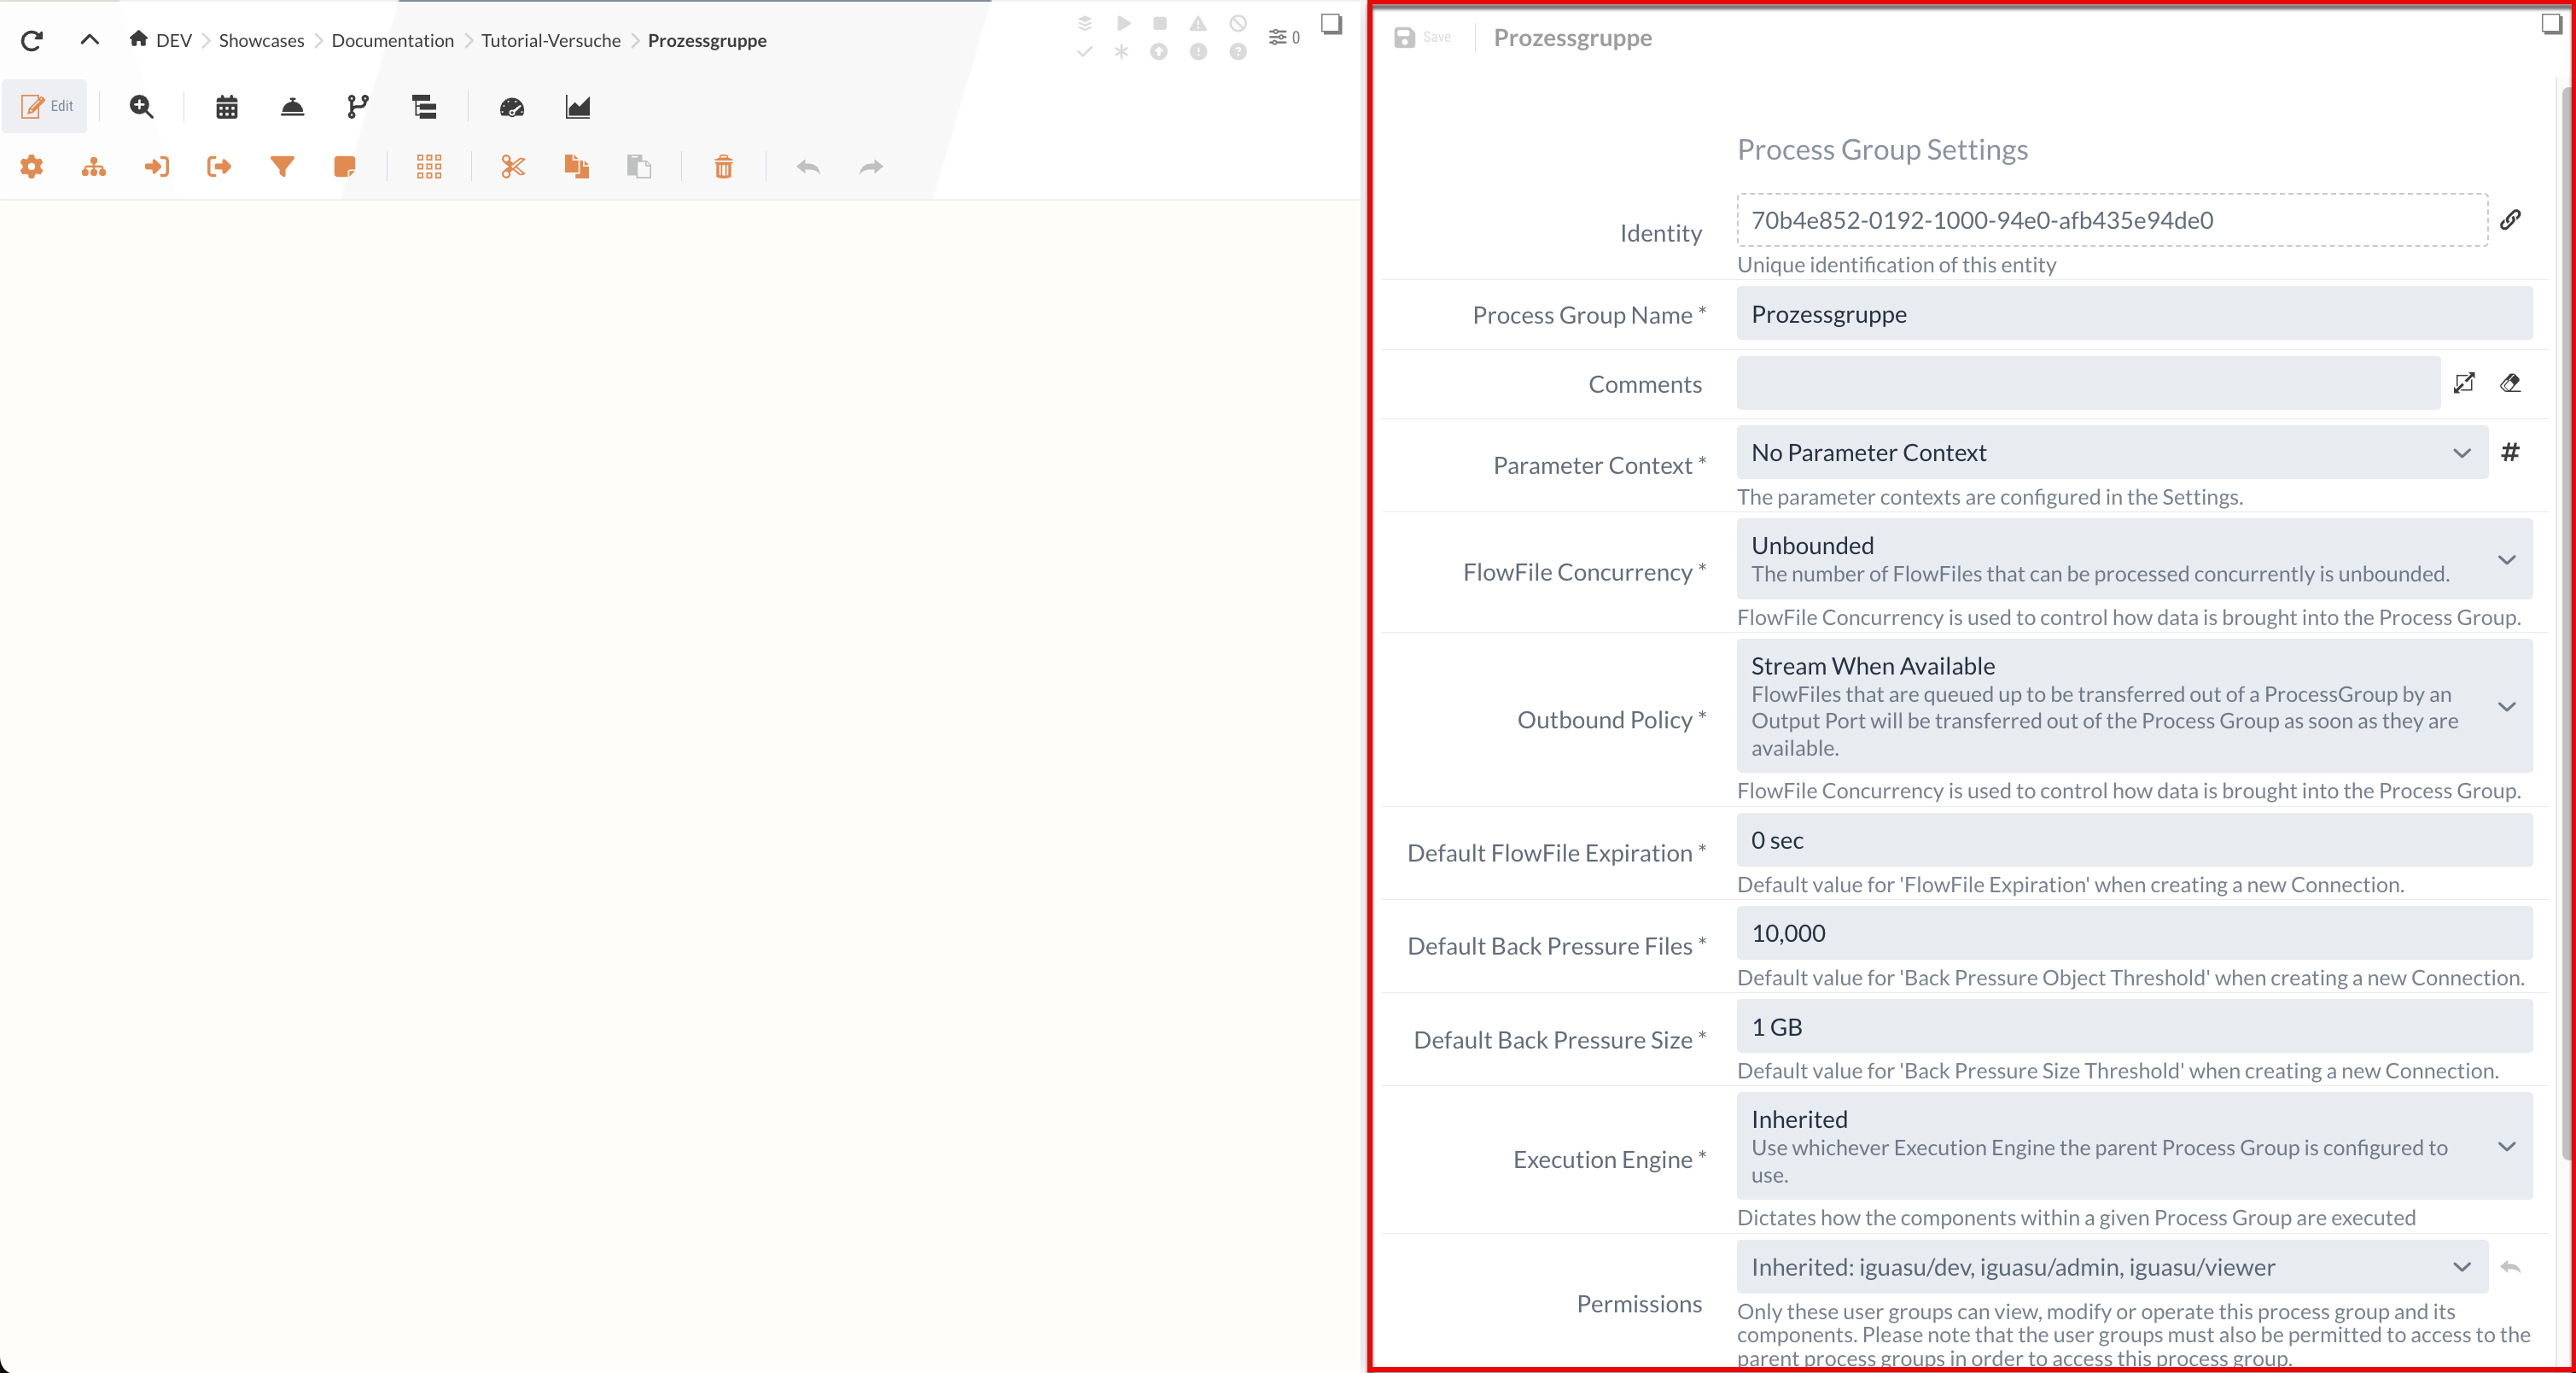
The configuration area can be displayed as Full screen or hidden (e.g. by double-clicking in the Diagram area).
General configuration
By default, the configuration area first displays setting options for the currently selected Process Group are displayed by default. If another element has been selected, the configuration for the current Process Group can be reopened by clicking on an empty area in the Diagram.
In addition to configuring the Process Group, it is also possible to delete all FlowFiles waiting in queues in the selected Process Group and the Process Groups below it:

Existing Process Groups can also be downloaded as JSON files:

This JSON file can be selected when Process Groups are created in order to restore them to another location or another system.
Toolbar of the configuration area
When configuring Processors, there is a toolbar at the top of the configuration area.
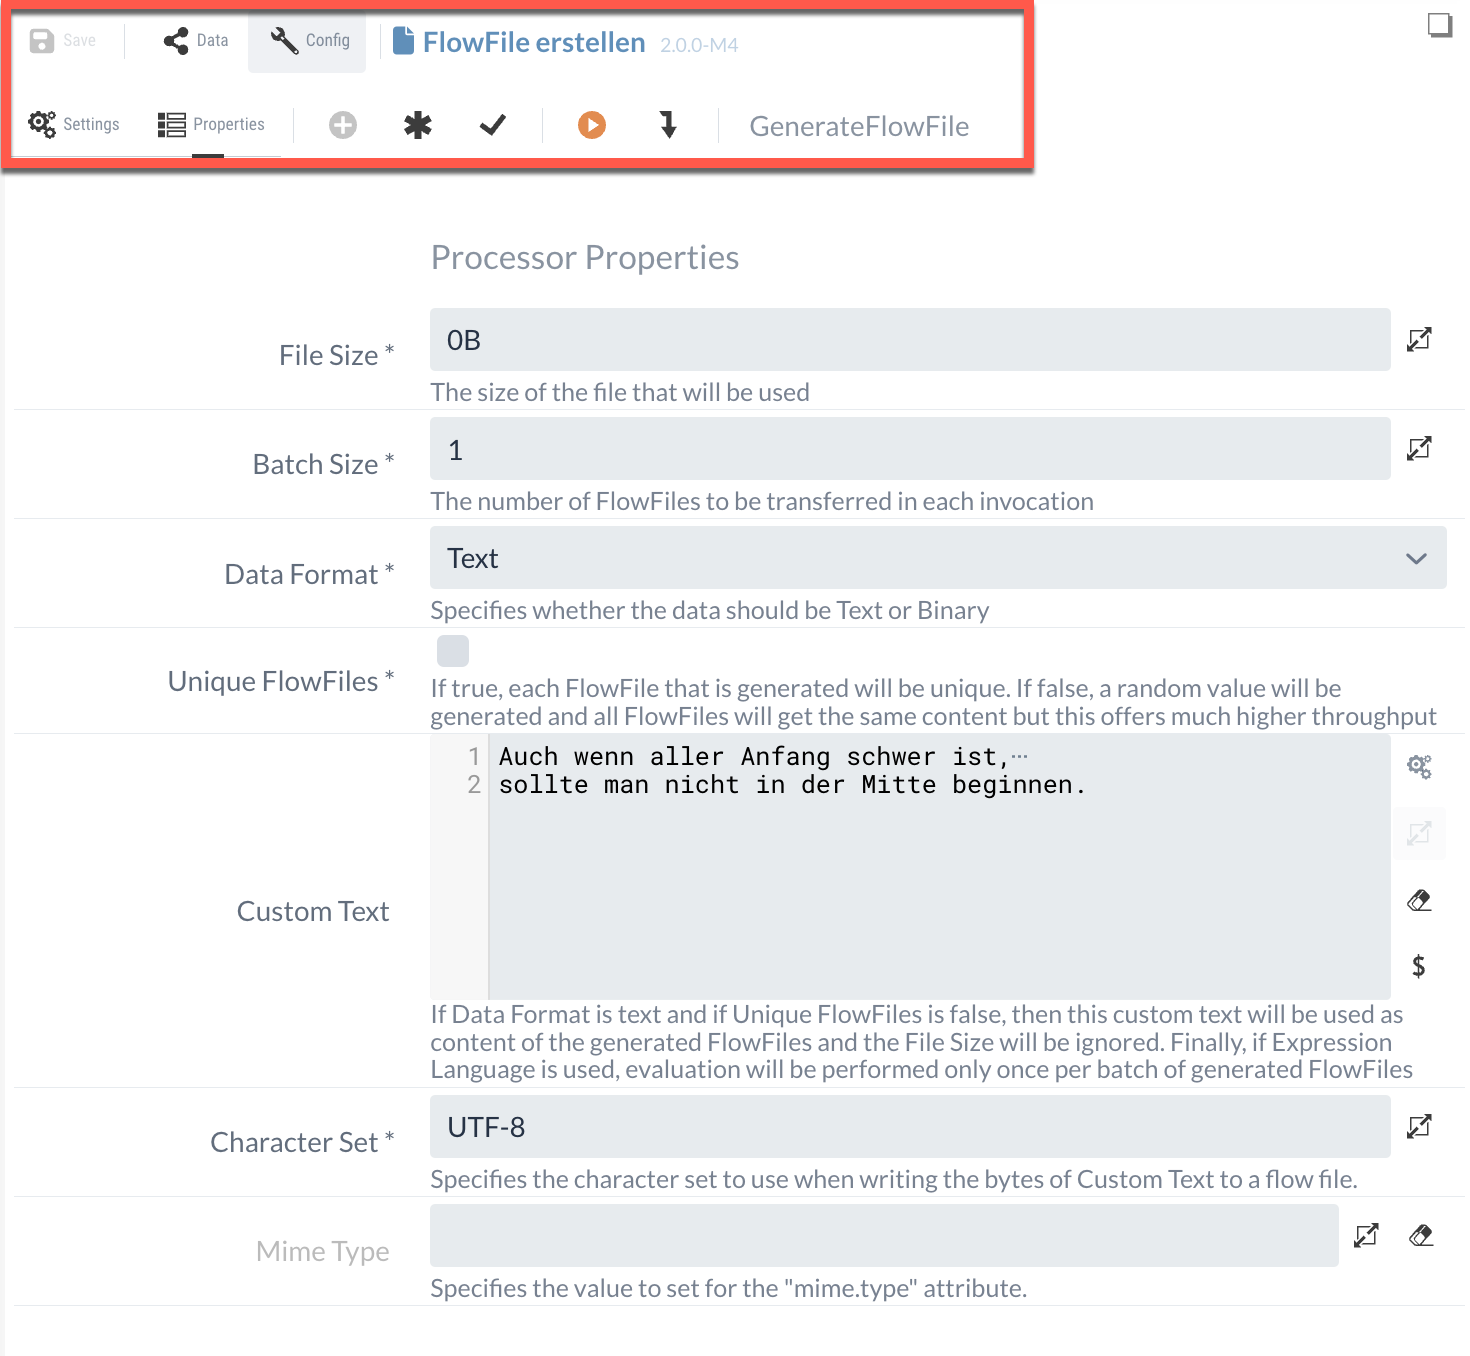
When selecting a Processor, Config Panel is displayed by default, with additional functions available in the toolbar.
The following table describes these functions in the toolbar:
|
Switches to the Data panel view. |
|
Switches to the Config Panel view. |
|
Switches to the view in which the Config and Data panels are displayed side by side at the same time. |
|
Opens the Processor properties view in the Config Panel, which allows individual adjustments to be made to the selected Processors. |
|
Opens the Editor in the Config Panel. |
|
Opens the view of Settings in the Config Panel, which can be used to make general adjustments to the selected Processors. |
|
Enables the creation of Dynamic Properties for the selected Processor. |
|
Allows you to show or hide configuration fields that are not mandatory and can be used for additional configuration of the Processors. |
|
Verifies the entries in the Config Panel. |
|
Enables the xref:developing.adoc#isolated-execution through an isolated execution. |
|
Shows and hides the windows of the results of an isolated execution. |
Config Panel
If the "Config" button is selected, various customization options for the Processors are available.
In addition to general setting options, individual adjustments can be made and created Processors can be tested.
Different views are also available for these customization options, which are divided into Processor properties, Editor and Settings and are described in more detail below.
Processor properties
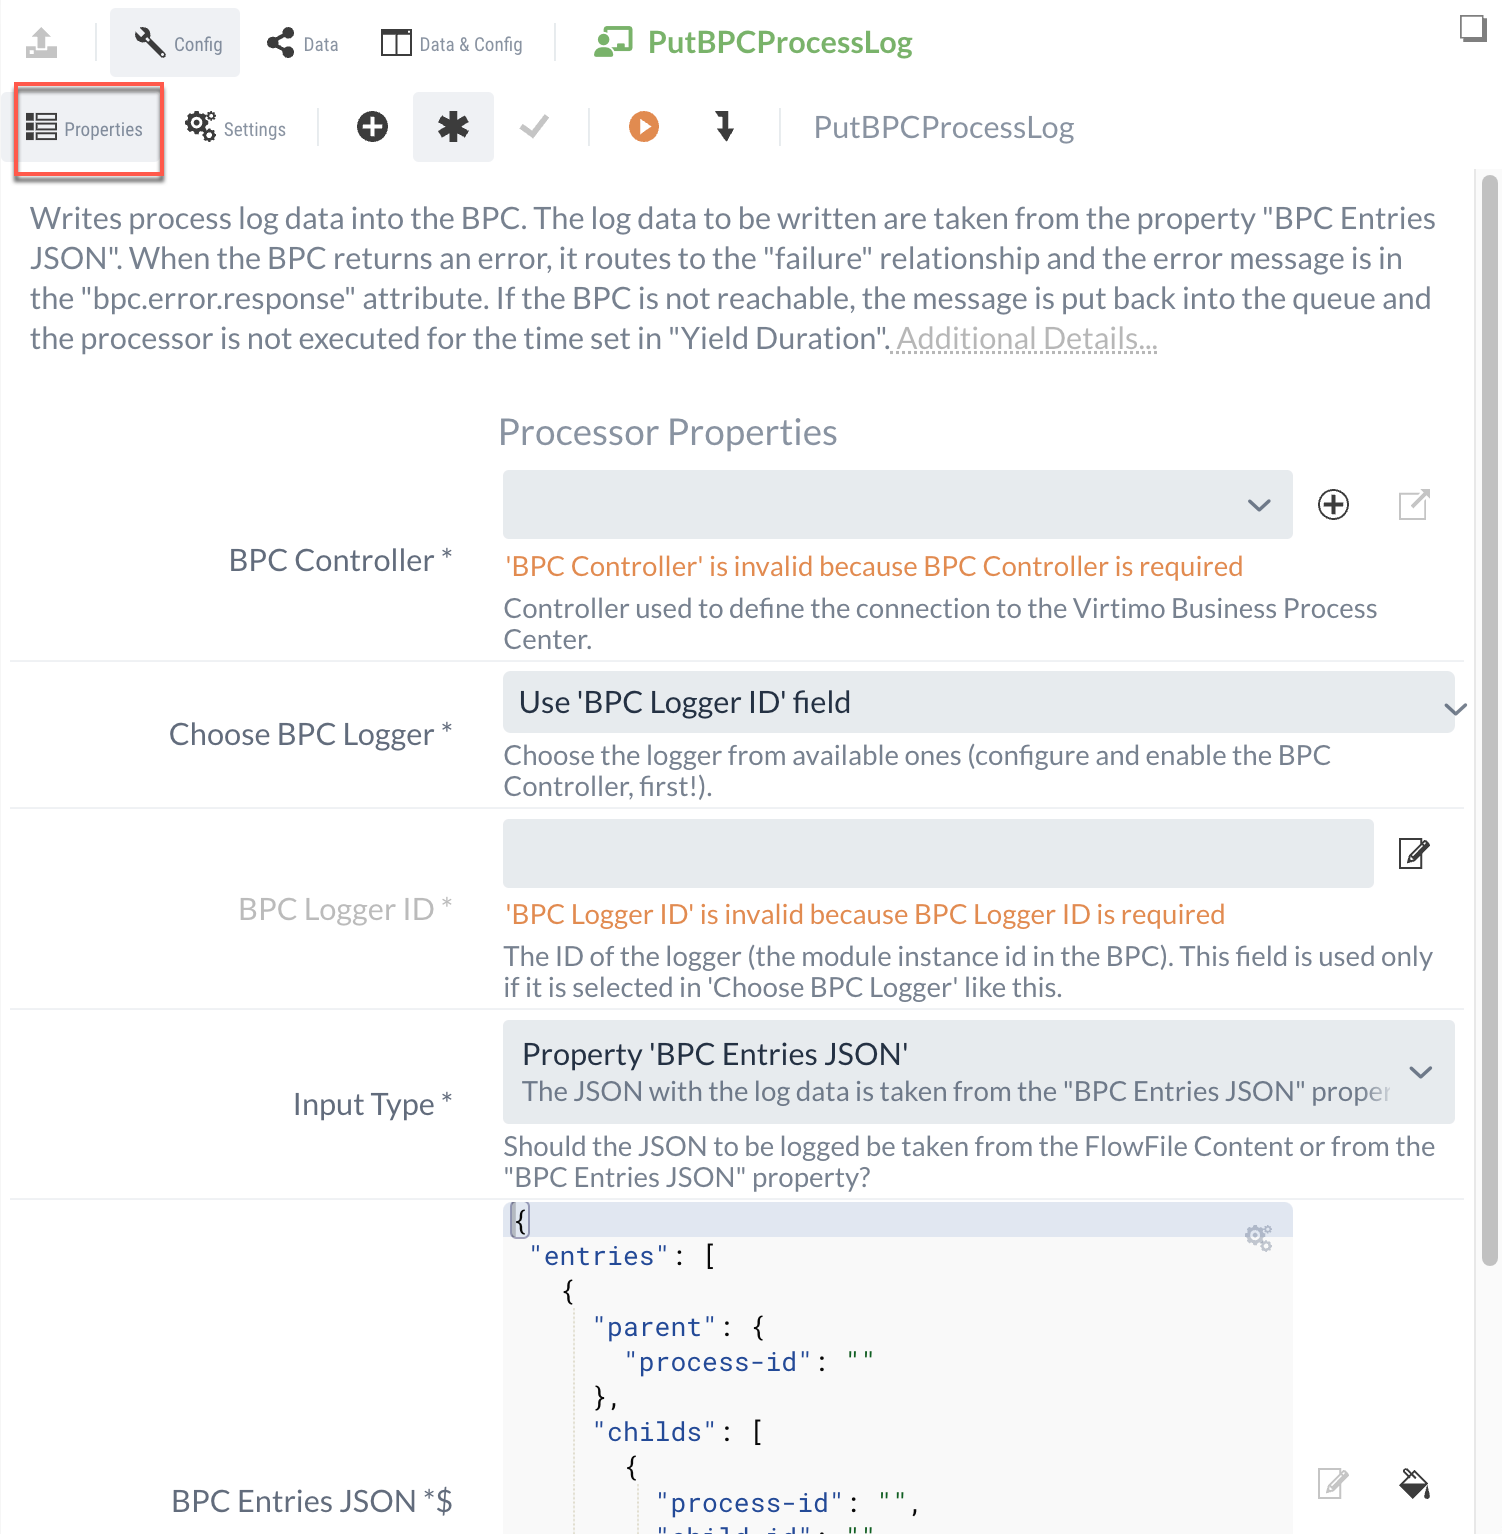
In addition to the general setting options, which are similar for all Processors, the Processors have Processor-specific properties. For all Processors, this is also the view that is displayed first in the Config Panel.
Input options
There are selection lists, checkboxes and text fields depending on the type of data. Required fields are marked with an *.
If the fields allow the use of the Expression languagethis is indicated by a $.
Fields that allow an expression language display the value of the execution in a dashed box below the text field. However, this is only displayed if the value differs from the input value (data from selected executions is taken into account during evaluation). Changes made when entering the properties are evaluated on-the-fly and the result is displayed accordingly.
If no value is set for a field, it is slightly greyed out.
In addition, warnings are displayed below the input fields if the information entered is incorrect or missing.
|
The Expression Language is fully supported in the multi-line editor.
There is a completion (to be called up via Ctrl-Space), syntax highlighting and the marking of errors.
The completions are available for the EL within |
Dynamic Properties
Some Processors support new, user-created properties, which are created using the button.
These dynamic properties can be used for different purposes.
They can be used, for example, to add new filter options to the QueryRecord Processor or to add new HTTP headers to the InvokeHTTP Processor.
What the dynamic properties can be used for in individual Processors is described for the selected Processor in the configuration area when the tooltips are switched on.
If the dynamically created properties generate results, e.g. through a query, then the created properties are also available as a relation to other elements in the Diagram.
Parameter
If a Parameter Context is set for the Process Group in which the Processors are located, the properties of the Processors can be assigned the Parameters from this context. Parameter Contexts are configured in the central settings and are described in the section Parameter Contexts section.
Editor
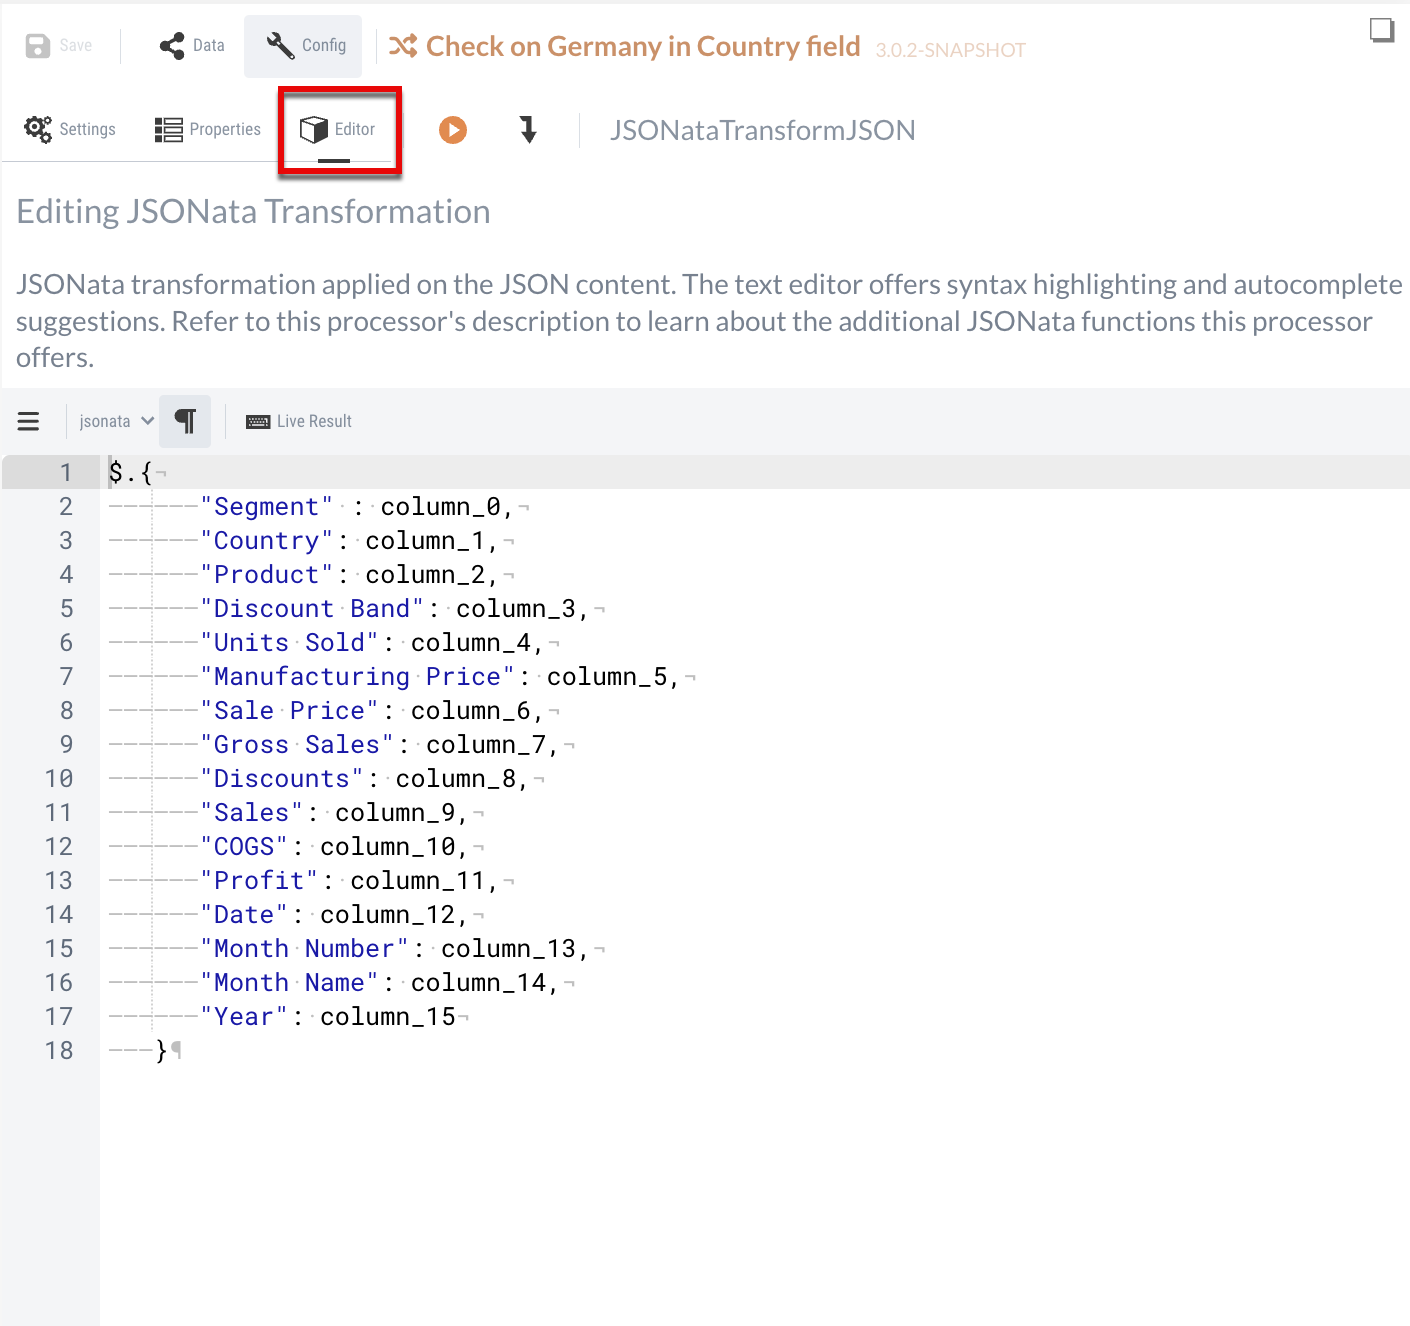
For some Processors, there is another special module editor in addition to the properties view, which is then visible in the toolbar. This applies, for example, to the transform processors JSONataTransformJSON and TransformXML.
Editor toolbar
There are also individual functions for the Editor that can be called up via the toolbar.
Just as in the Processor properties view, the Processor can be executed in isolation via the  button.
The results of the test can be shown or hidden using the adjacent arrow button.
In addition, further functions are available in a third toolbar bar, which are listed in the following table.
|
Enables a text file to be uploaded to the Config Panel editor. |
|
Allows you to download the content in the editor. |
|
Deletes the entire content in the editor. |
|
Allows you to adjust the programming language displayed or the format of the content in the editor. This allows you to change the highlighting and improve readability. |
|
In the specific case of XML and JSON, there is the option to switch pretty prints on and off for an improved overview. This button is not displayed for other formats. |
|
Switches on text wrapping in the Editor in the editor. |
|
Activates real-time results, whereby every input in the Editor leads to the execution of the Processors. The changes can thus be tracked in real time. |
|
Shows and hides the toolbar in the editor. |
Settings
General settings that are available for all Processors can be made under the Settings in the configuration area. This includes both general settings, such as the displayed name of a Processor, as well as more specific changes, some of which are described below.
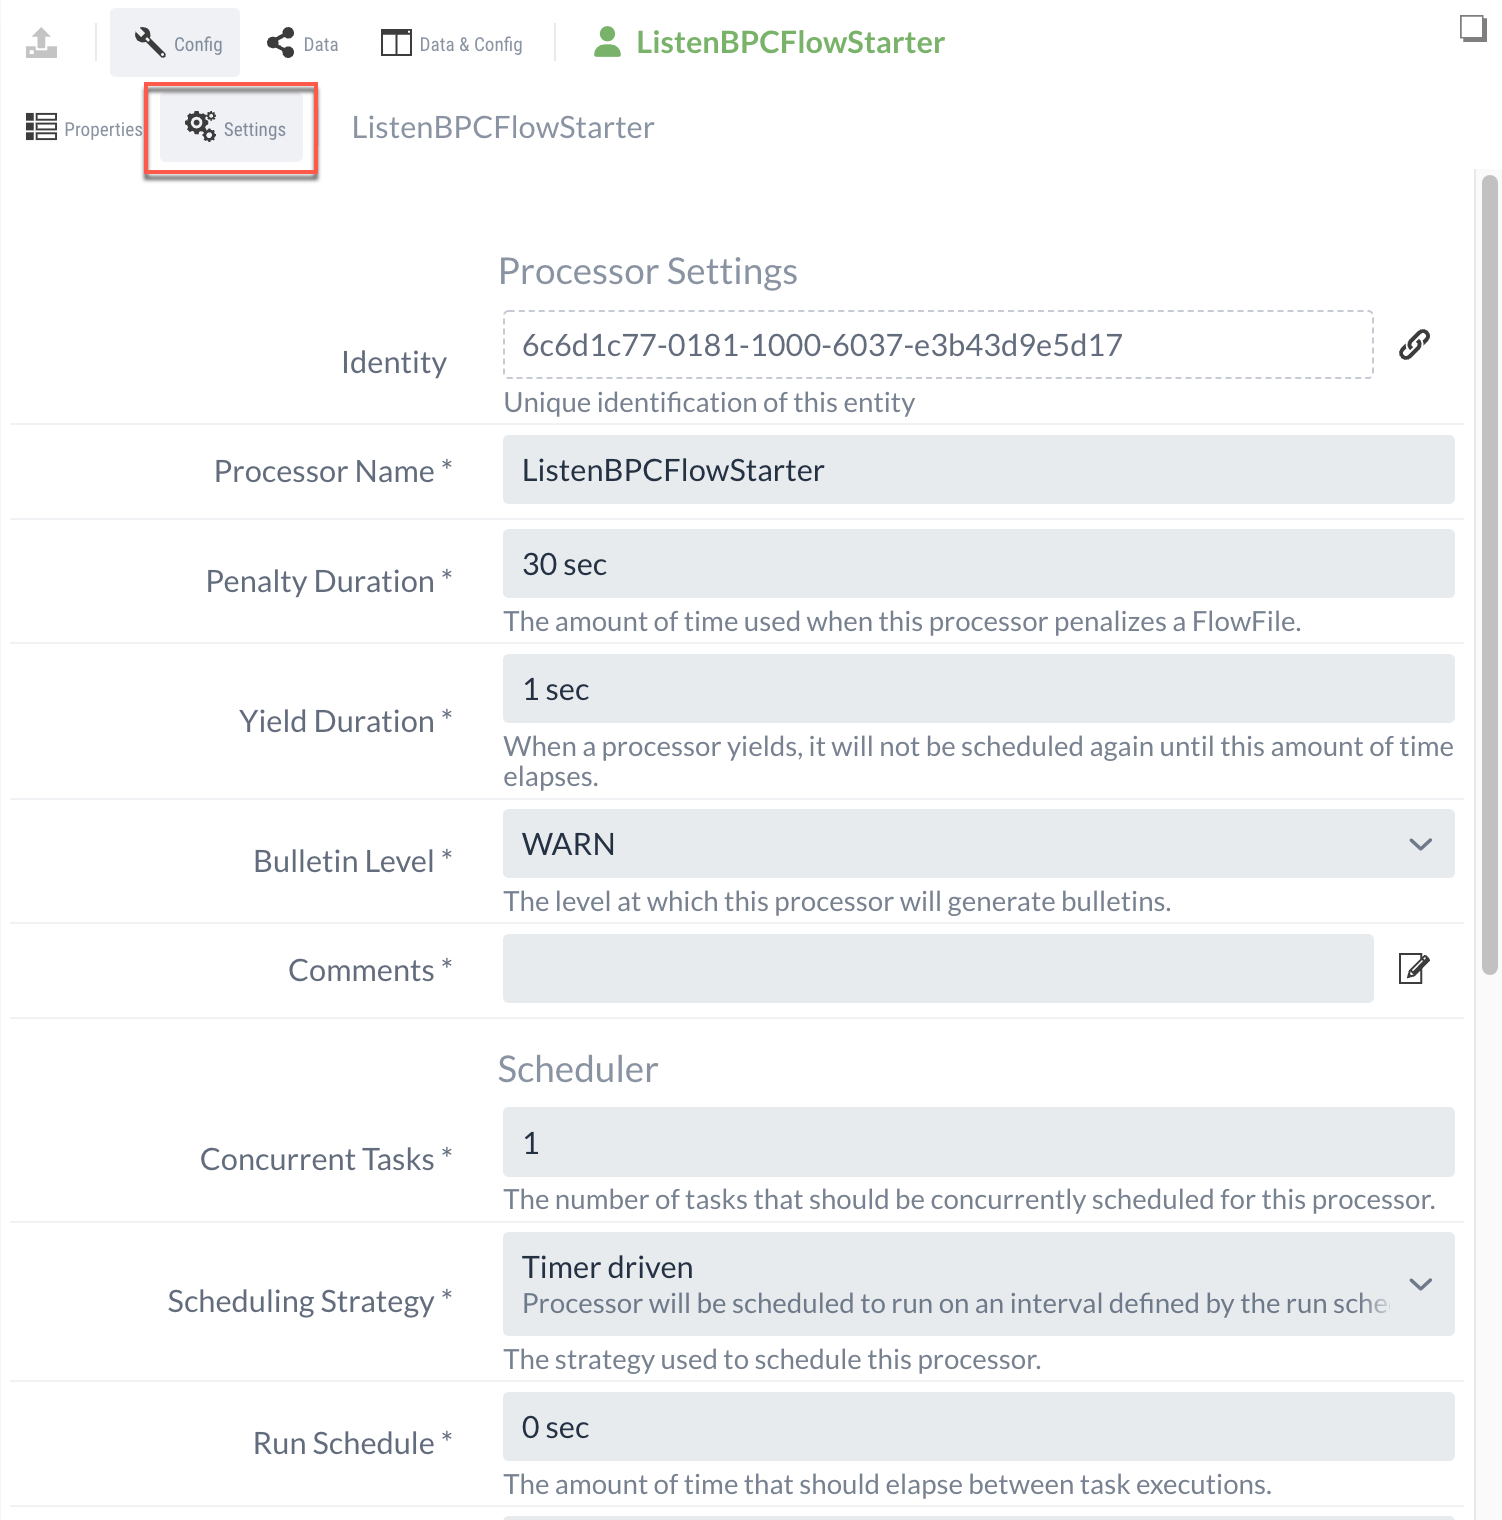
Processor Name
The displayed name of the Processor. Should ideally be used to improve the clarity of the created flows.
Penalty Duration
The Penalty Duration is also a property that is available for each Processor and is set to 30 sec by default.
This waiting time refers to a specific FlowFile.
It therefore waits 30 seconds before a new attempt is made to process exactly this FlowFile.
An example would be a PutFile Processor that cannot write a FlowFile to the hard disk because a file with this name already exists. It is possible that a second process removes these files in parallel, which means that writing works again after a certain time.
Yield Duration
A Yield can be triggered by a Processor.
Yield Duration is the property on each Processor and is set to 1 sec by default.
This is the time that the Processor should no longer be executed after an internal error (caught by the Processor).
An example is an FTP Processor that cannot reach the set FTP server, but it is foreseeable that the server will be accessible again after a short time (e.g. unstable network).
In addition to the yield at each Processor for the errors that this Processor itself expects and understands, there is also a central yield.
In a case in which an exception is generated by a Processor that was not expected or handled, NiFi starts a central timer of 30 seconds (can be set with nifi.administrative.yield.duration) until the Processor can be executed again.
Bulletin Level
This option allows you to configure the level at which messages are generated by the Processor. The selected levels can be used to sort warning messages and thus provide an improved overview.
Concurrent Task
This setting can be used to adjust how many threads should execute this Processor simultaneously.
In addition, the central settings can be found in the settings of Maximum Timer Driven Thread Count.
Further information on this can be found in the section General settings
Scheduling
Processors typically have scheduling by time interval (Scheduling Strategy = Timer driven).
The default value is set to Run Schedule = 0 sec.
The Processors can therefore wait for new FlowFiles without interruption.
However, there is also a global property in the nifi.properties: nifi.bored.yield.duration=10ms, which minimally limits this time.
This means that this defined time is waited between calls so as not to overload the system.
For Processors that do not have a high level of activity (for example in scenarios where latency is not a problem), the value can be increased further if necessary.
In addition to timer-driven scheduling, it is also possible to define the intervals with a CRON string.
Execution
This option is used to specify the nodes of a cluster on which the Processor is to be executed. The option to create clusters will be made available in a later version of IGUASU.
Run Duration
The Run Duration property is not supported by all Processors.
It is used to tell the Processor that it should process a batch of FlowFiles together.
This is particularly useful for a large number of small FlowFiles whose individual execution is short.
The thread works for the specified time without thread switching and it is only committed once for all FlowFiles.
Depending on the scenario, increasing the run duration can trigger a significant improvement in performance.
Number of Retry Attempts
Retry options can be configured for existing connection types, such as Success or Failure, in the Processors settings. By setting the number of retry attempts, you can define how often a FlowFile is to be picked up by a Processor for reprocessing. If the retry attempts cannot be completed successfully either, the FlowFile is forwarded elsewhere or dropped.
Back Off Policy
The Back Off Policy allows you to configure the processing of further data while a FlowFile is in retry.
Here you can choose between the option Penalize, where further FlowFiles can be processed despite retry, and Yield, where no other data is processed until all retries have been completed.
Maximum Back Off Period
In combination with the selected Penalty and Yield duration, the duration of the execution is continuously increased. To define a limit for this duration, the Maximum Back Off Period option can be used to set a limit for the time frame.
Automatically Terminate / Retry Relationships
This area lists all existing relationship types of the Processor that can be used to connect to other elements in Diagram.
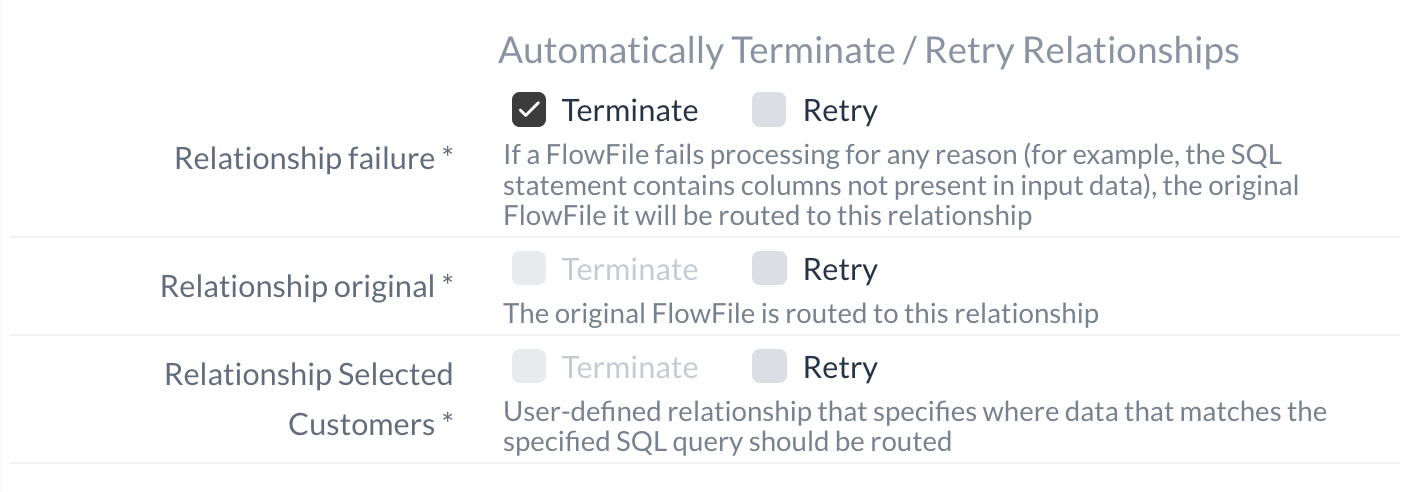
Each relationship type listed must either be addressed in an outgoing connection to another element or by automated termination. In addition, it is possible to start retries for the relationship types using the retry option.
Data panel
In addition to the configuration view, a data view of the selected Processor can be displayed using the Data button.
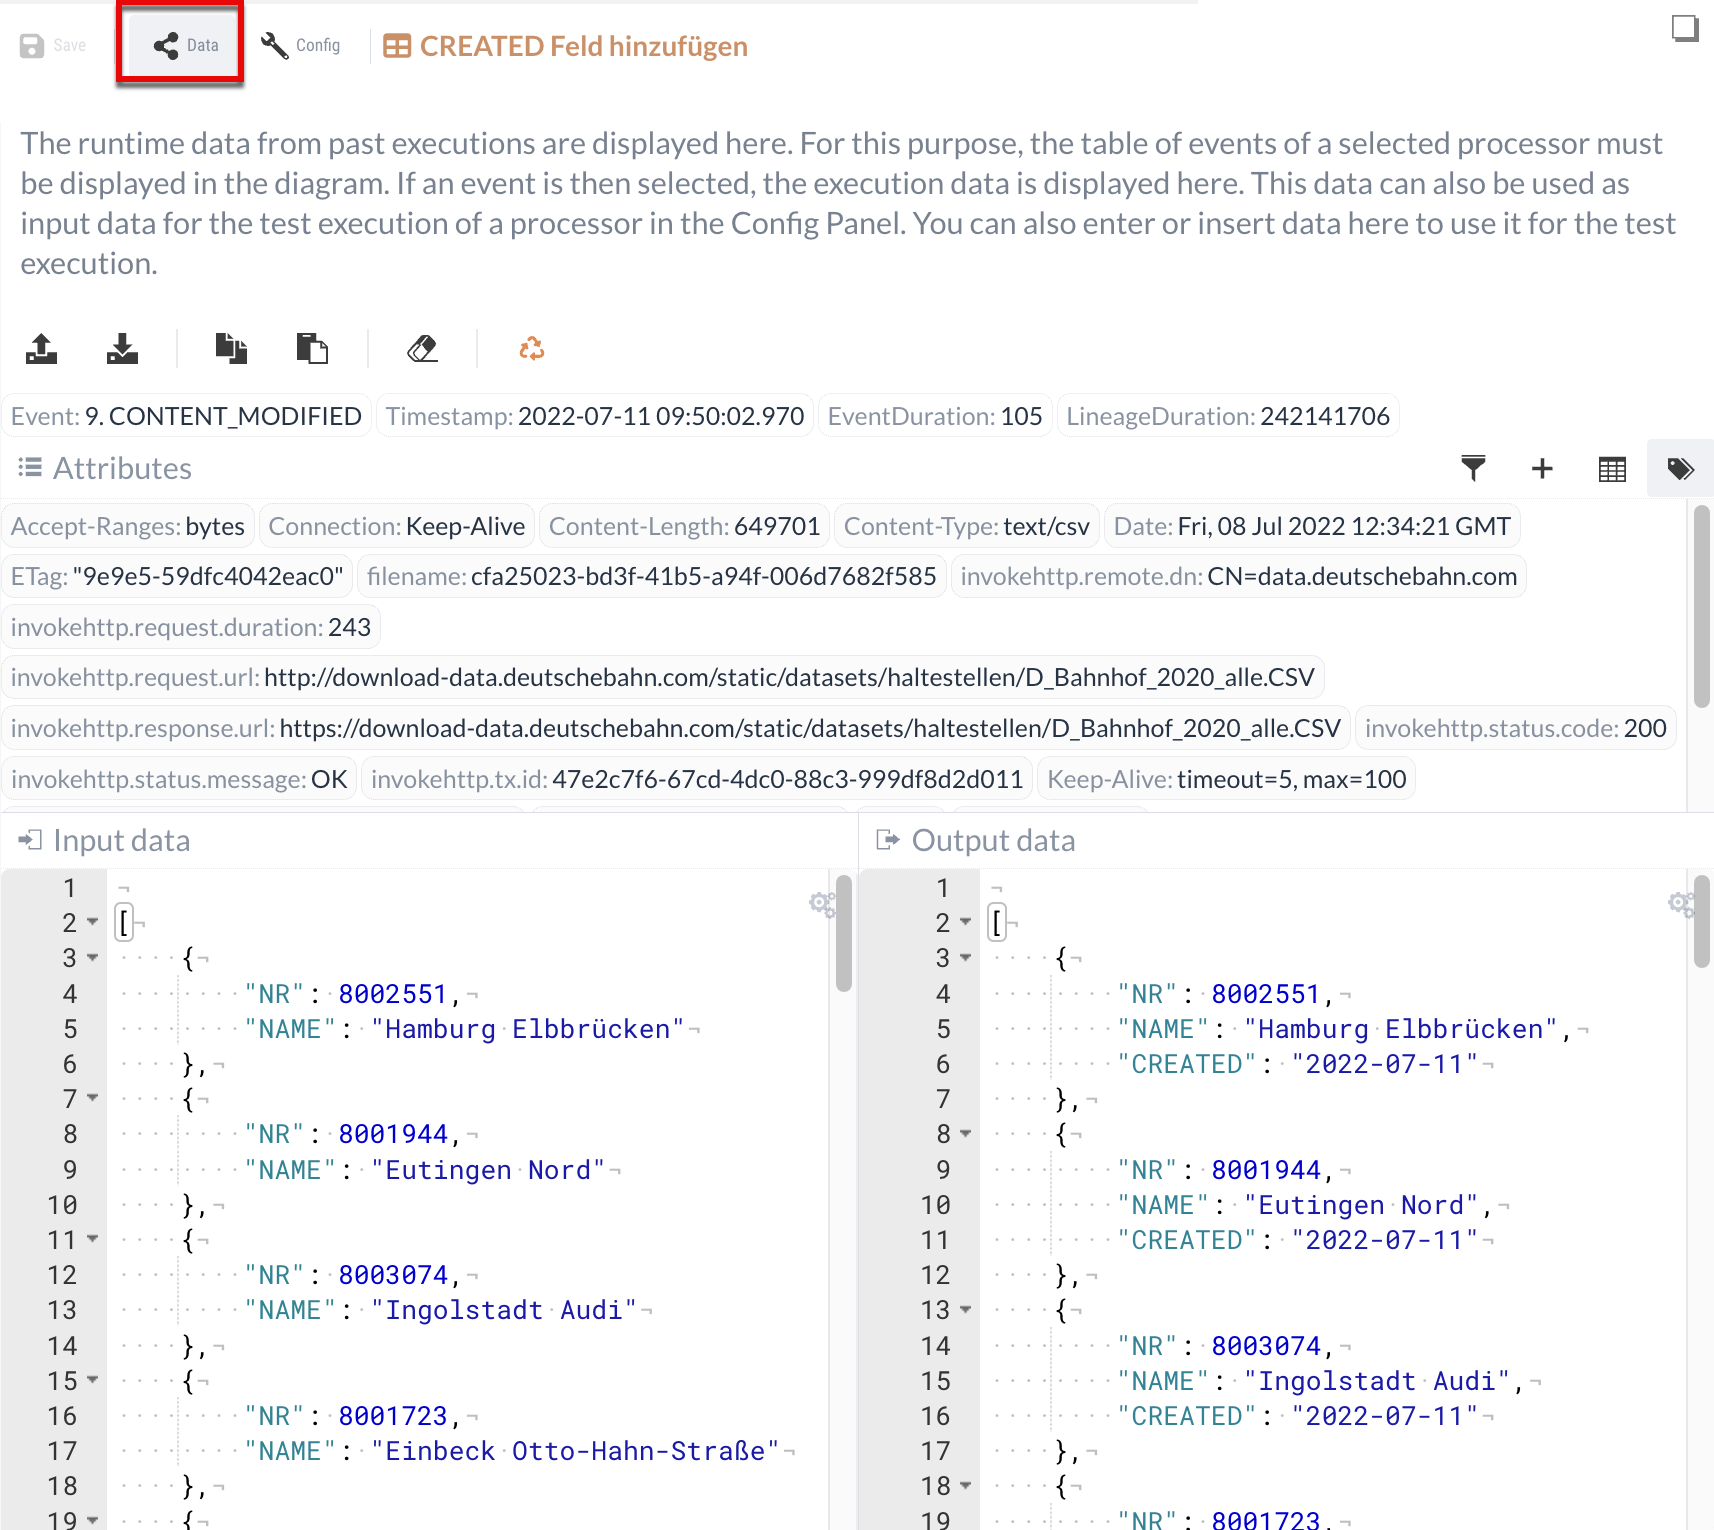
If there is no previous execution in the Event table has been selected, both areas of the Data Panel are empty.
The upper half contains a section in which attributes are displayed and functions can be called up via a toolbar. The lower half shows the input and output of the FlowFile that was processed by the selected Processor.
Data toolbar
Similar to the Config Panel, there is also a toolbar in the data view that can be used to call up various functions:
Allows you to import previously downloaded FlowFiles. |
|
Downloads displayed FlowFiles. |
|
Copies the displayed data, e.g. to use it as input for a test execution. |
|
Pastes copied FlowFiles. |
|
Removes the displayed attributes and displayed input and output data. |
|
Enables the displayed execution data to be re-inserted into the queue. The next time the Processor is executed, this data is also processed again and displayed as the "Replay" event type in the event table. |
Attributes
FlowFiles are described by higher-level information known as attributes.
While some core attributes are shared by all FlowFiles, such as filename or path, individual attributes can also be created.
Processors such as the UpdateAttribute processor can be used to create new attributes or change existing attributes. Depending on the Processor, attributes can be used differently, for example in the InvokeHTTP Processor as HTTP headers or in the QueryRecord Processor to create new queries.
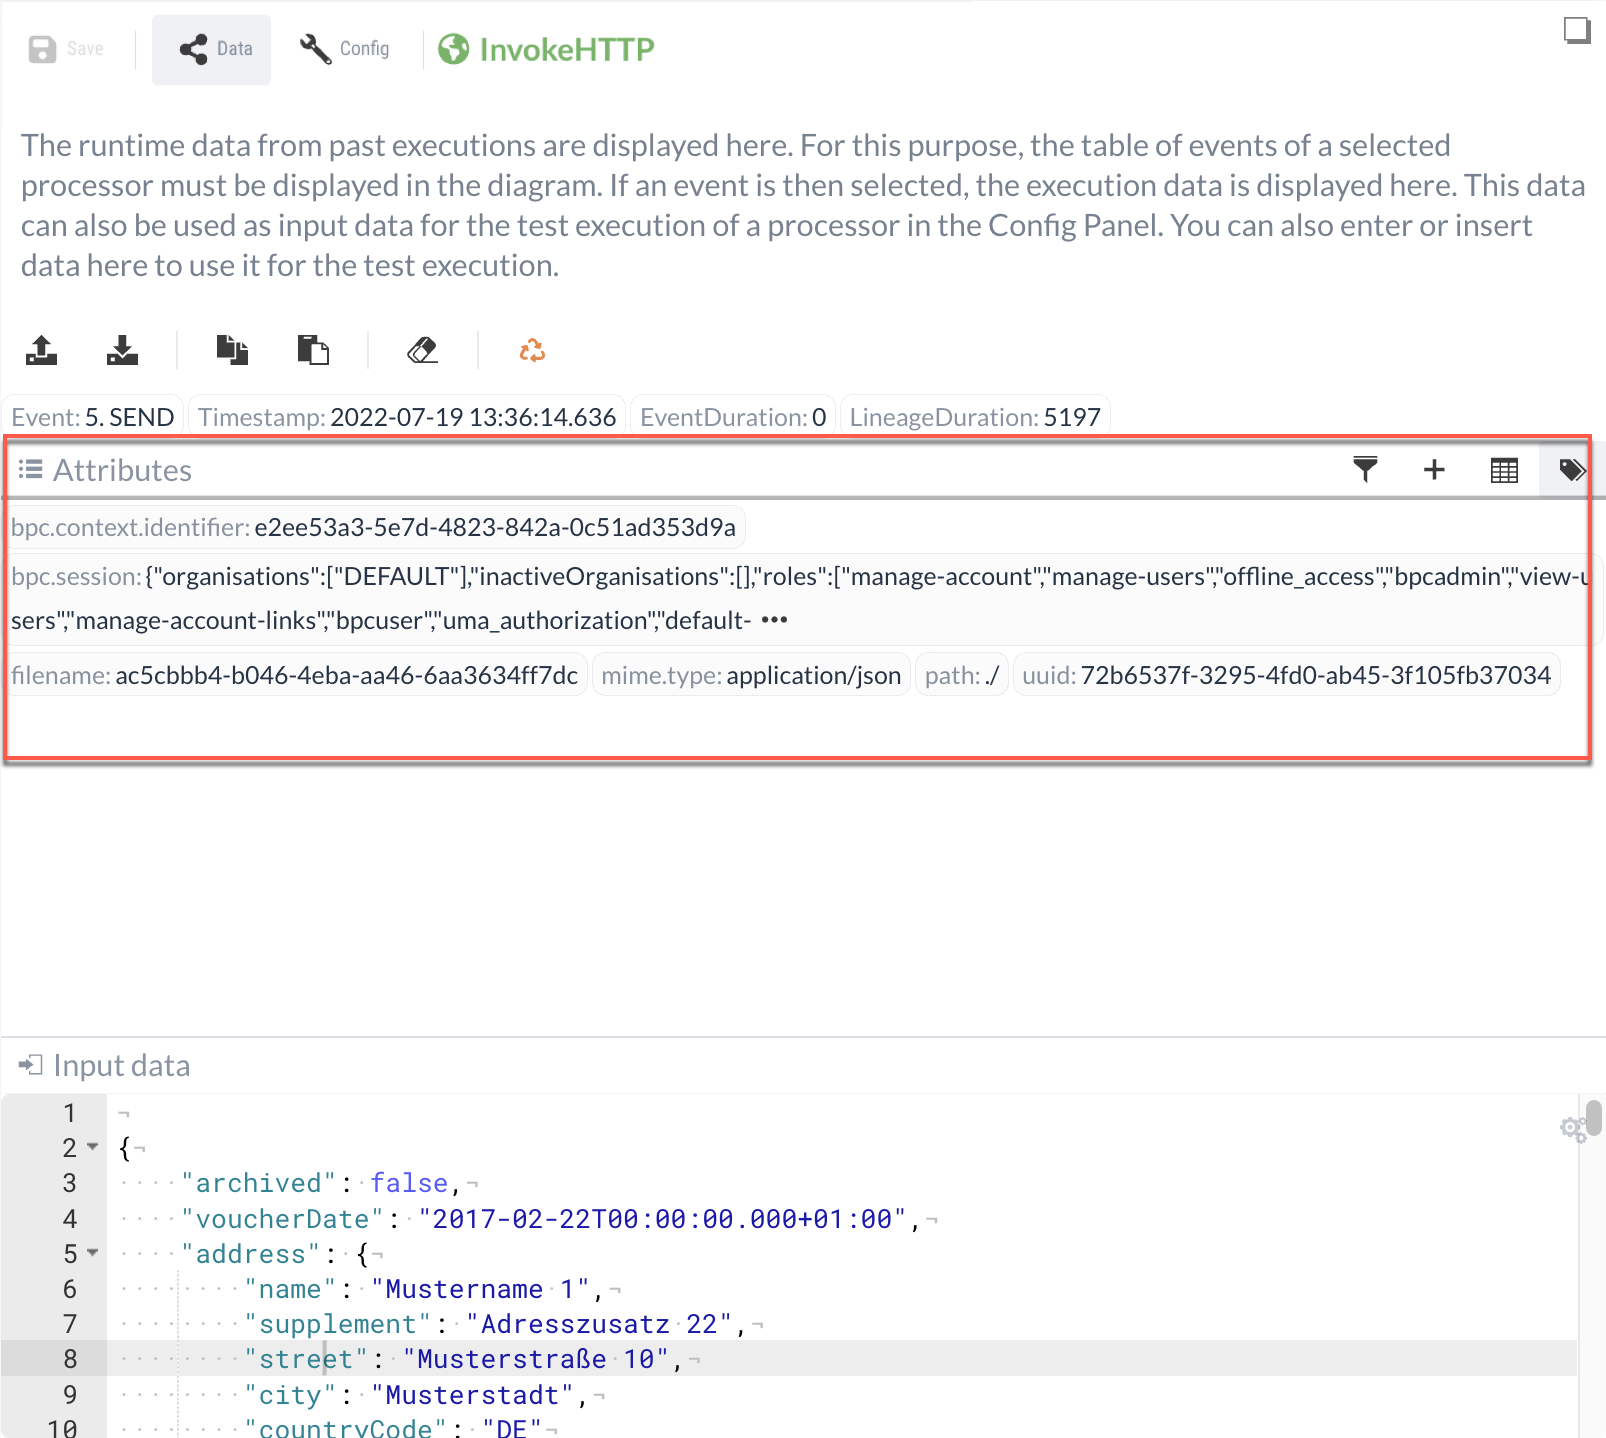
There is also a toolbar for the displayed attributes of the FlowFile at this point. This allows the existing attributes to be searched or new attributes to be created in order to adapt the data for retesting.
You can also switch between two display options to adapt the overview to your individual requirements.
Input & Output
The content of the processed FlowFile is displayed in an editor in the lower area of the Data panel.
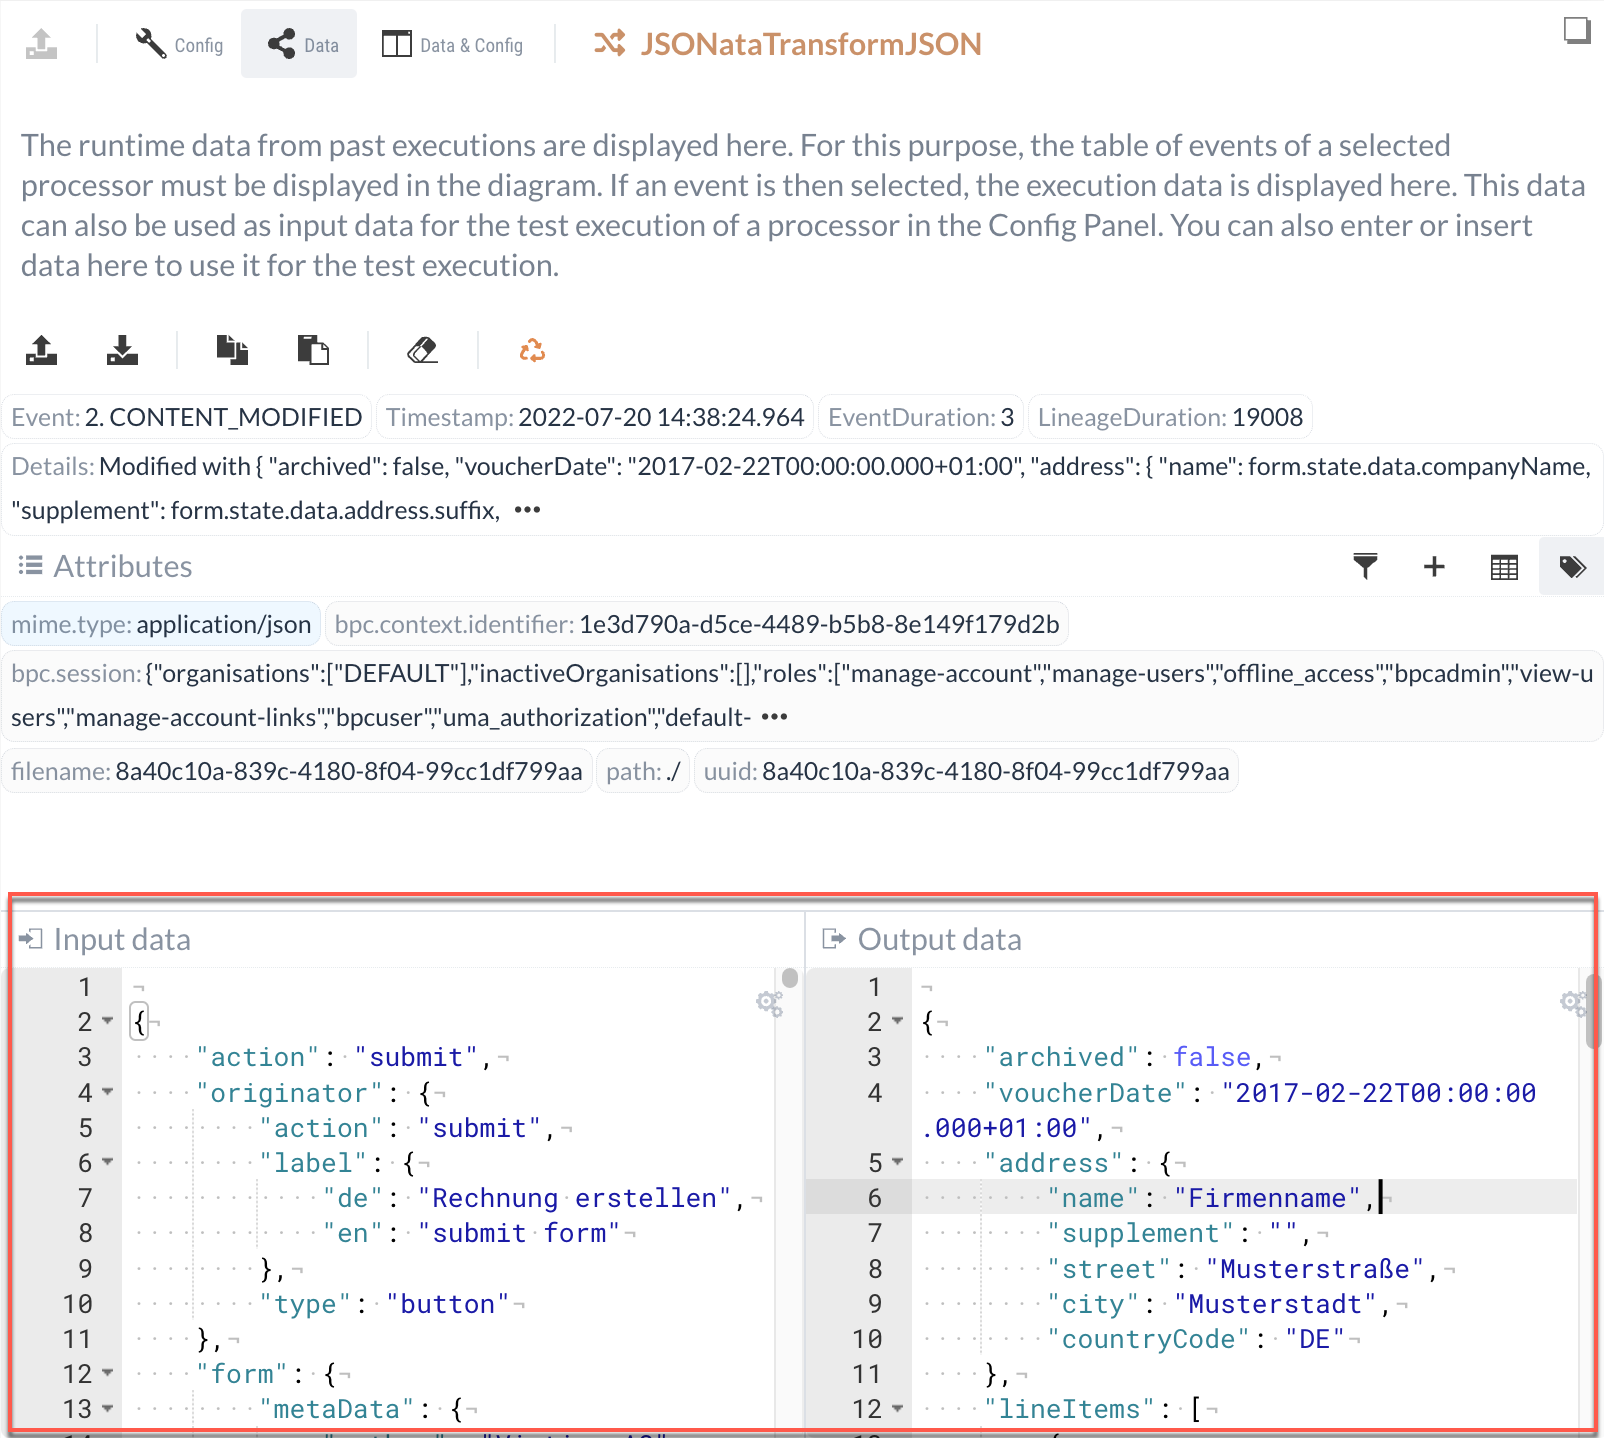
The data is divided into input and output data, whereby the latter is only displayed if a change has been made to the data by the Processor. If a Processor is at the beginning of an execution, it may not have any input data.
