Introduction tutorial
Introduction
This tutorial will create a simple Flow with two Processors and a Funnels, demonstrating the basic components of the interface and the use of Processors. The finished Flow will generate a FlowFile with a defined test and count certain metrics of the generated content.
Prerequisites
You have logged into IGUASU and have an existing Process Group or have opened a new Process Group created.
Create Processors and Funnels
Two Processors are created for this flow: GenerateFlowFile and CountText.
The first will generate a FlowFile with a specific text and the second will count defined metrics and save the results.
The IGUASU interface is displayed in view mode by default View mode which only allows viewing but not editing of the diagram Diagram is possible. To create a Processor, you must therefore first switch to edit mode using the Edit button Edit mode with the Edit button.

The gear icon can now be dragged and dropped into the Diagram to create a Processor.

This displays a list of the available Processors and their description.
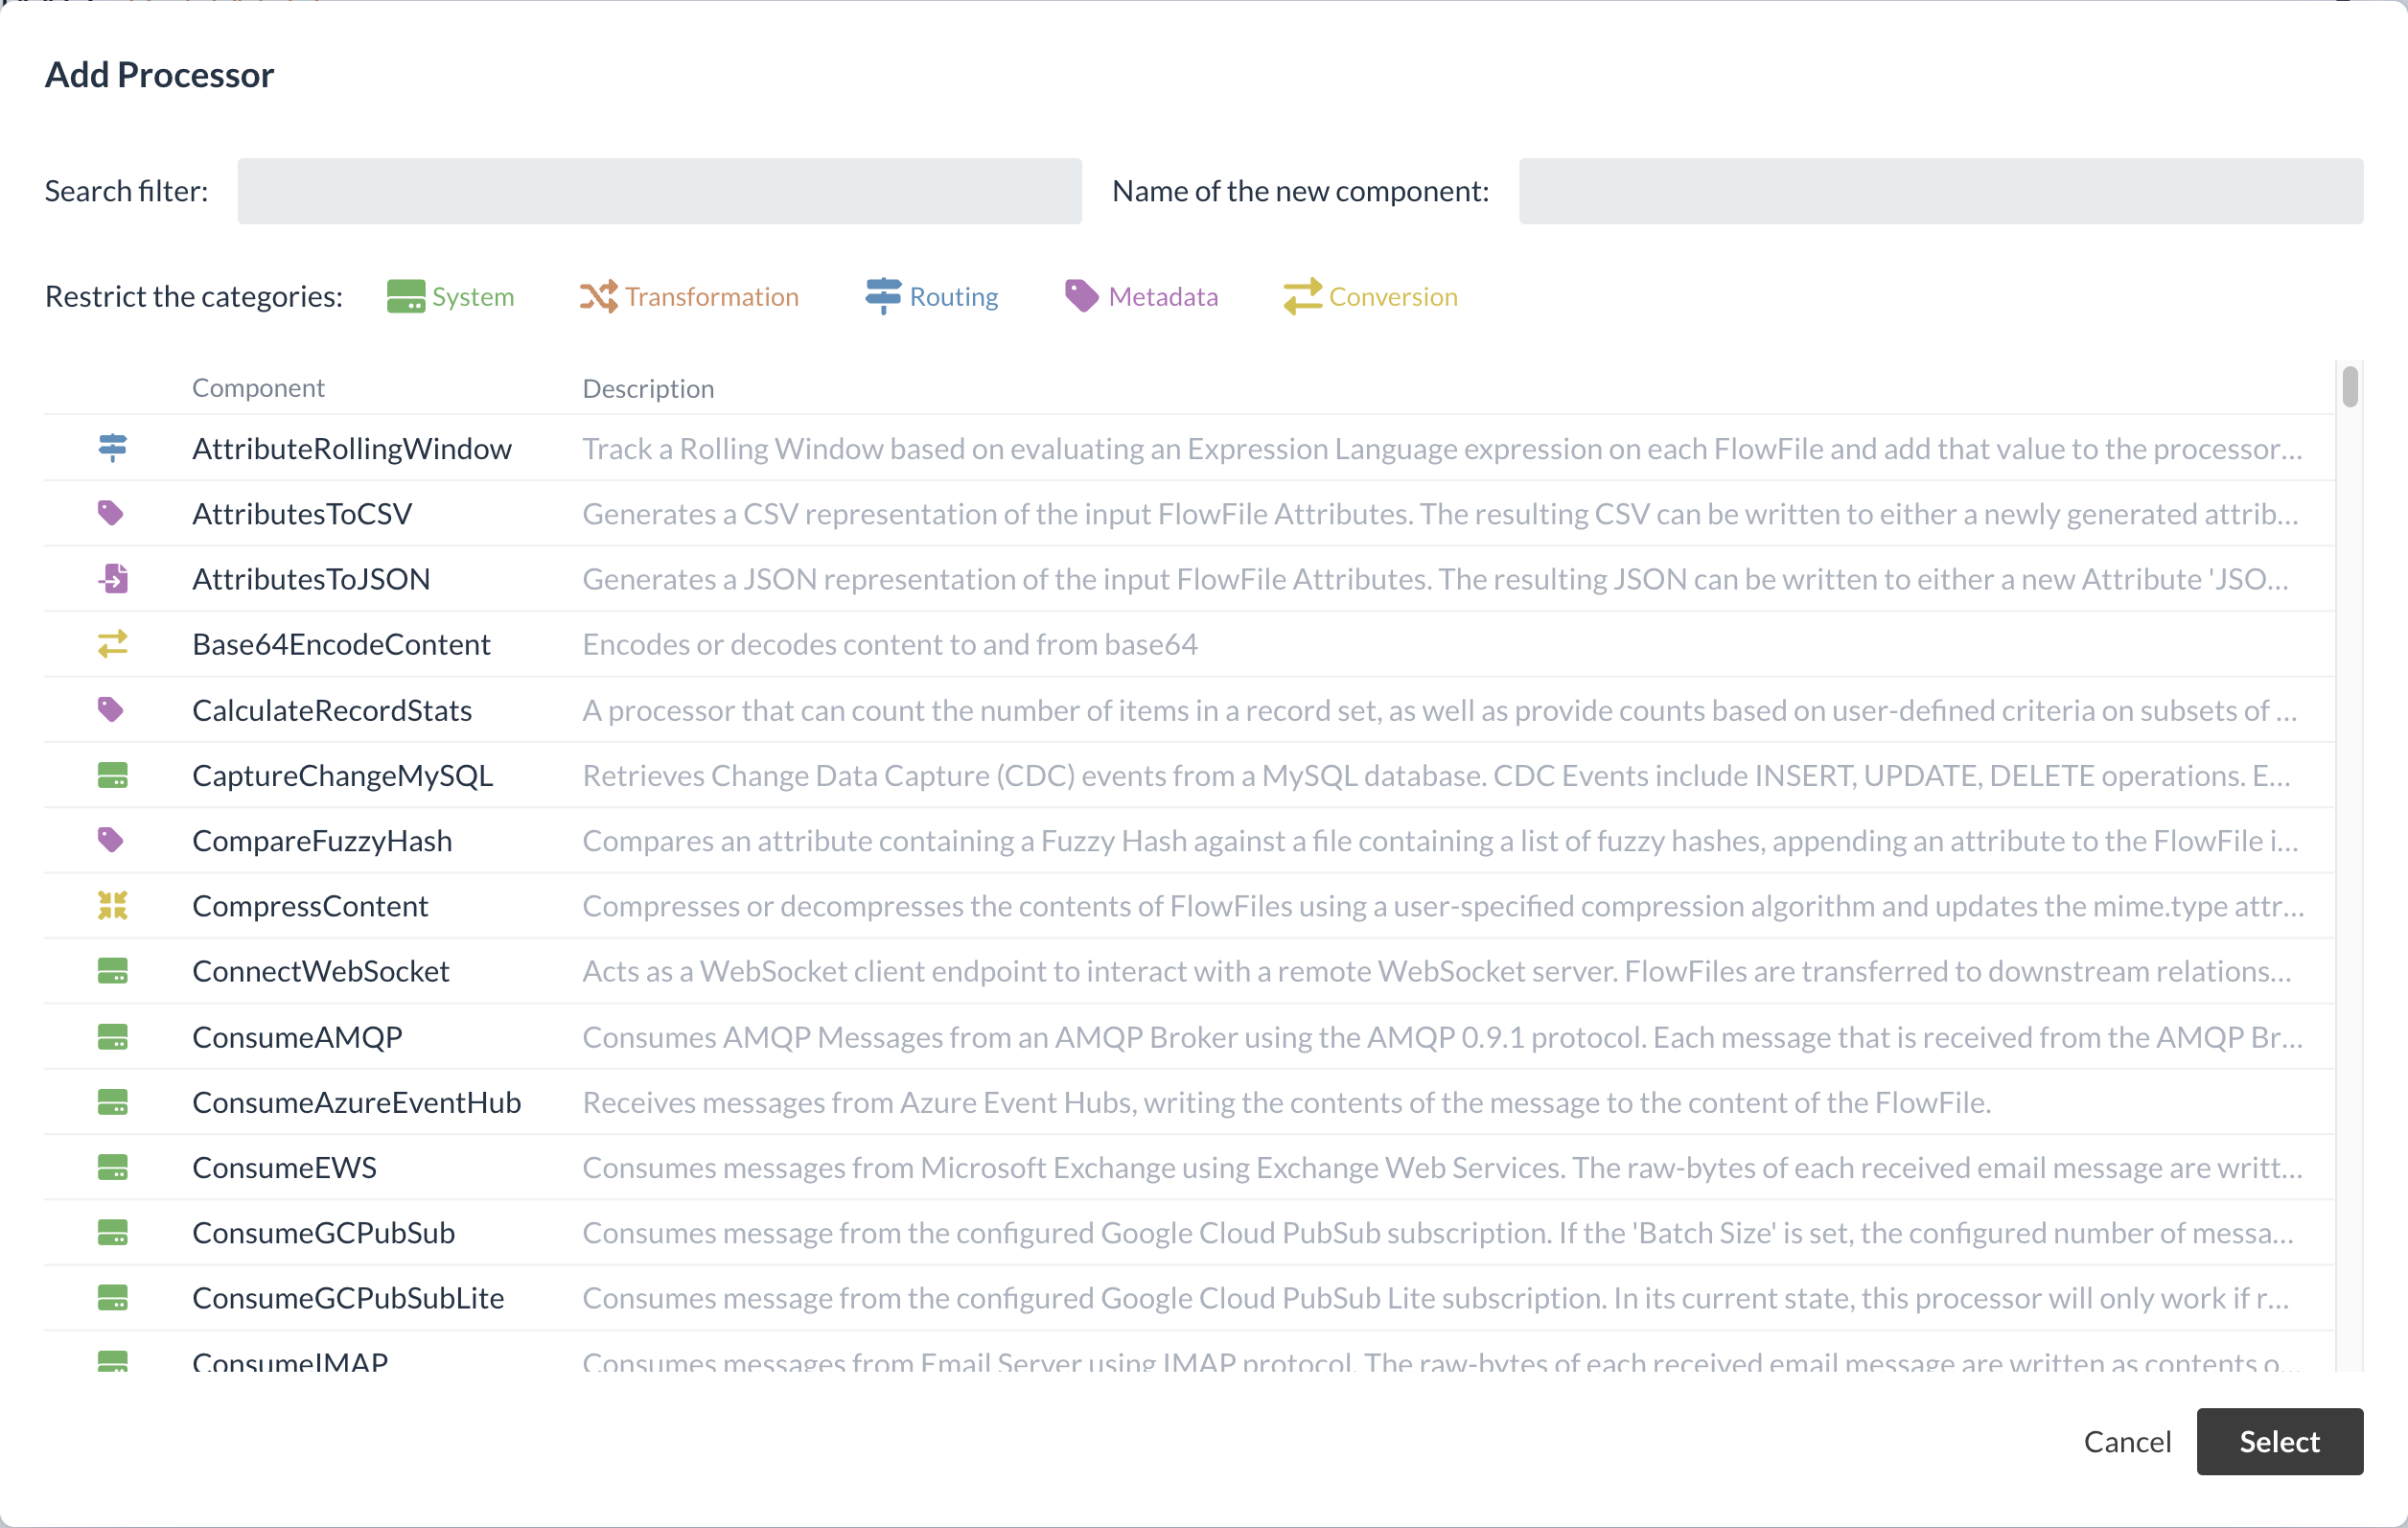
The Search Filter input field can be used to search for Processors.
For our example, the GenerateFlowFile Processor, which generates FlowFiles, is required. To create an instance of this Processor, it must first be selected. When creating the Processor, the Name of the Component input field on the right can also be used to define a name.
In our example, the name FlowFile erstellen is assigned.

After confirming, the new Processor is now displayed in the Diagram. The CountText Processor is created in the same way for this tutorial.
In addition, a Funnel is to be created that enables data flows to be merged. In this example, it is to be used to display an end point and show the results.
To create a Funnels, the corresponding icon is dragged and dropped into the Diagram.

Once all elements in the Diagram have been created, the overview should look something like this:

While the GenerateFlowFile-Processor is in a stopped state, a warning sign is initially displayed for the CountText-Processor.
This means that this Processor has not yet been fully configured and is therefore not yet executable.
The elements created should therefore be configured in the next step.
Configuring Processors
The properties and relations (links) must be set for a Processor to be configured correctly.
Setting options
By selecting a Processor, the settings are displayed on the right-hand side of Configuration area.
Each Processor has two setting areas:
-
Processor Properties (Processor-specific settings)
-
Processor Settings
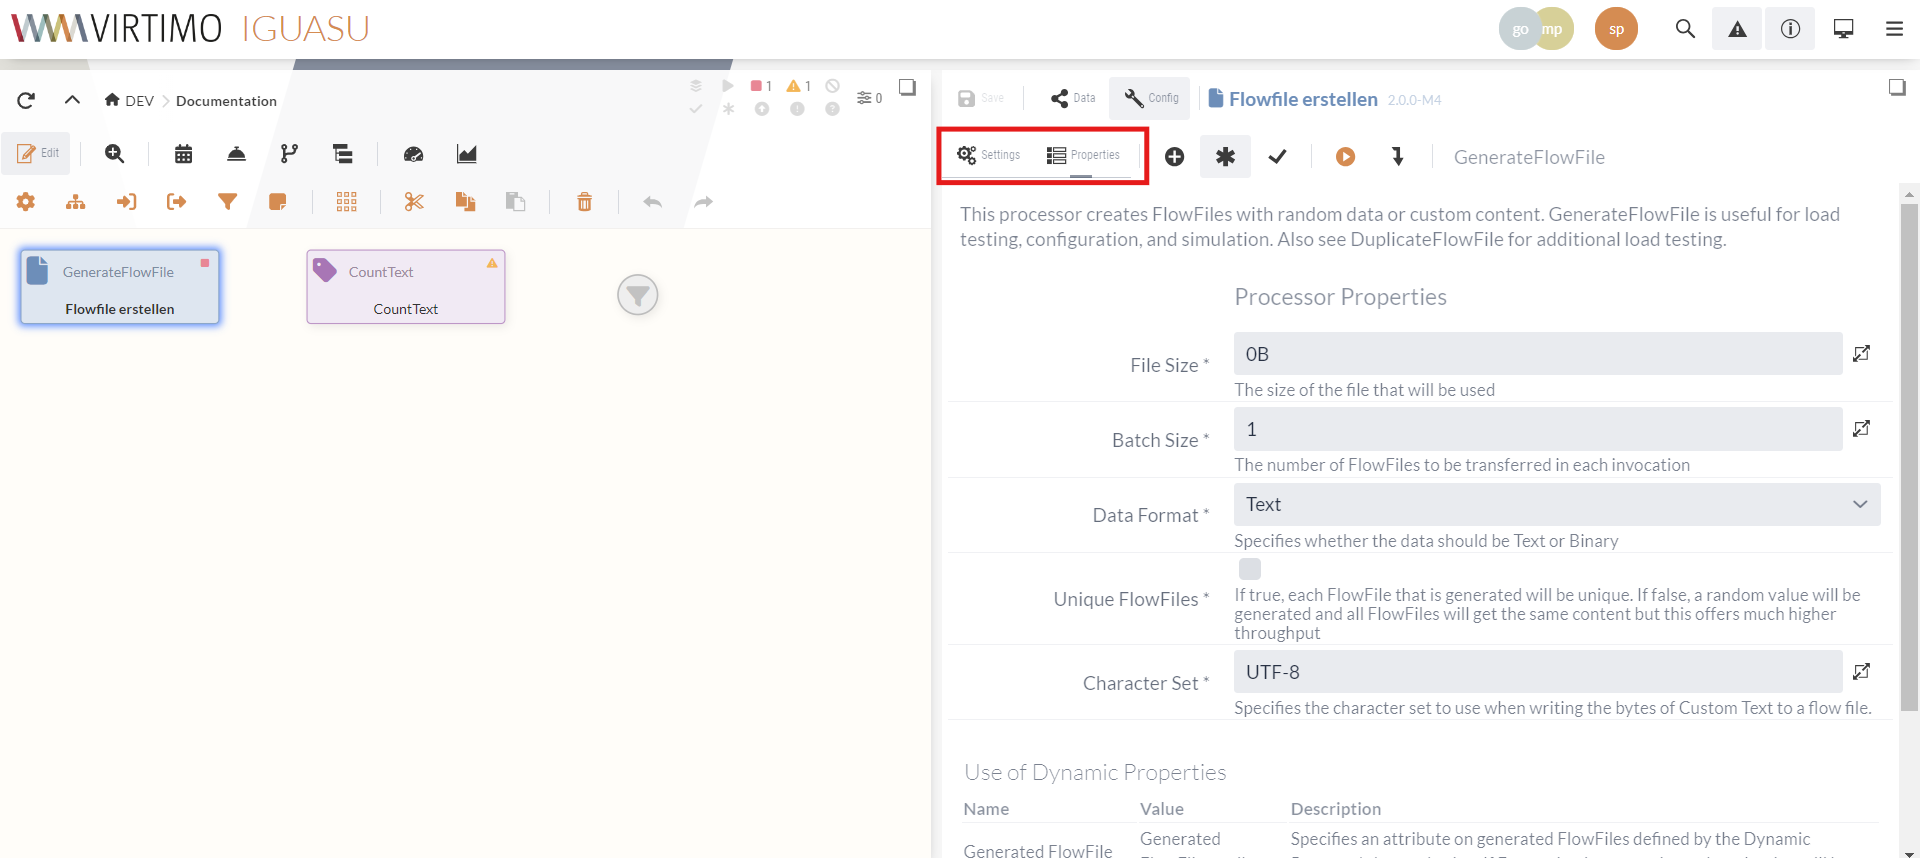
For our example, we first want to take a closer look at the Properties tab for the GenerateFlowFile Processor. Here, this specific Processor would have the option of generating FlowFiles with random or defined data. In this case, the generated text for the FlowFile should not be random, but fixed.
To display this setting option, the star button at the top of the configuration area can be used to display the input fields that are not mandatory fields.
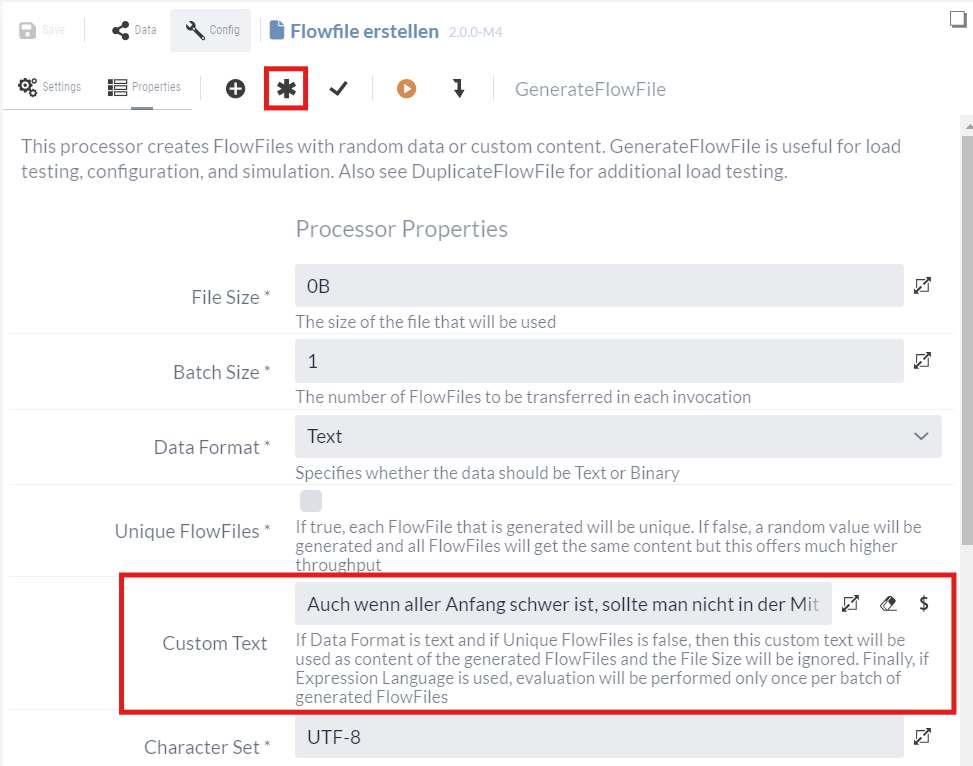
This opens the option to define a Custom Text.
Any text or data format can be inserted here as content for the FlowFile.
To keep the example simple at this point, a string can be inserted first:
Auch wenn aller Anfang schwer ist,
sollte man nicht in der Mitte beginnen.
The configuration should then look like the following figure:
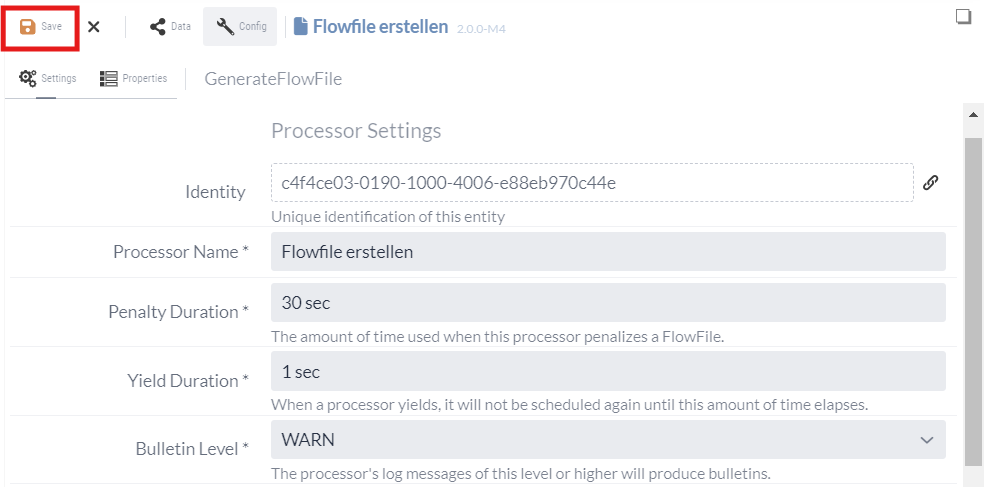
In addition, the Run Schedule should be set to 30 seconds (30 sec) in the Settings tab so that there is a certain time interval between the generated data.
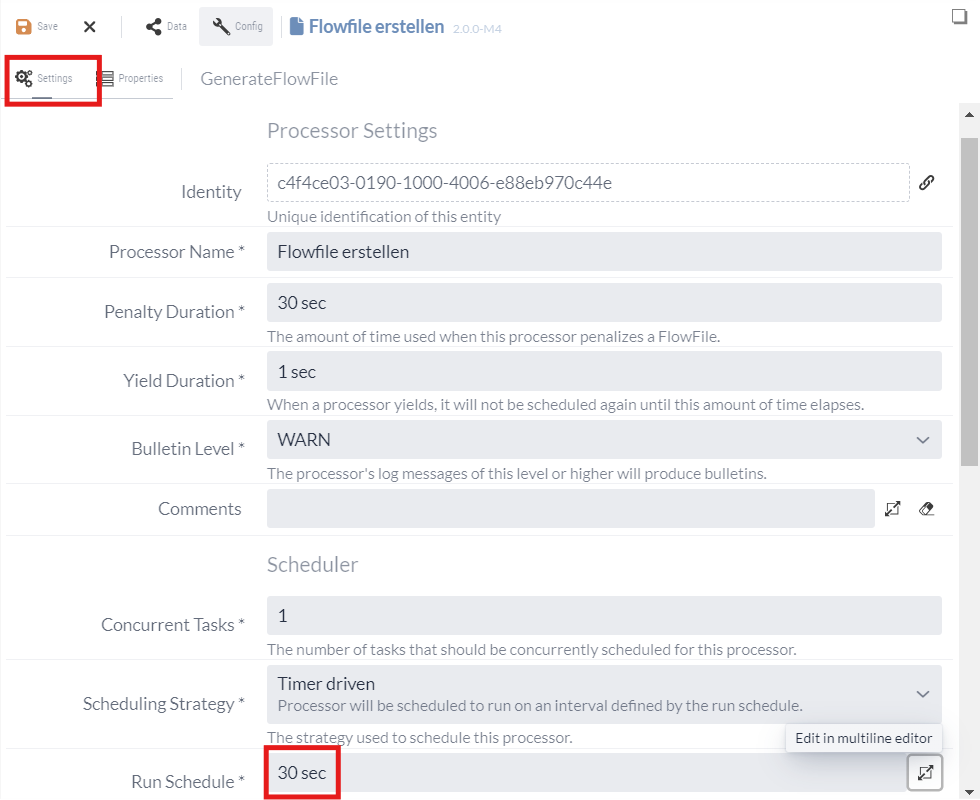
This will now generate a FlowFile with the specified string every 30 seconds.
The Processor settings are automatically saved as soon as you switch to the next Processor or click in the Diagram area.
However, it is also possible to save the settings manually using the respective button in the toolbar.
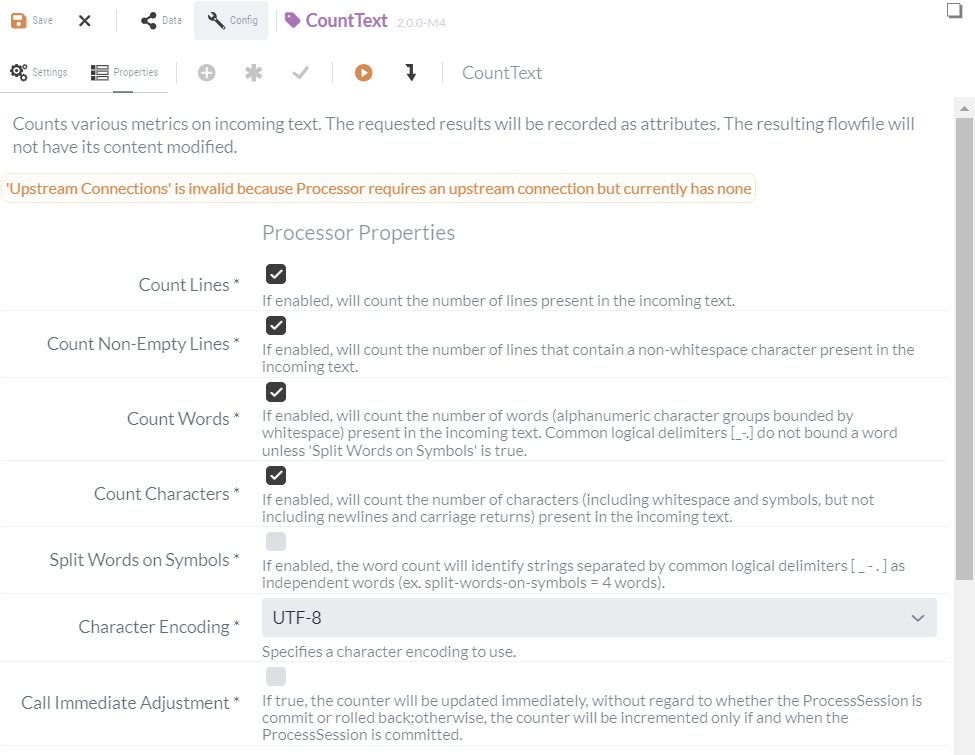
The configuration of the CountText Processor is similar, although no general settings need to be changed. In the individual Processor properties, you can define which metrics are to be counted for the incoming data for this Processor. This option can be used to check almost all metrics, which completes the configuration of the Processor.
No configurations are necessary for the Funnel, which completes the required settings for the created elements.
In the next step, the elements still need to be linked to enable data communication.
Links
Communication between the Processors takes place by means of so-called relations (links). These are directed connections that specify the flow of input and output data.
The output of a Processor is forwarded along an outgoing relation, whereby the generated outputs can be divided into different types. The success and failure relations, which are also used in this tutorial, are available for most Processors.
If the processing was successful, the output is forwarded along the success relation.
If an error occurs during processing, the data is transmitted along the failure relation.
All types of output must either be forwarded by at least one relation or explicitly terminated.
In the constellation created, the following three relations are currently missing for a correct configuration:
-
The success output of the GenerateFlowFile Processor
-
The success output of the CountText Processor
-
The failure output of the CountText Processor
In order for the data generated by the GenerateFlowFile Processor to reach the CountText Processor, a link must first be created between the two Processors.
This link is created by dragging and dropping a connection from one of the possible relation symbols to the next from the middle of the Processor.
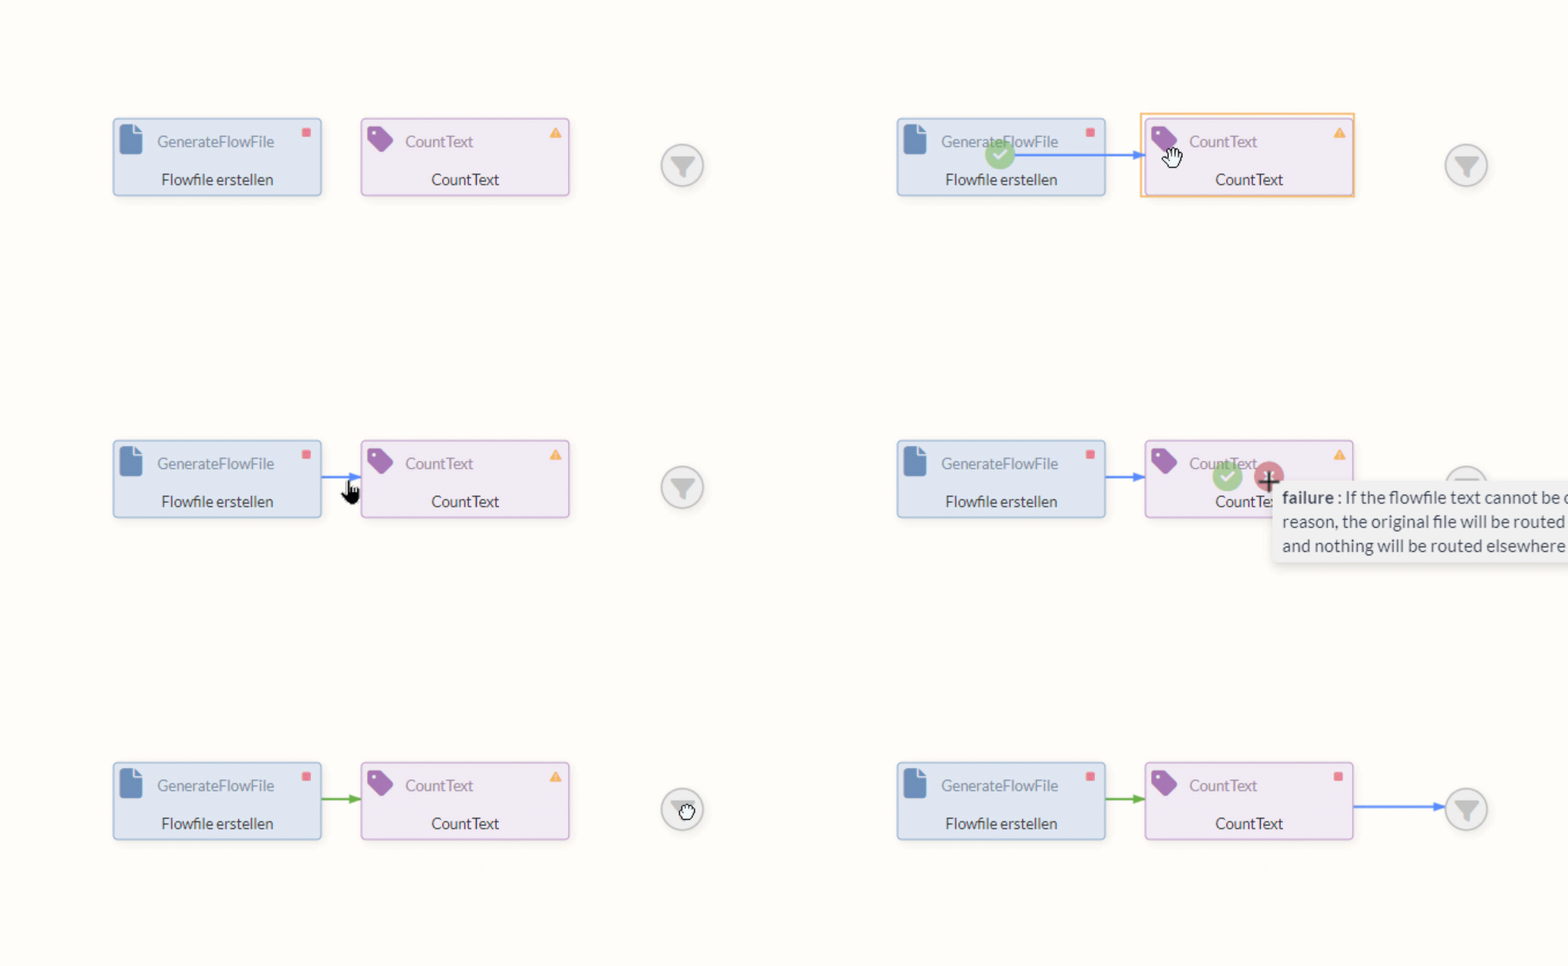
As the GenerateFlowFile Processor cannot generate errors, only one success relation is available.
The success/failure__outputs of the CountText Processor must also be configured. The success relation can be dragged to the Funnels in a similar way to the GenerateFlowFile Processor. As no errors are expected during processing at this point, this relation can be explicitly terminated in the Settings tab.
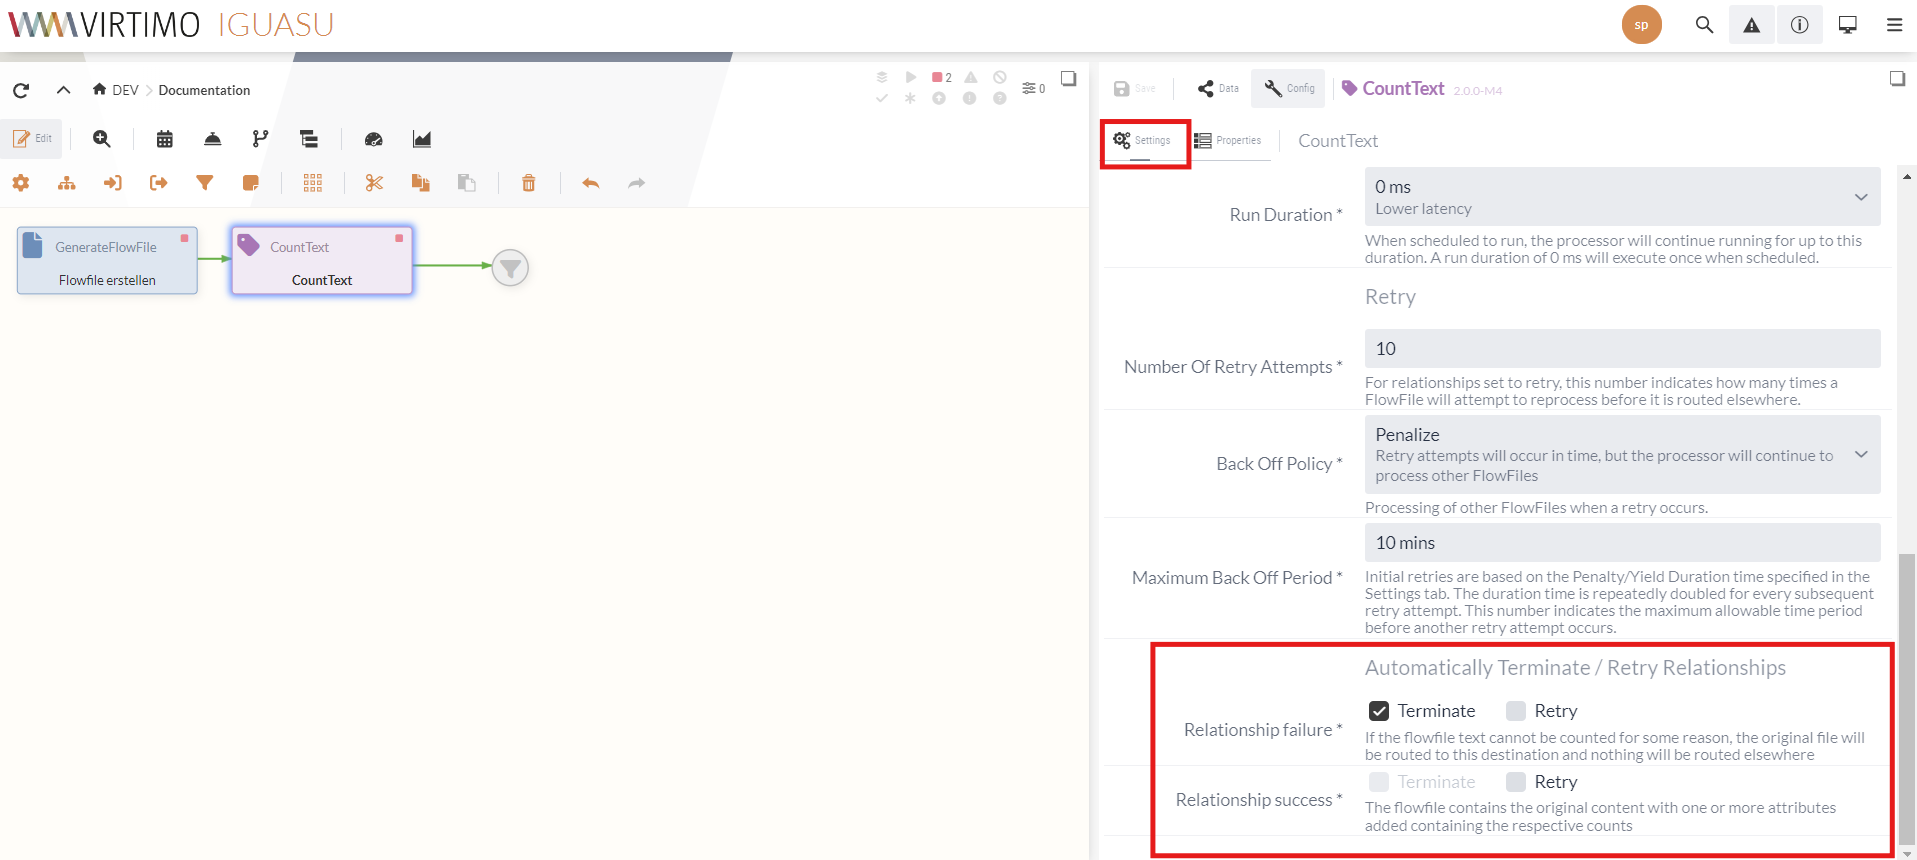
This configures all the necessary outputs and inputs of the Processors with relations and the Processors can be executed.
By right-clicking on the respective Processor, both can be switched to the "Running" state by selecting the "Start" command. This causes the GenerateFlowFile Processor to be executed by the Scheduler every 30 seconds, which generates a FlowFile and transfers it to the CountText Processor via the relation, where it is then processed.
The results of the counted metrics are then created by the CountText Processor as metadata (attributes) of the FlowFiles. The current status of the content and attributes of the data that has been processed is displayed on the edge between the CountText Processor and the Funnels after the final processing. By clicking on the edge, data can be viewed in the queue in the configuration area.
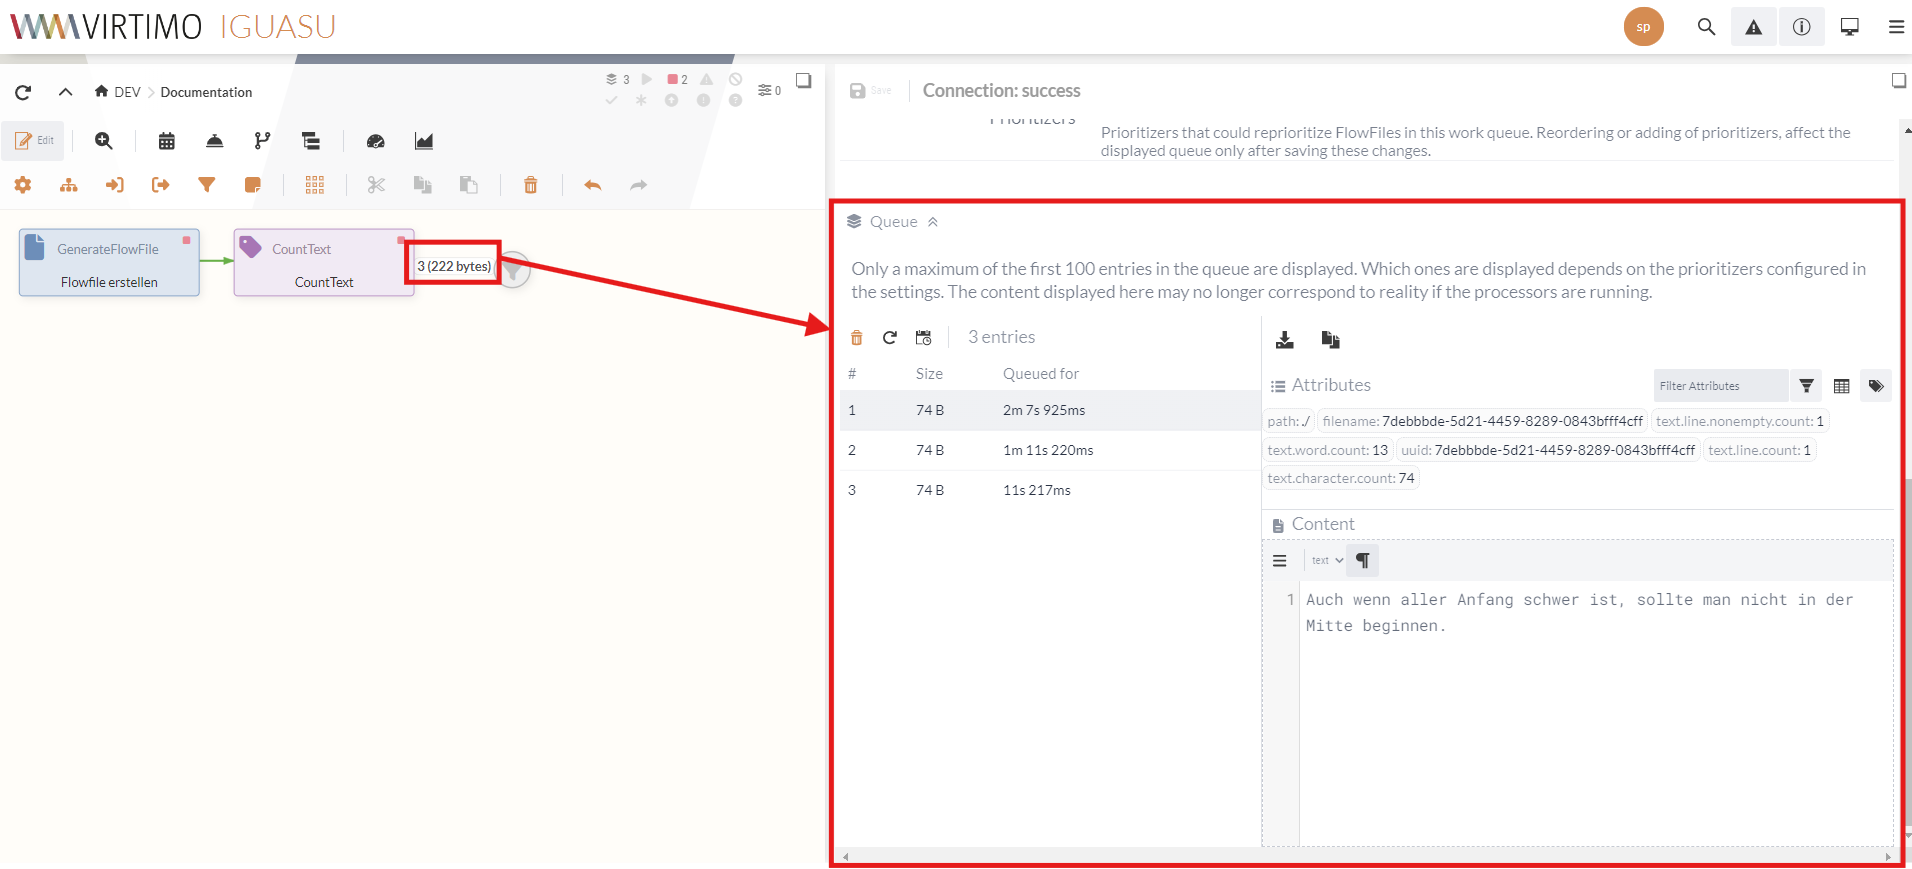
At this point, the metadata and thus the results of the CountText Processors can be viewed under Attributes. The content of the FlowFile, which in this case is the entered string, is also located below the attributes.
If there are several data records, the data record to be displayed can be opened by clicking on it to obtain further information on the respective FlowFiles.
Result
This tutorial has created and configured a first simple Flow. For further introduction to its use, Basic Tutorial can be used to test the transformation of FlowFiles.
